I recently started doing some electroless plating in my garage, and wanted a way to control the fumes from the degreaser and plating chemicals. A fume hood seemed like the right tool for the job, so I spent some time researching what other people had been building. I found some examples of cheap and fast builds as well as larger, more involved builds, but I found myself wanting something that had some of the features of full-fledged lab hoods in a smaller form factor that could be moved relatively easily (e.g. not built into the wall or workbench). The requirements list I settled on is included below.
- Features I want
- Adjustable height of the sash (slidey front glass thing).
- Full open position: enables easy access to items inside the hood.
- Regular working position (mostly closed): keeps a high flow rate through the sash opening when working with gross chemicals or smelly things.
- Full closed position: keeps dust and other stuff out of the fume hood when everything is turned off and put away.
- Exhaust piped to outside the building without needing to drag a hose anywhere whenever I turn on the fume hood.
- Good lighting.
- Pass-throughs for electrical cables so they don’t need to pass through the sash opening.
- Waterproof surfaces and a built-in secondary container for containing spills.
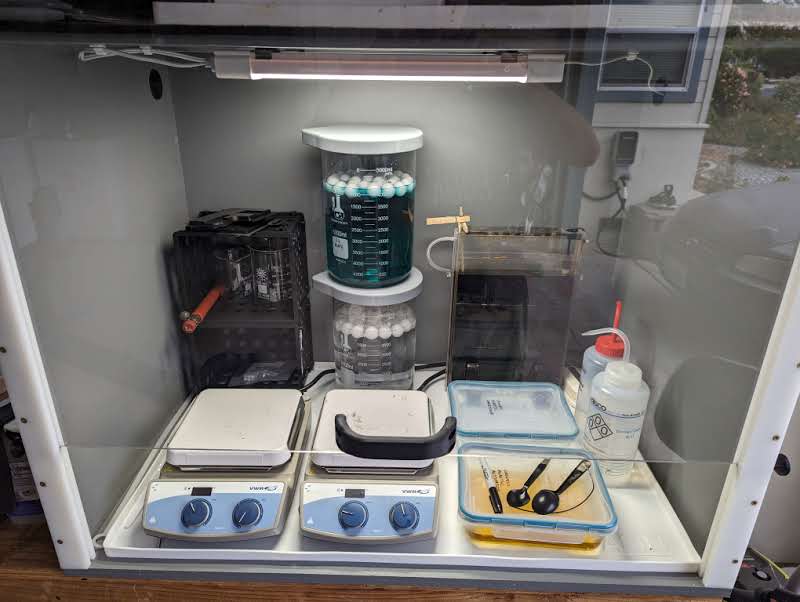
- Enough working area for PCB etching and electroless plating.
- Adjustable height of the sash (slidey front glass thing).
- Features I don’t need
- Exhaust air scrubbing / filtering: The chemicals I’m working with aren’t gross enough to require scrubbing of the exhaust air–they’re only really a problem when working in an enclosed space if there isn’t adequate ventilation.
- Chemical-proof exhaust fan: I’m OK replacing the exhaust fan every now and then if required, I’m not doing anything super corrosive at the moment.
- Explosion-proof / fire-proof / etc.
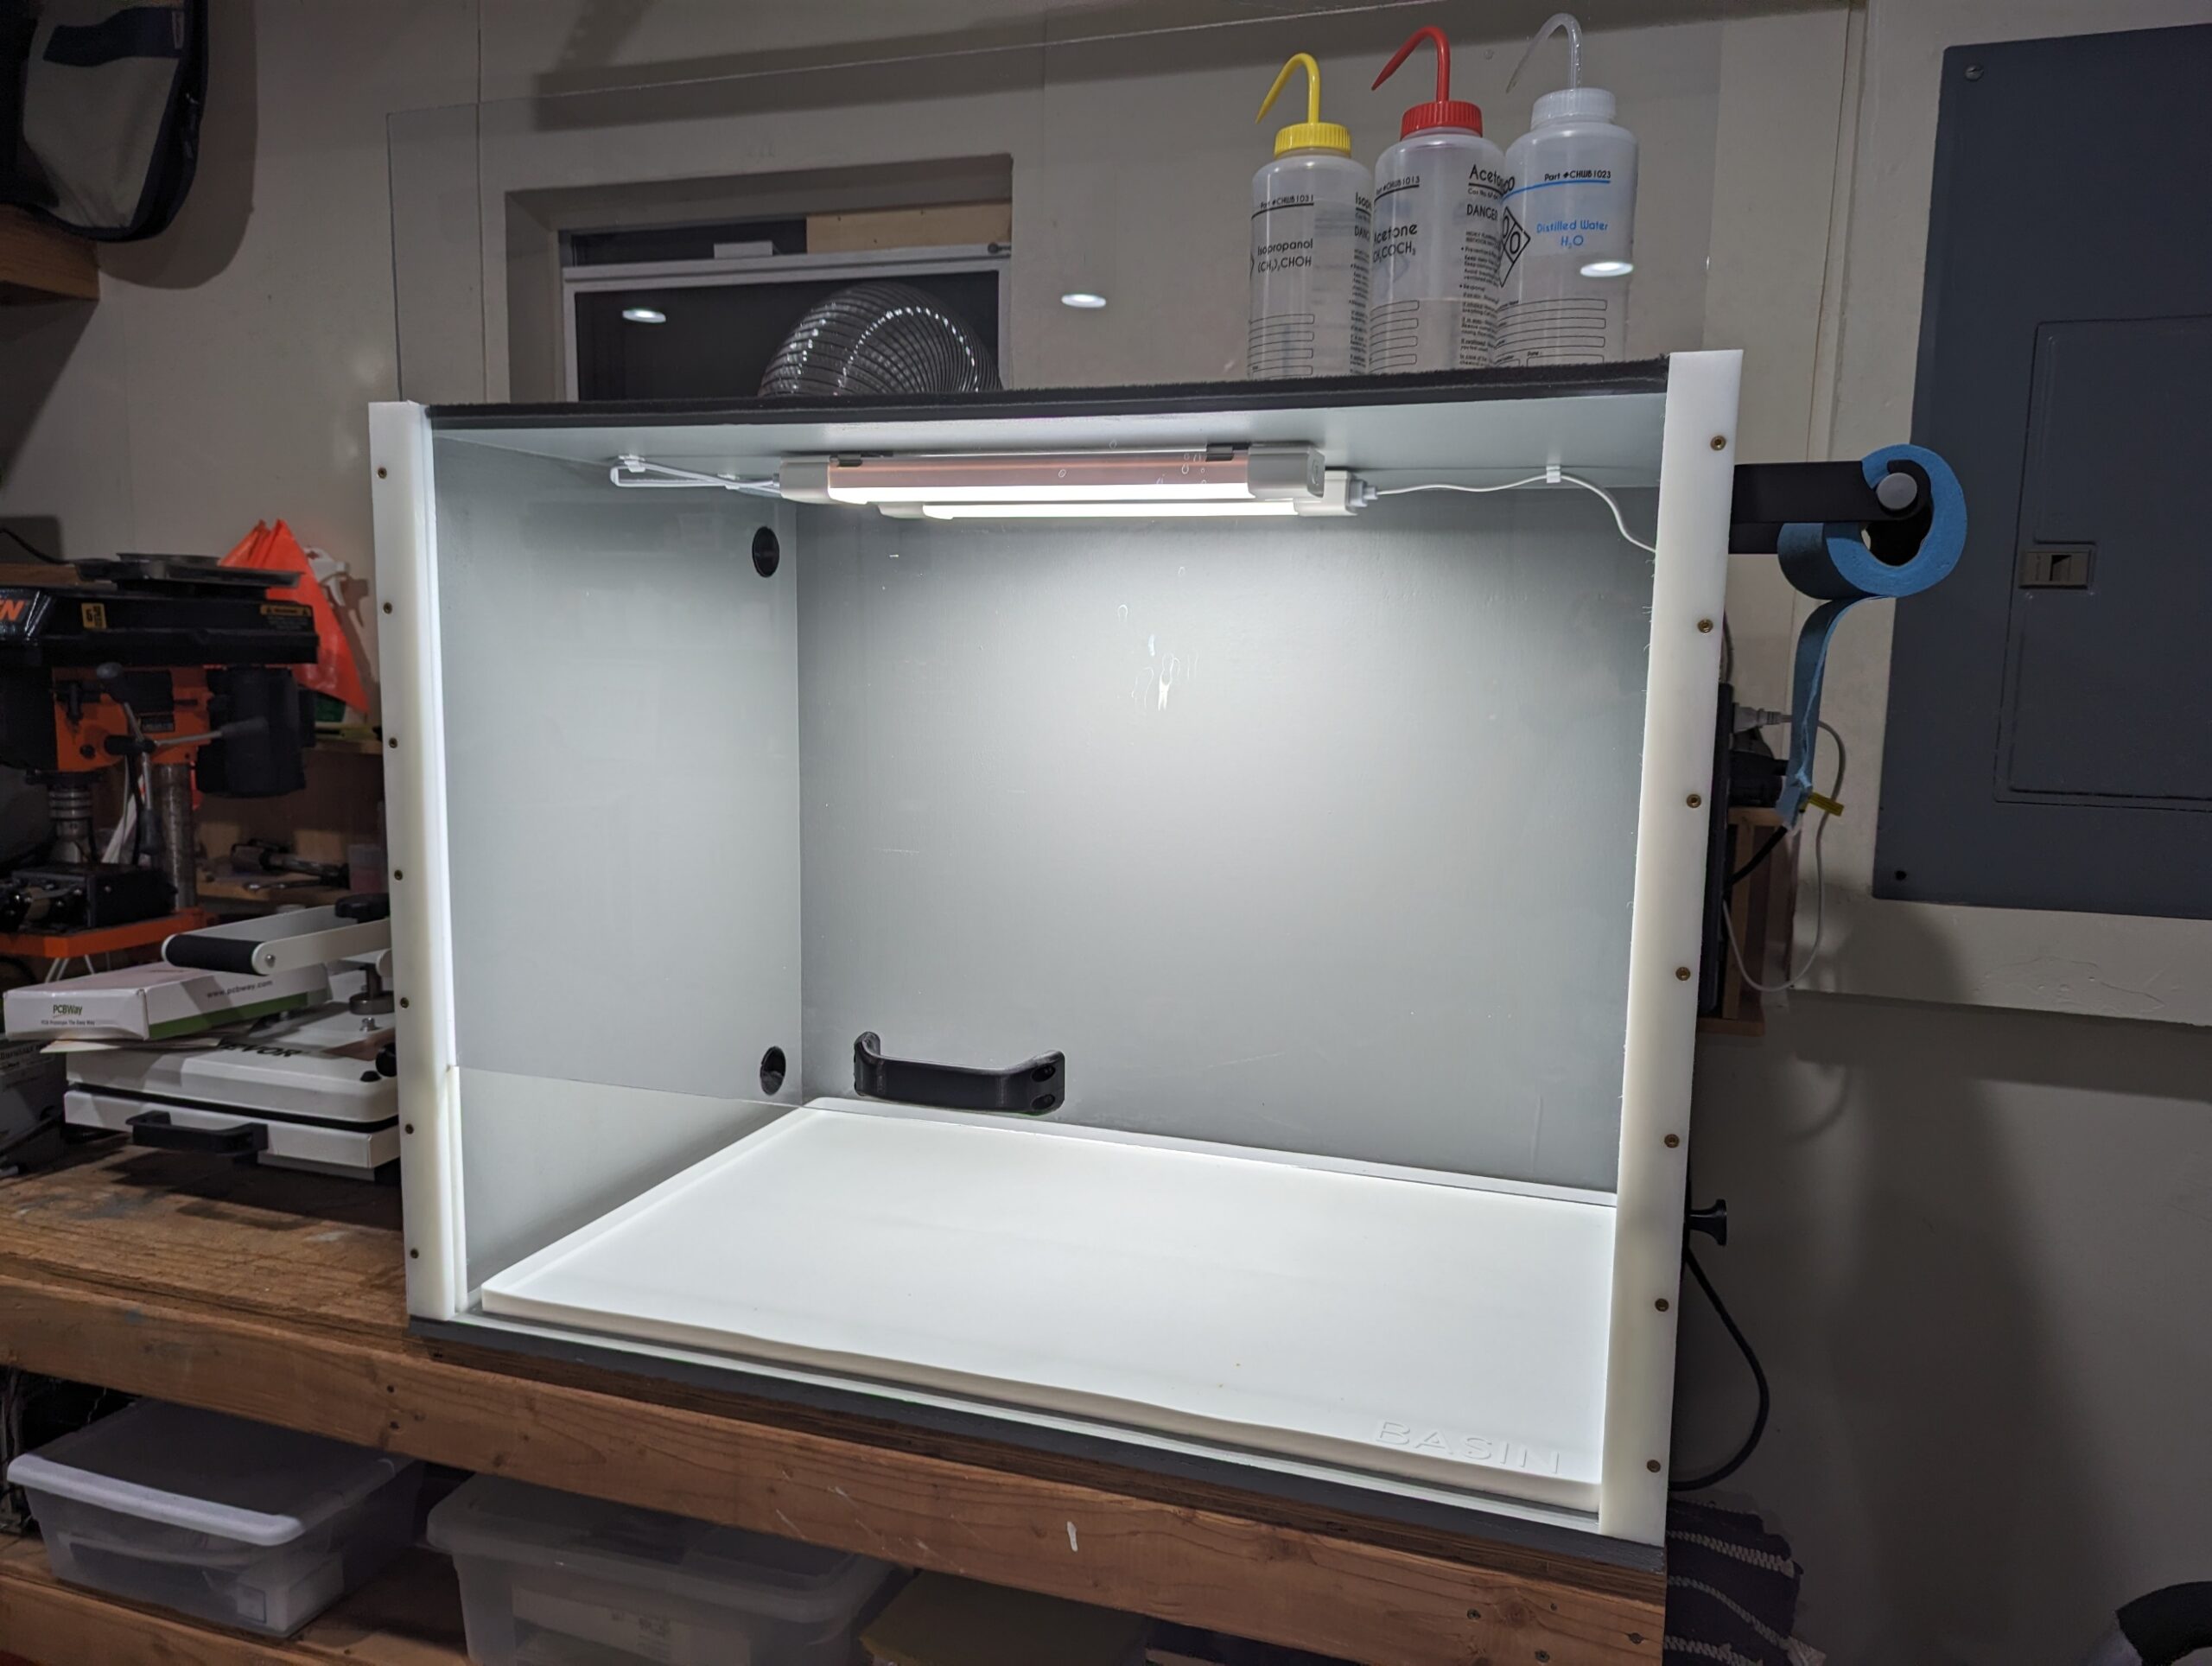
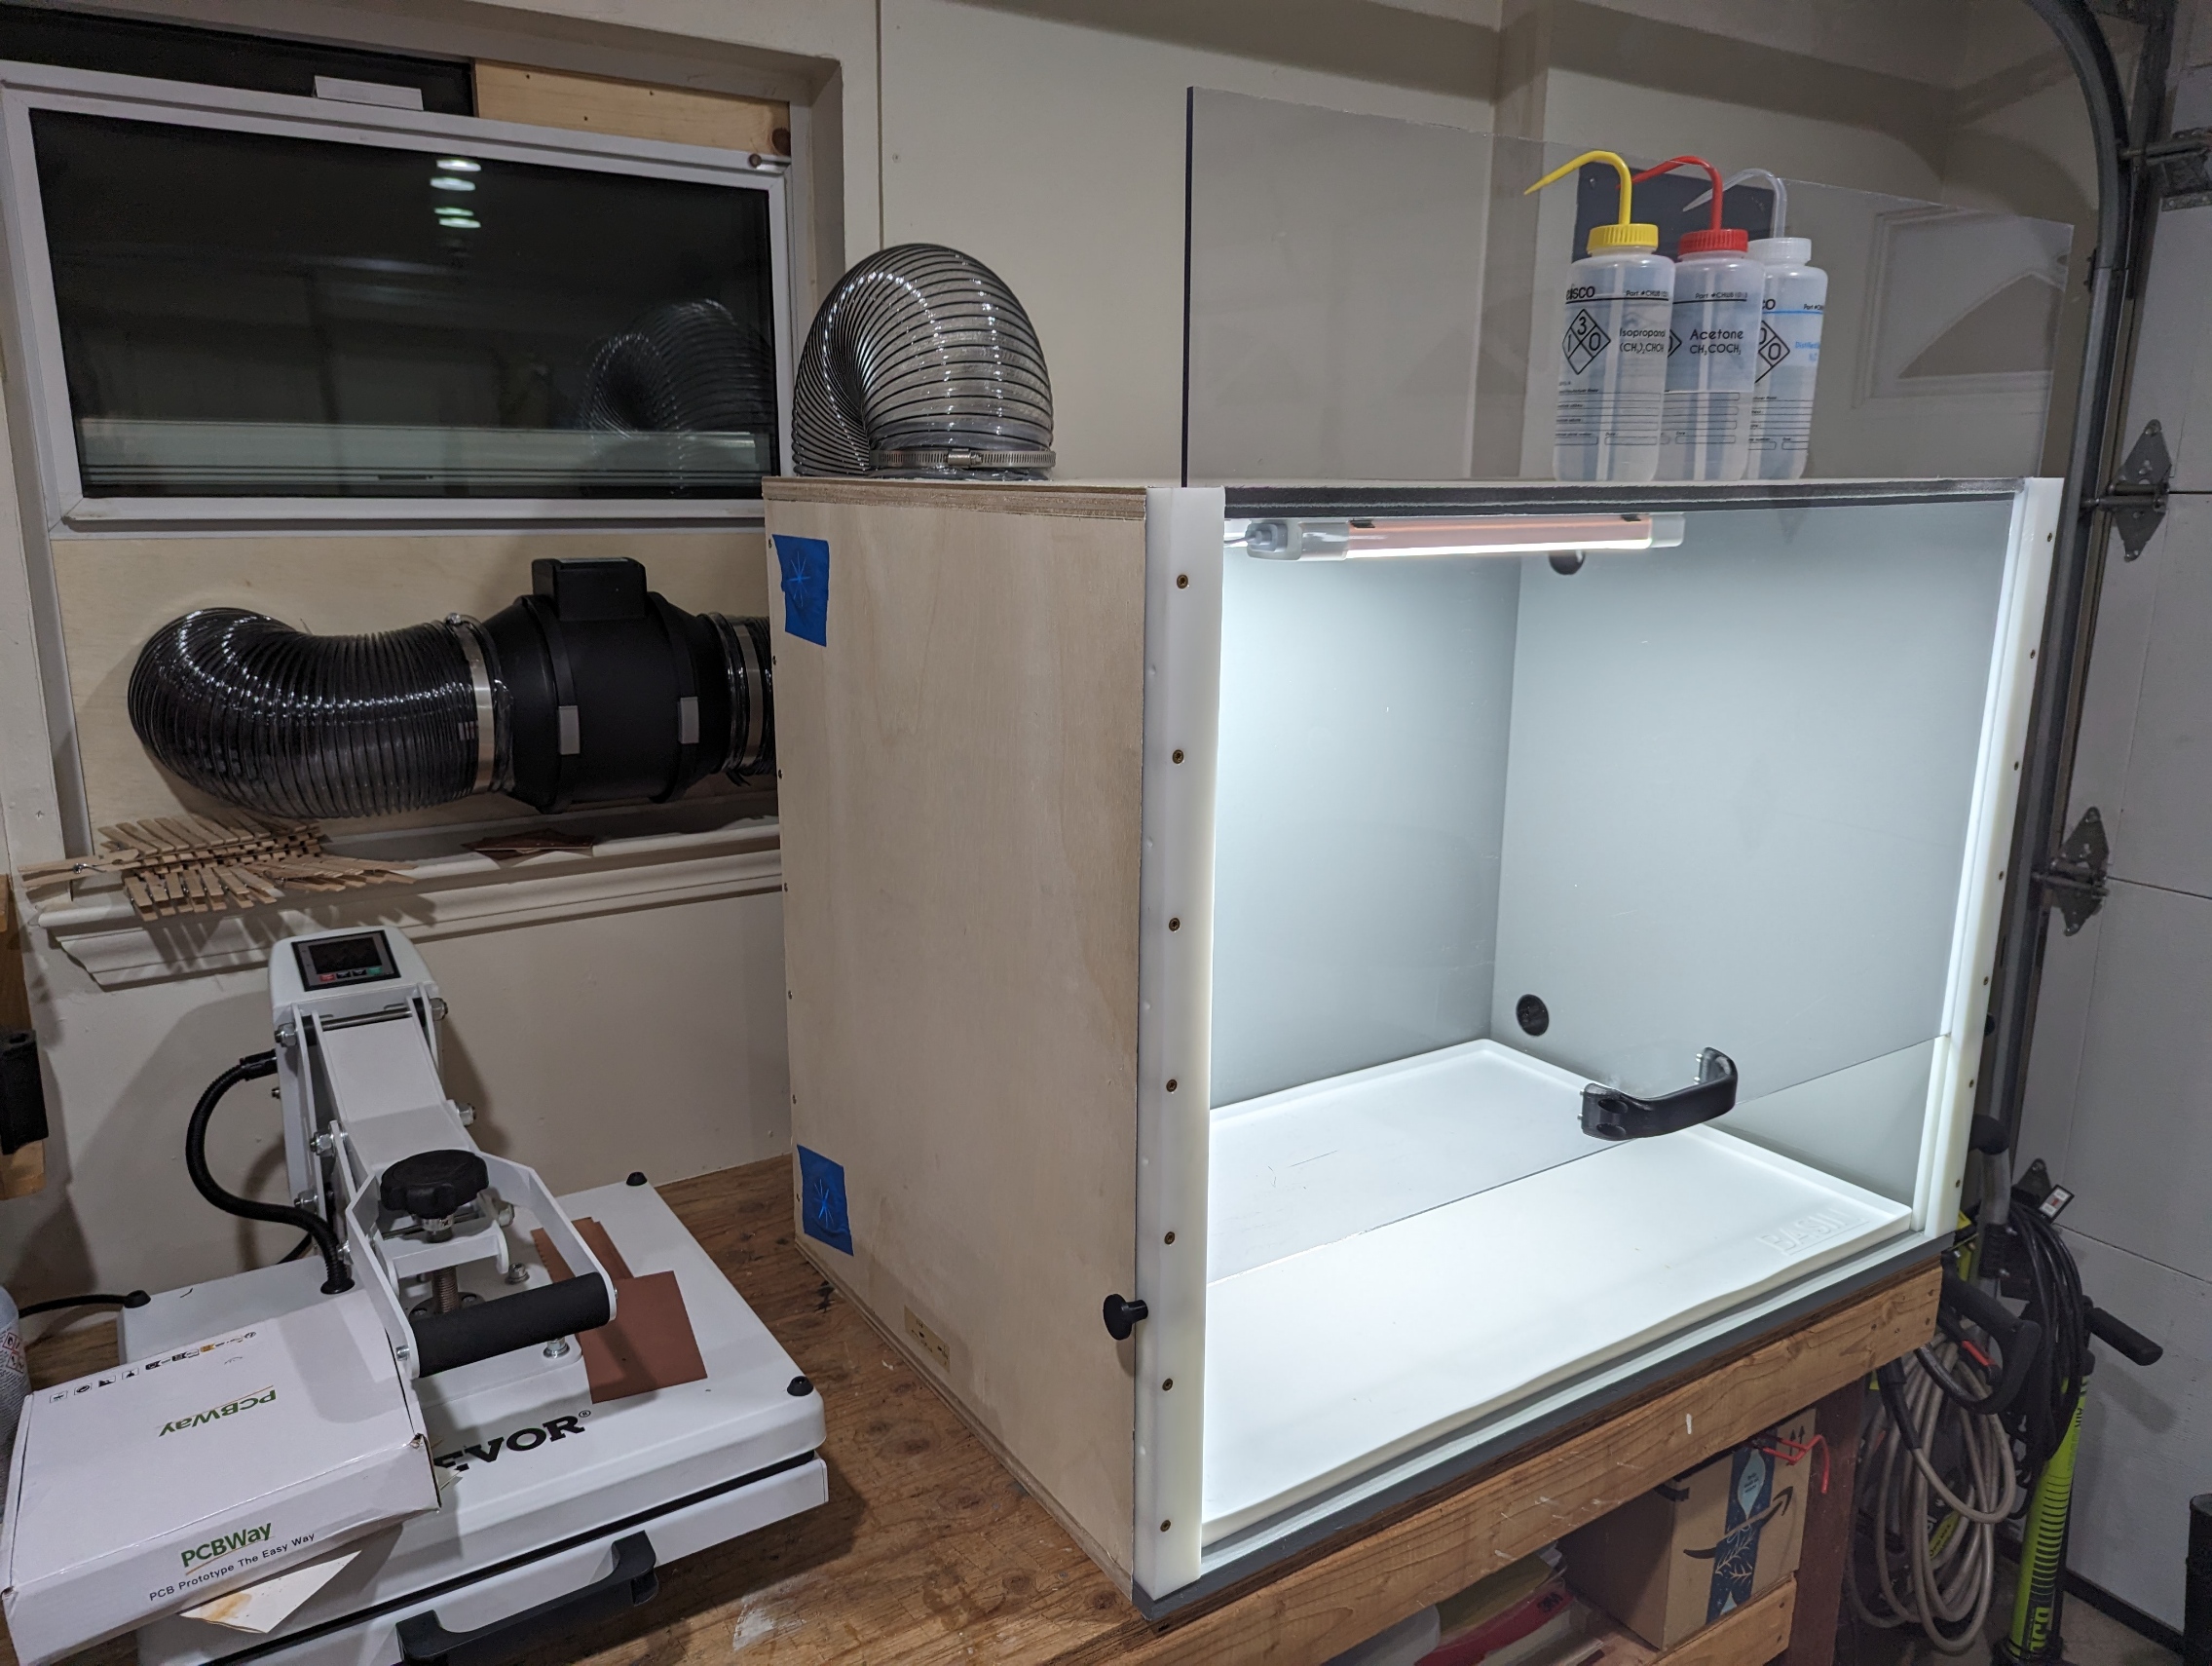
…and here’s what I made! As of writing this post, I’ve been using it for a few weeks now and it’s worked a treat. I took extra time throughout the build process to make proper drawings and take lots of pictures, in case anyone wants to build their own.
Build Steps
Enclosure
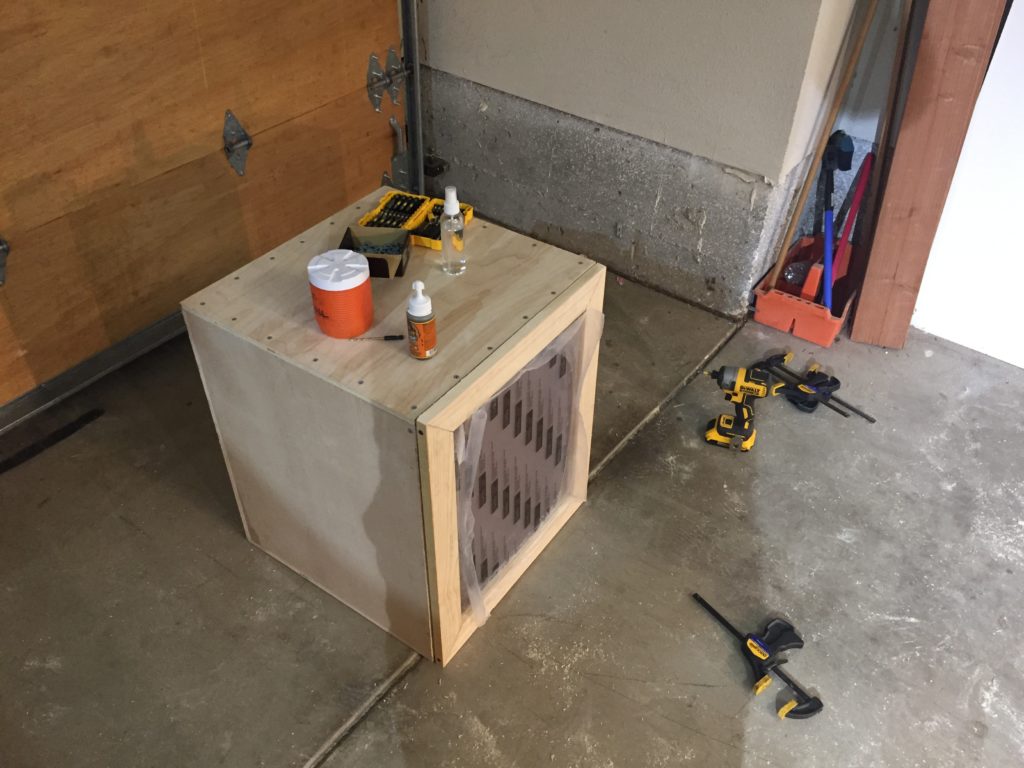
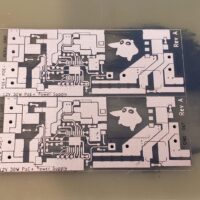
The enclosure is designed such that the sides, top, and bottom of the enclosure can be cut out of a single 4x8ft sheet of 3/4in plywood, including an extra vent panel that can be inserted into a sliding window as the exhaust port. I chose to use a laminated Sande plywood sheet for this project, since the thin outer laminate of Sande wood provided a nice smooth surface to paint, and was naturally water resistant. If you go to a big box home improvement store like Home Depot to buy the plywood, they often have a track saw that they can use to break down the wood into rough cut pieces for free, in order to make them easier to handle and fit into a car for transportation. Make sure to get these pieces cut slightly oversized! When I got my enclosure pieces cut, I tried getting them cut exactly to size, and ended up having to buy an extra project panel to make up for a piece that was cut too short.
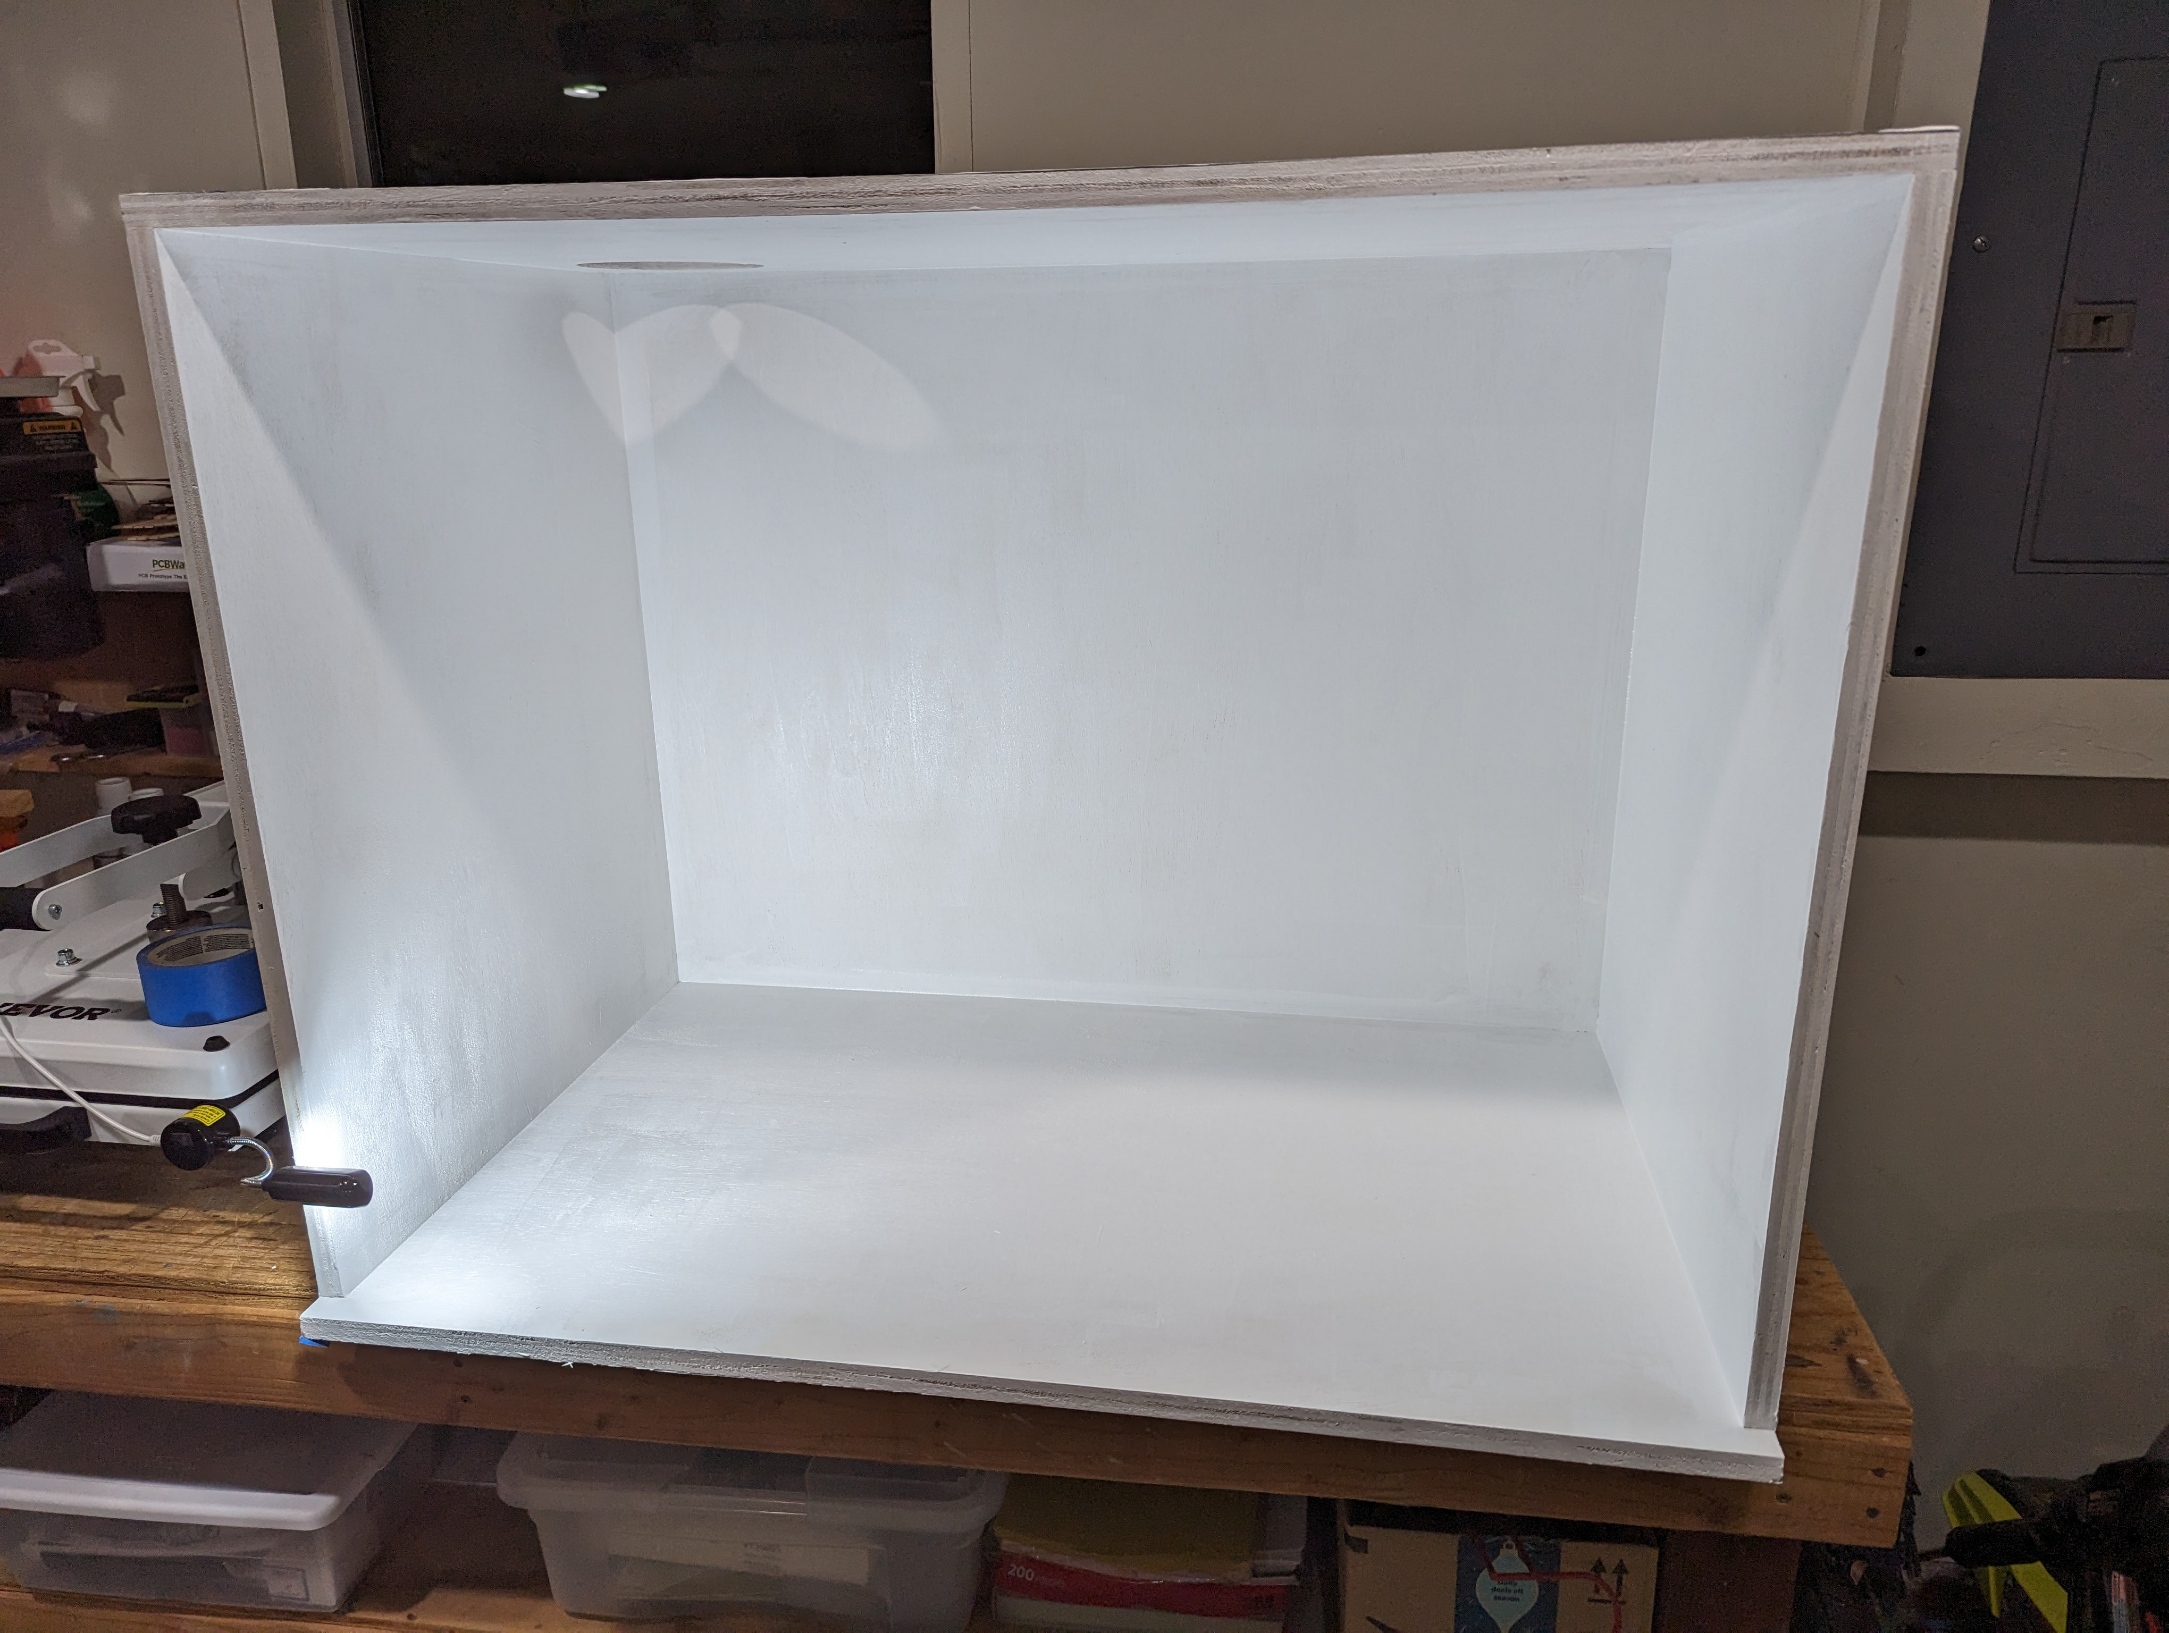
Before assembling the enclosure, I took the rough-cut pieces and trimmed them down to their exact final size using my table saw. These pieces were all a manageable size, which made it easy to hold around a 1/16in tolerance on each dimension. I stood the final-cut pieces of plywood together in the shape of the box, and taped them together with some masking tape to make sure that everything was square. This turned out to be a great way to hold things together, so I proceeded to permanently fasten the sides, top, and bottom of the enclosure together with 1-1/2in multipurpose screws while checking that it was still square.
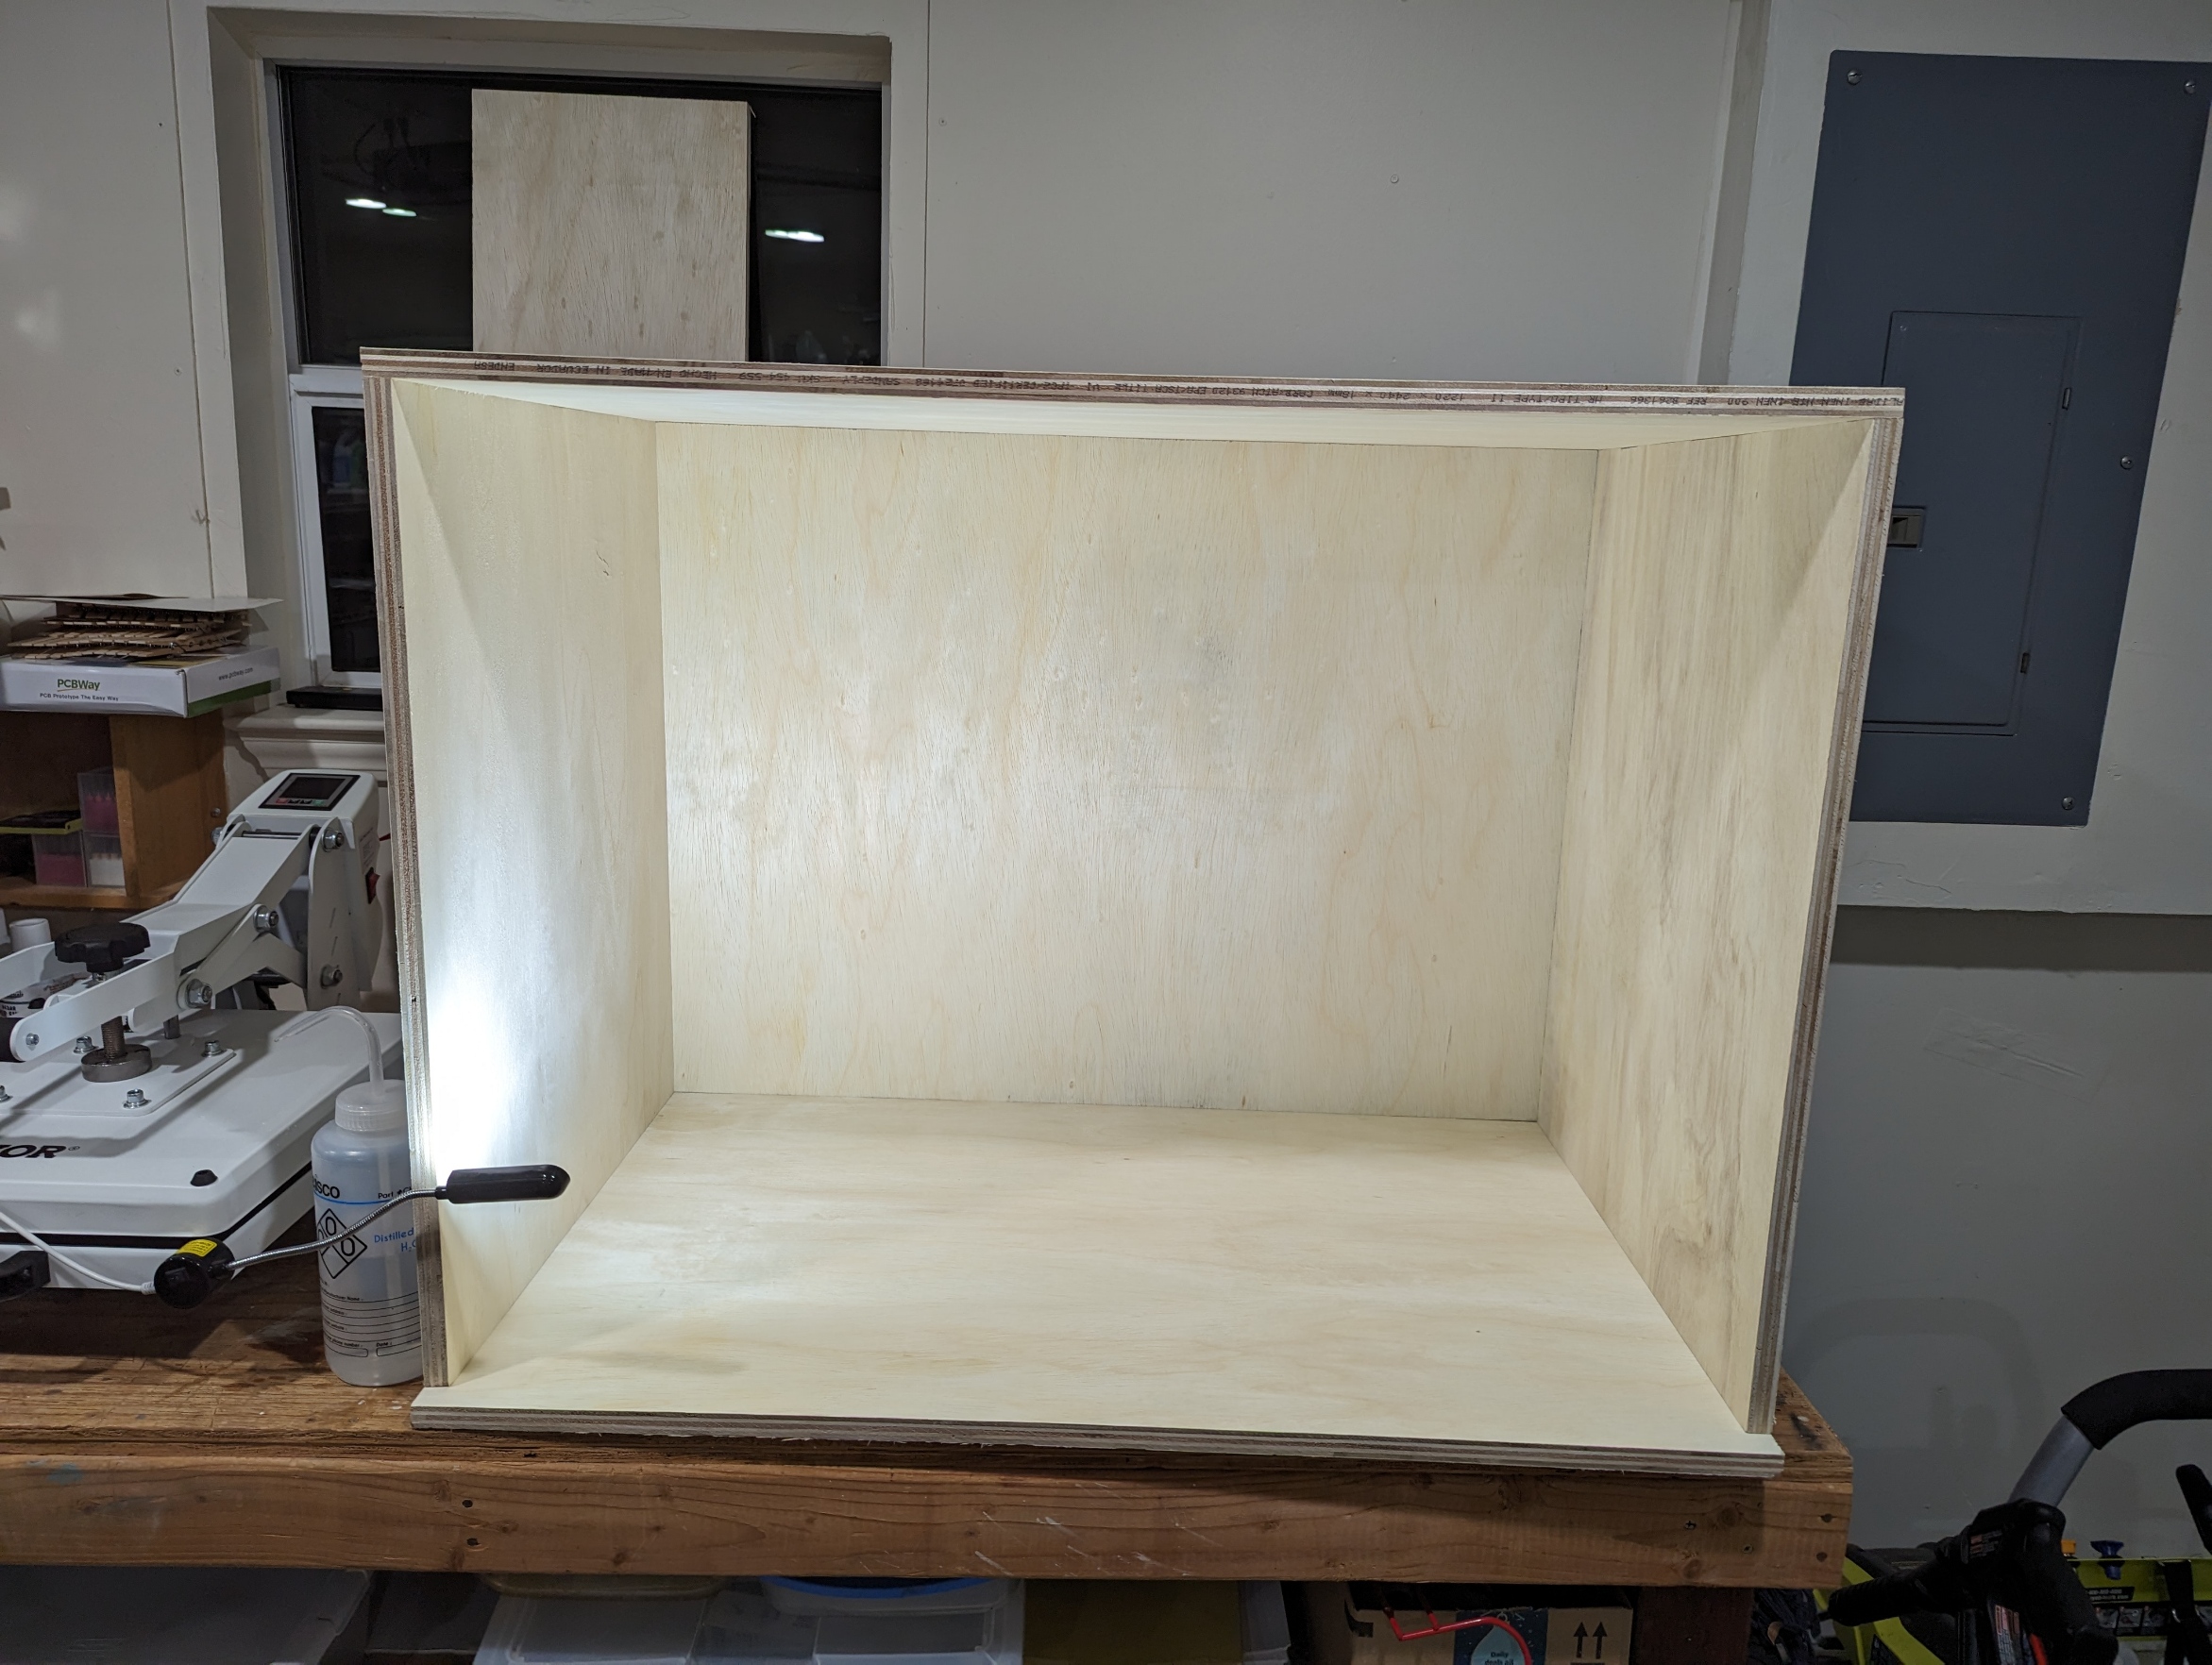
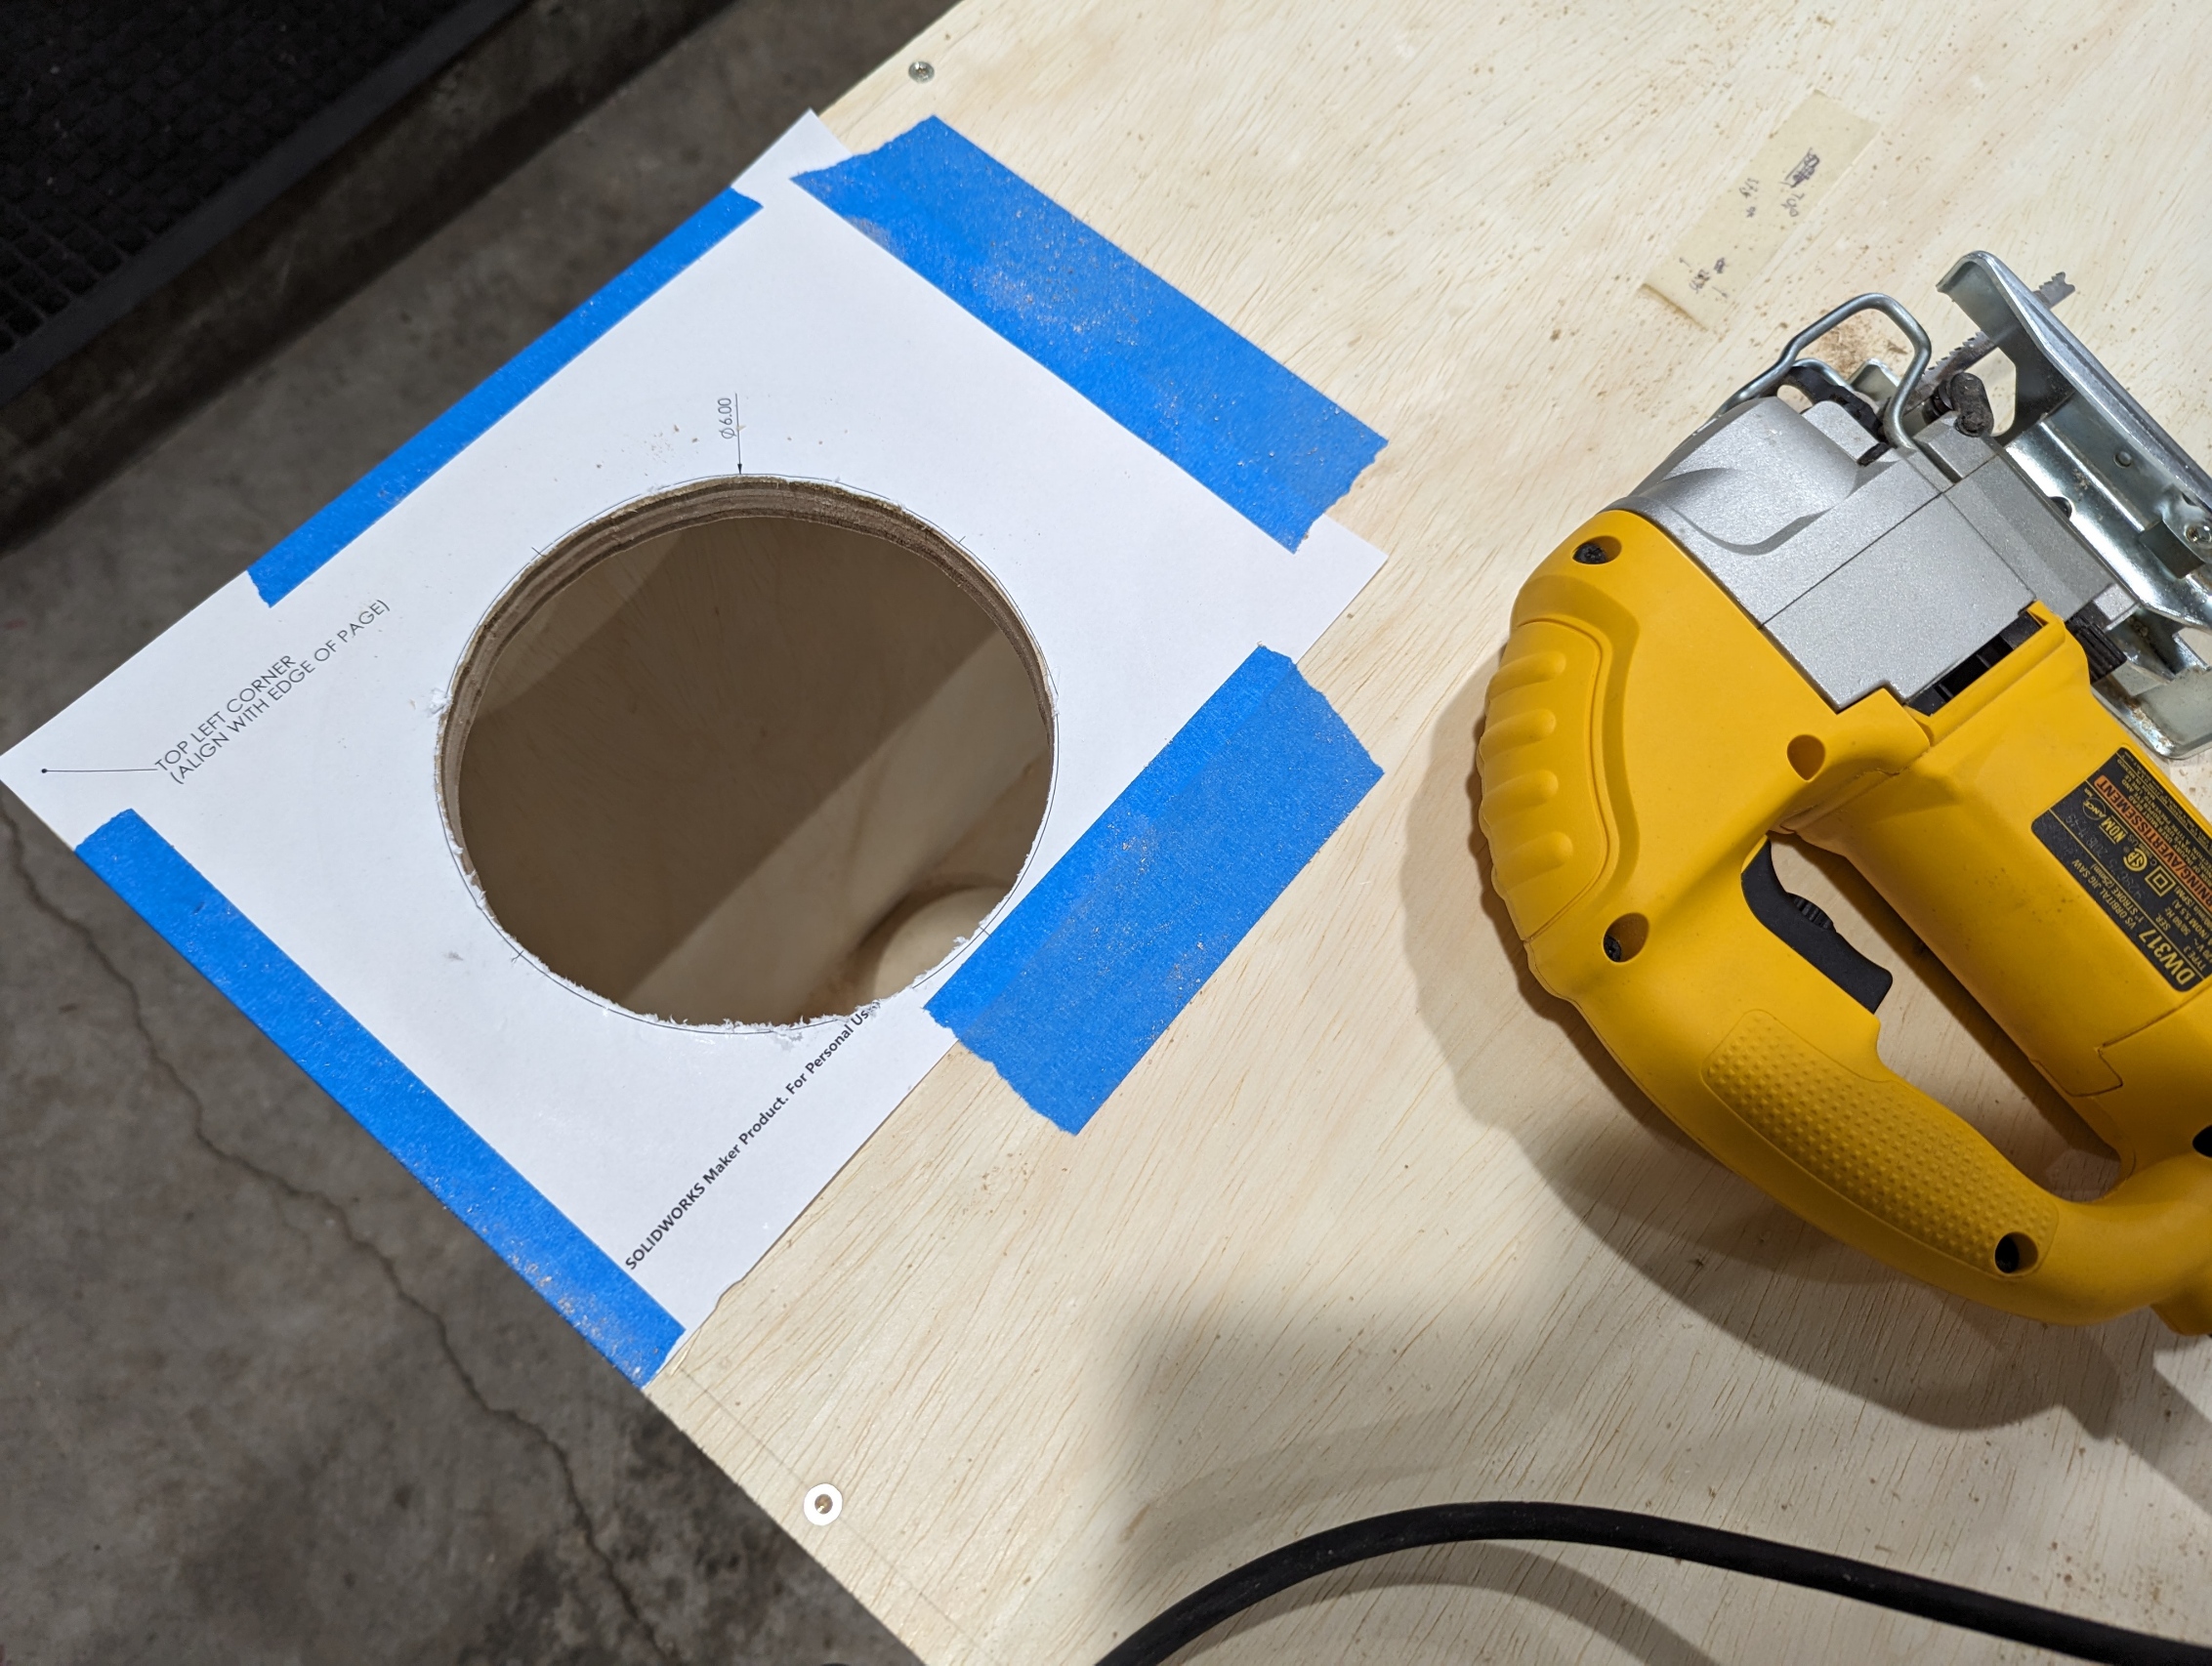
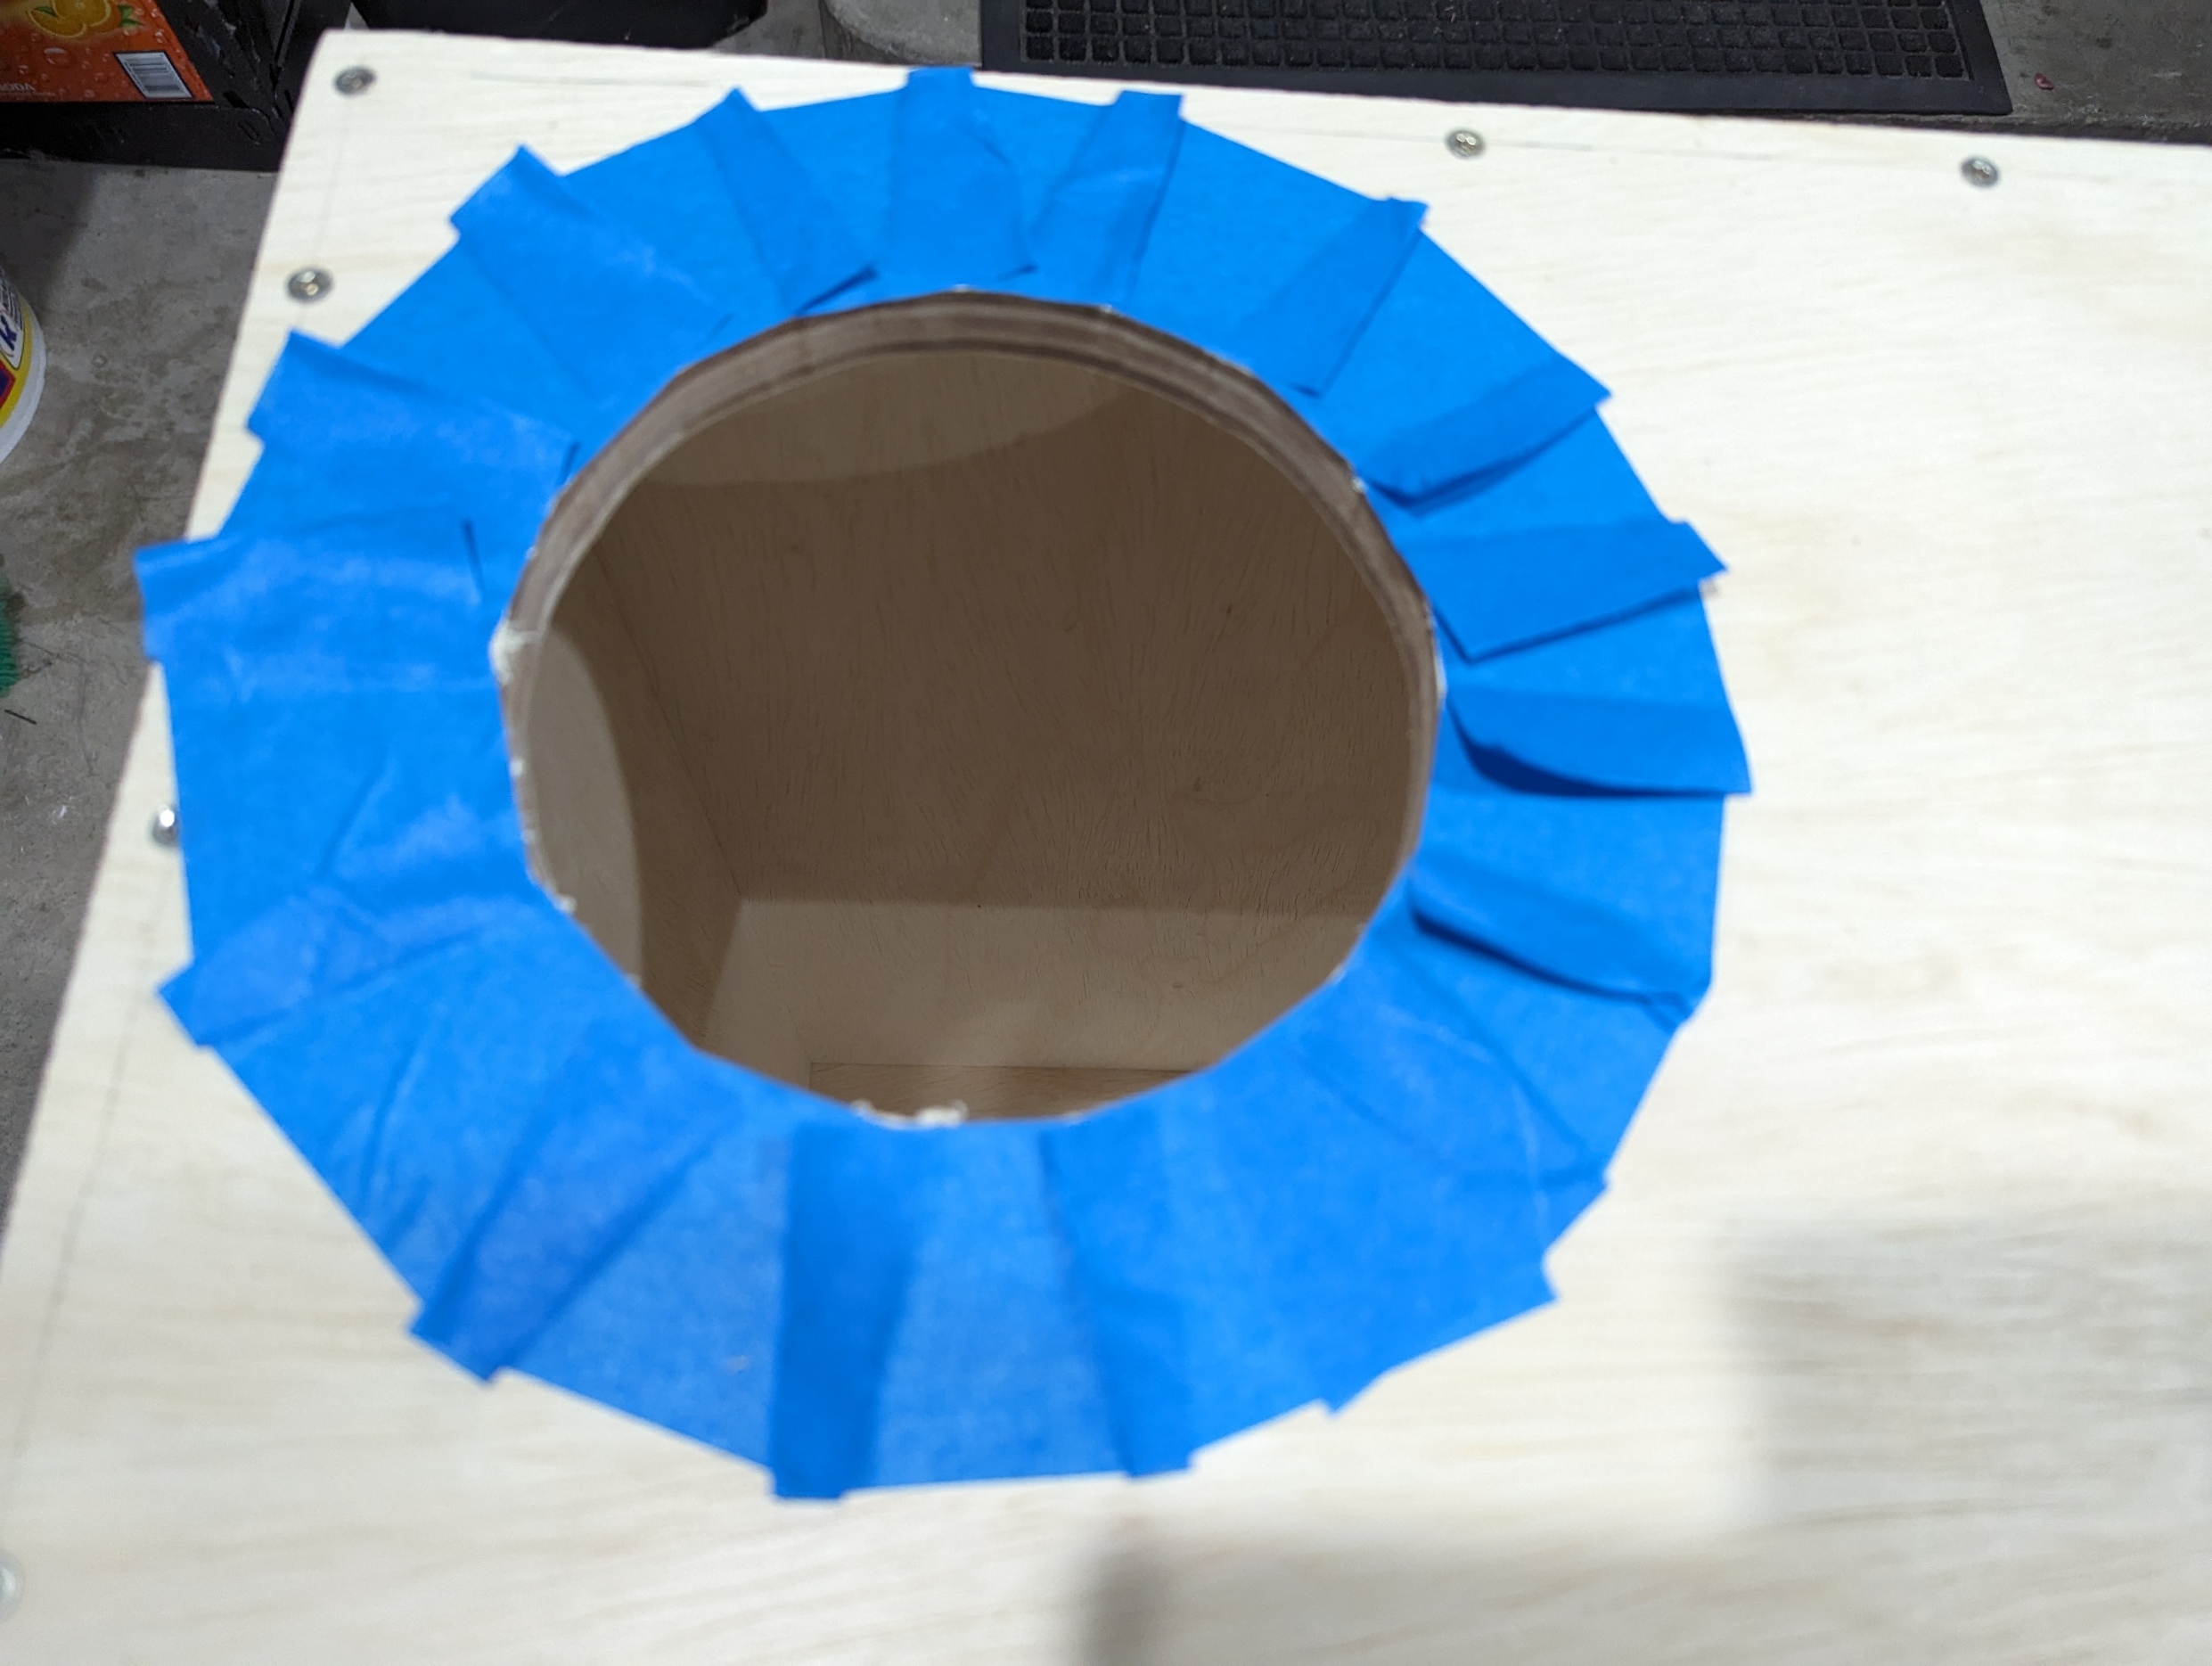
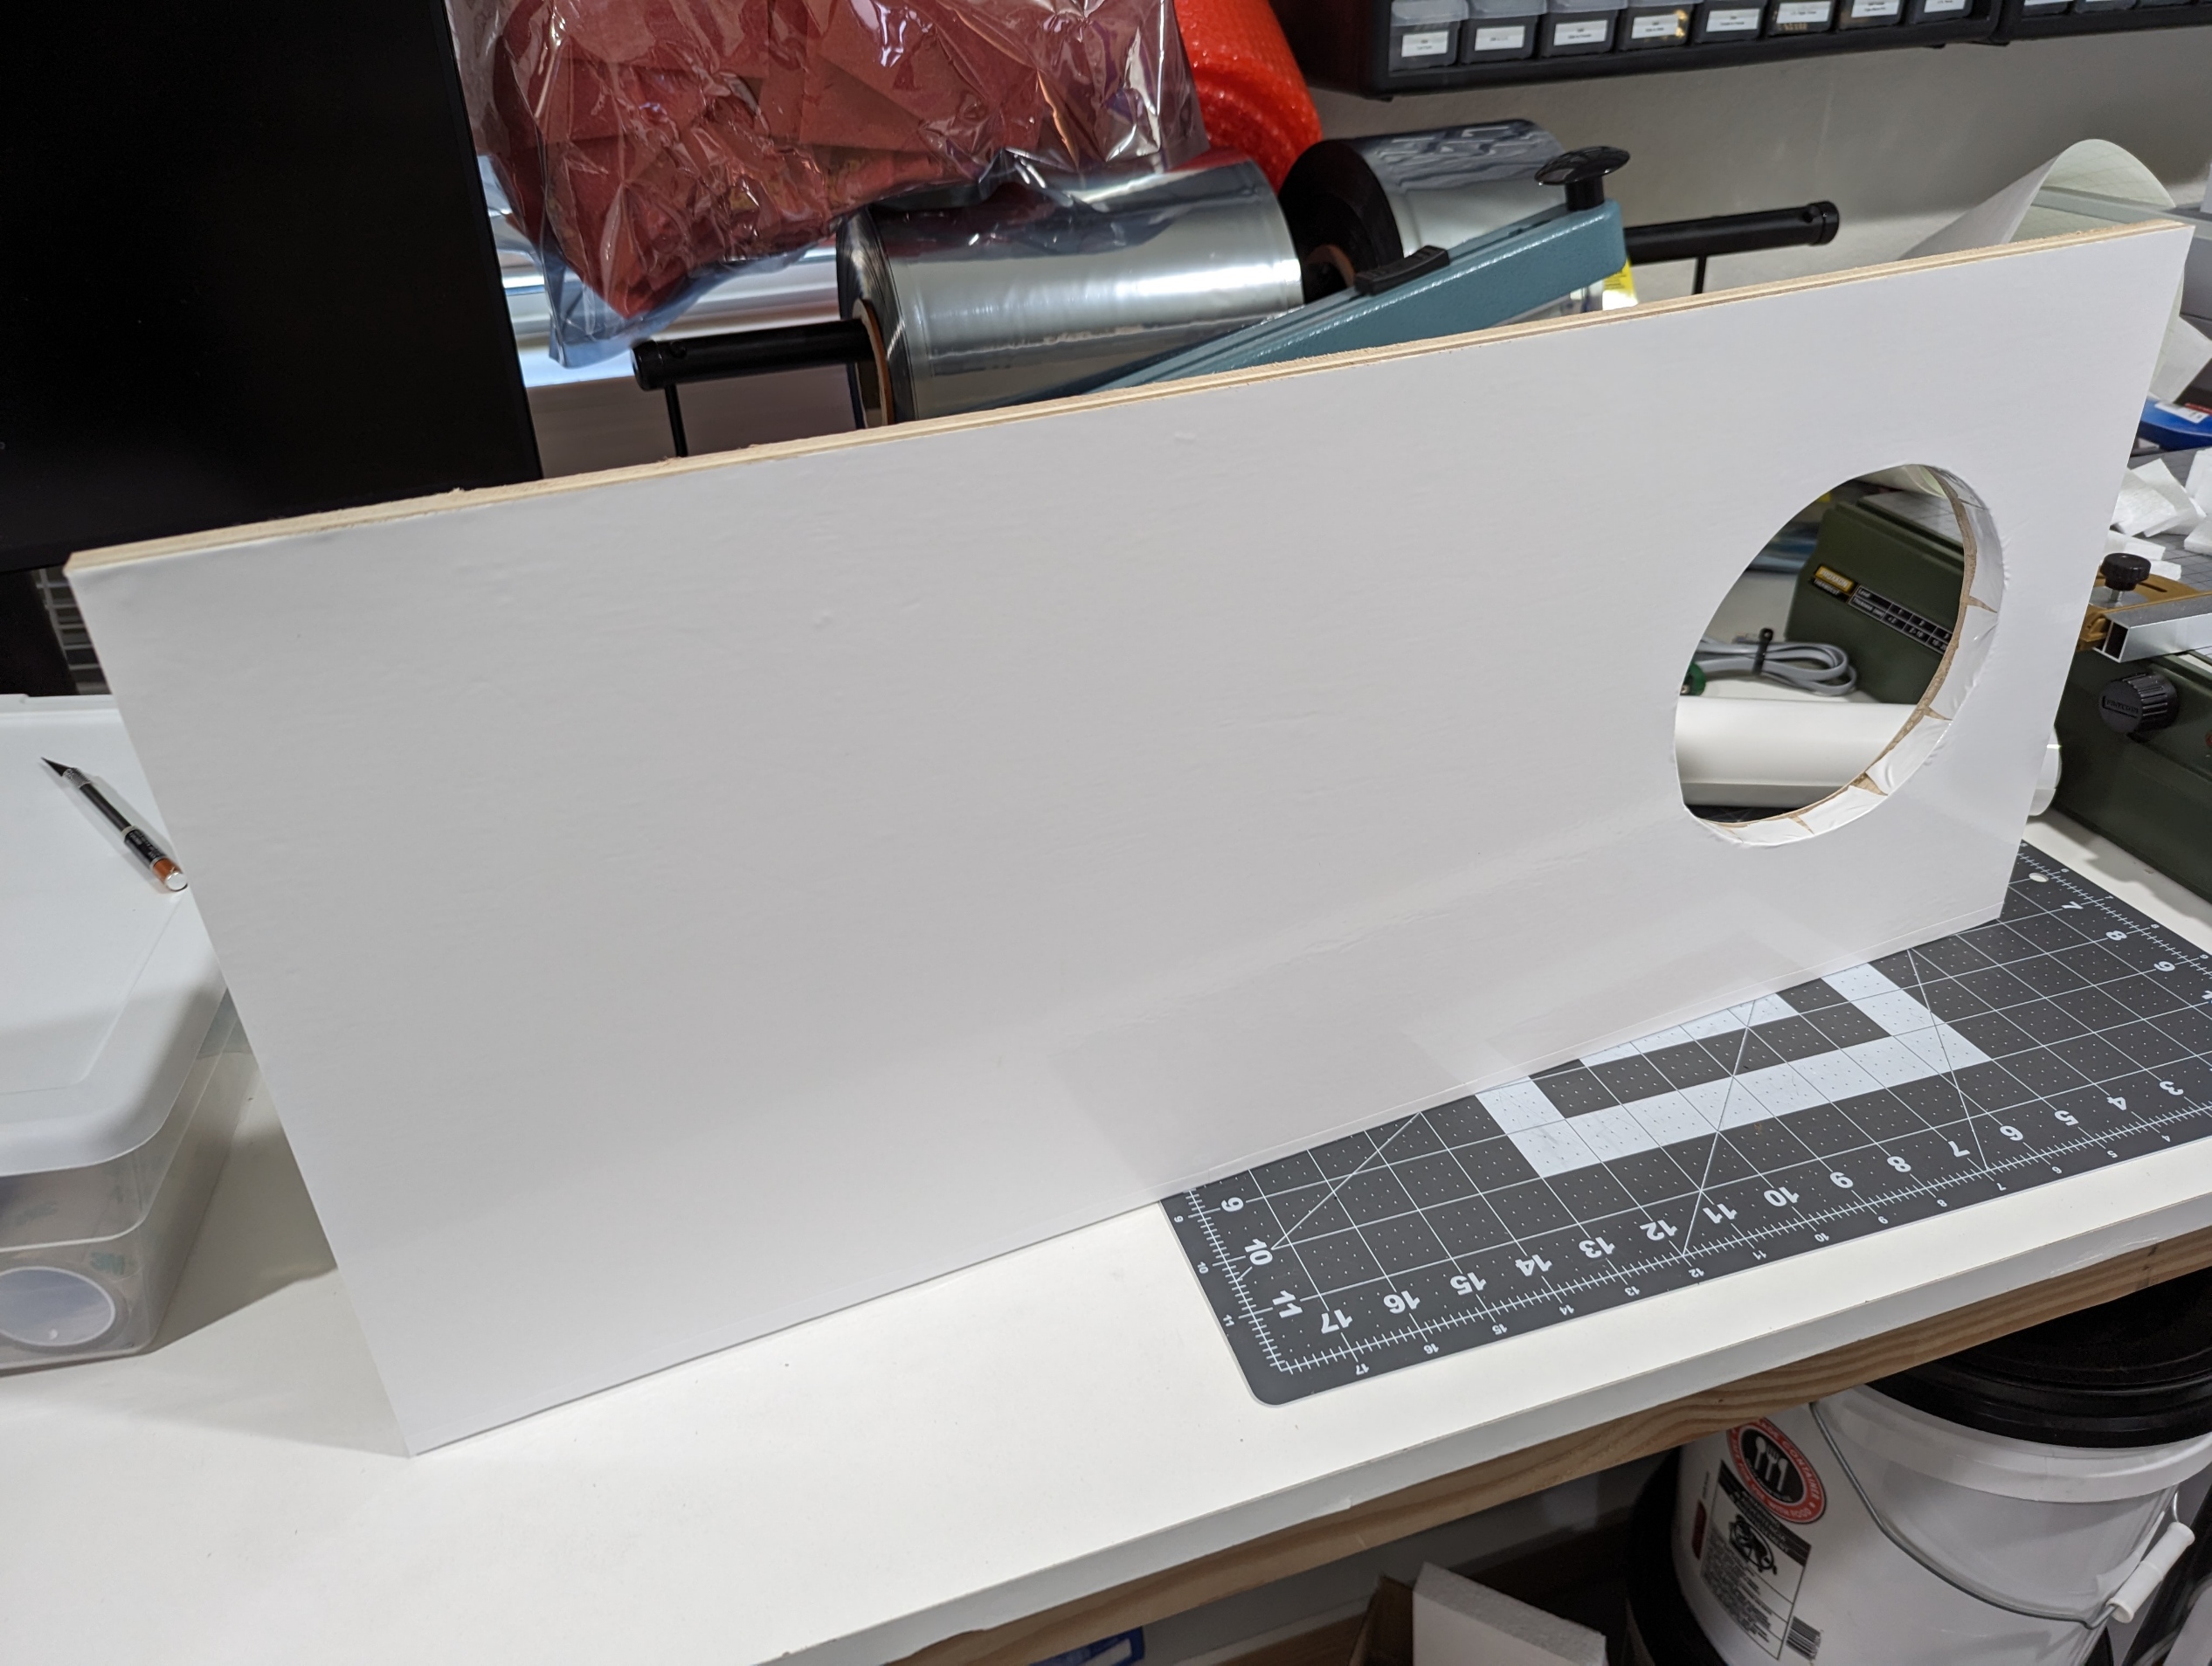
Once the enclosure was assembled (without the front rails), I cut the openings into the side walls for the cable pass-throughs with a 2in hole saw, and cut the vent pipe pass-through into the ceiling with a printed template and a jigsaw. Cutting these holes before painting allowed me to also paint the inside edges of each hole, providing additional protection to the plywood in case of a liquid spill inside the enclosure.

With the enclosure assembled and holes cut, I painted the interior faces and exposed interior edges of the enclosure in order to protect the wood. I started with a base coat of white exterior-grade primer, then followed up with three coats of matte gray exterior floor paint (meant for painting wood decks). I had previously used this paint stackup on the floor of a catering trailer, and found that it stood up to abuse (including stains and mechanical abrasion) quite well. I’ve also read about excellent results from people who used epoxy floor paint (like the stuff used for garage floors), or elastomeric roof paint, inside their fume hood enclosures as well.
Front Rails
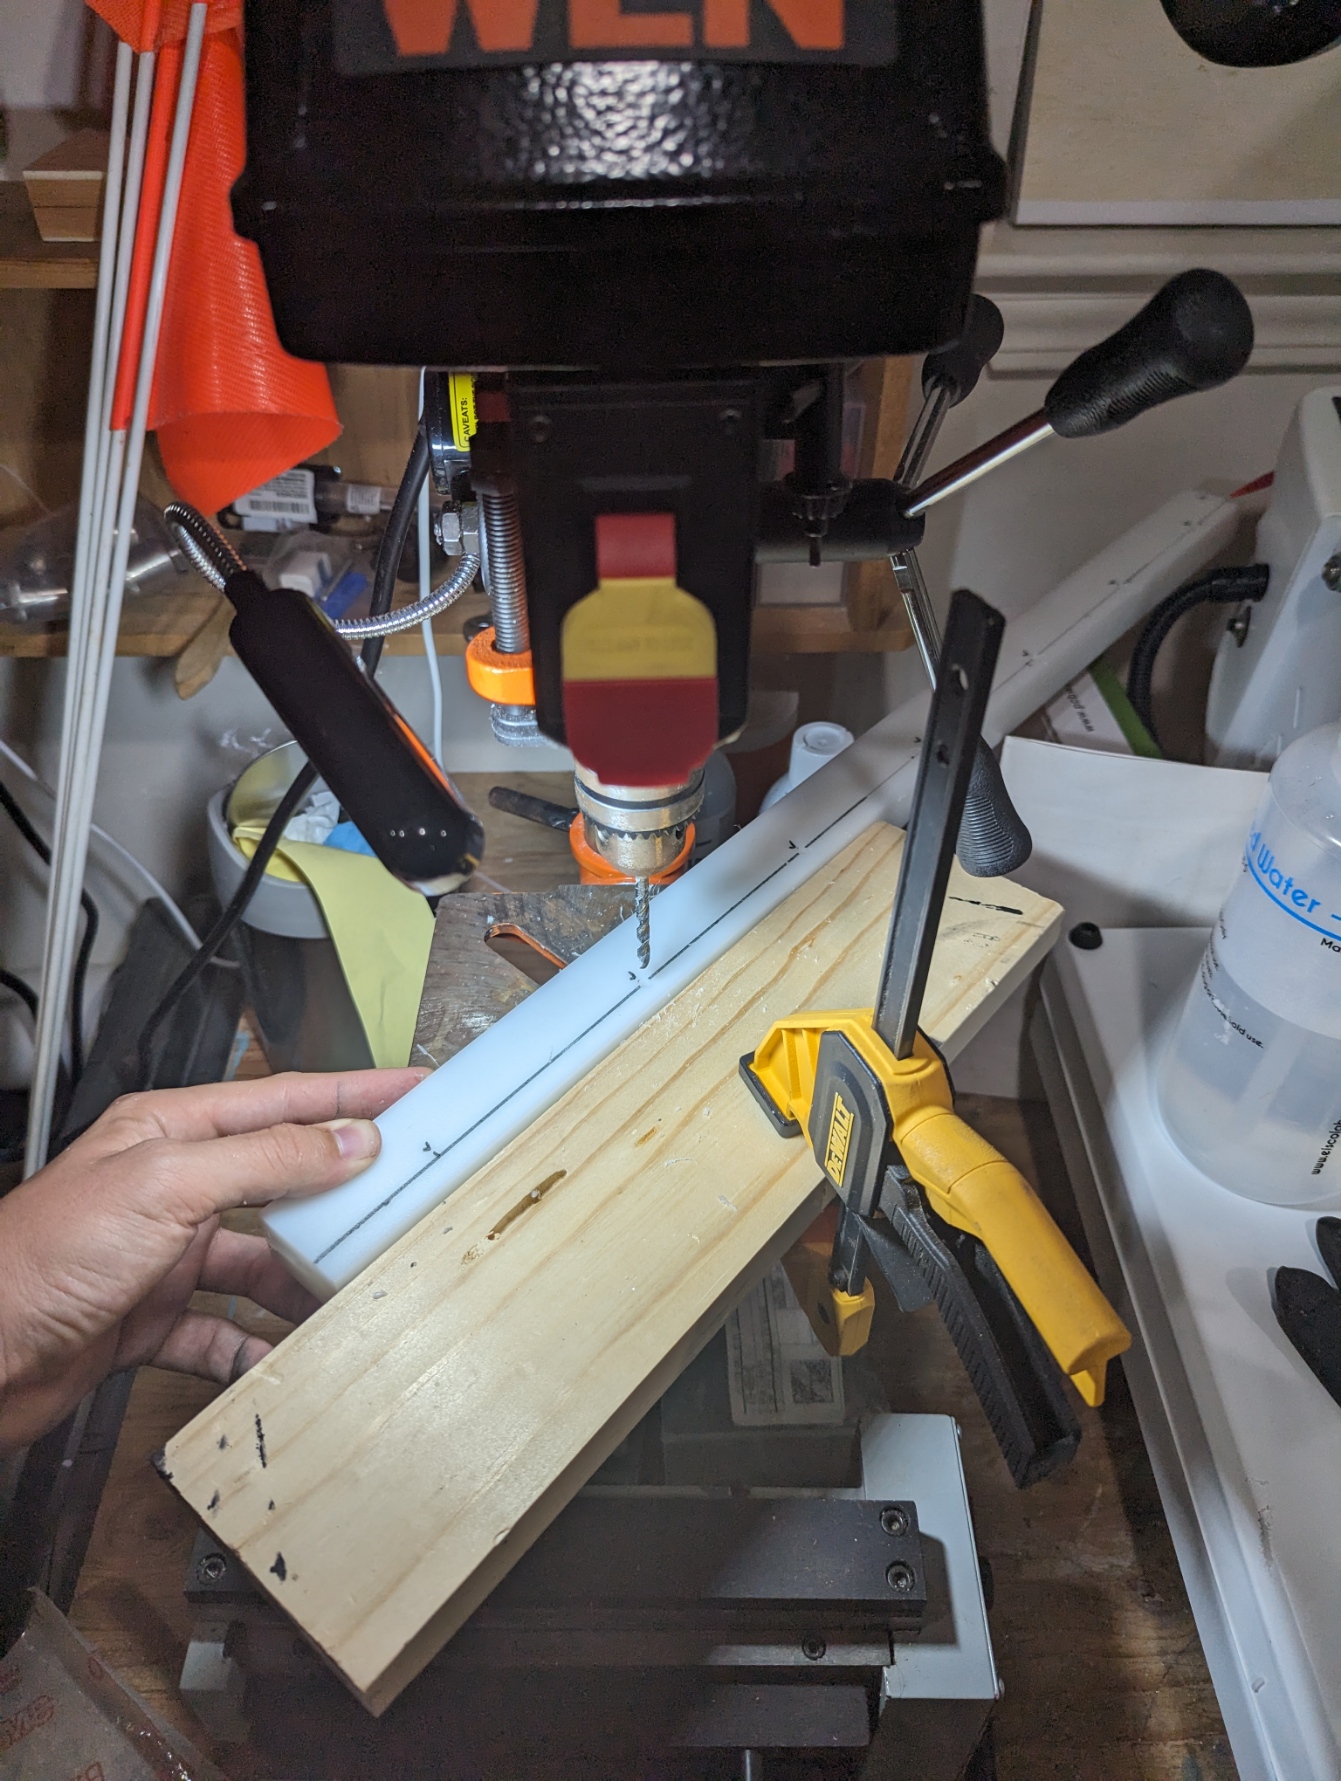
The front rails of the enclosure are designed to be fabricated from 1” thick strips of HDPE plastic, which is easily machinable and provides a low-friction surface for the sash to glide up and down along. This kind of plastic is commonly used in cutting boards, and can often be purchased from local plastic shops who can cut it to size (usually they have a 1” thick 4x8ft sheet of HDPE and will rip it down into strips with the height or width that you specify). When I purchased my HDPE, I got three strips since it was the same cost as the two strips I actually needed to complete the project. This proved helpful, since I managed to mess up one of the strips while cutting in the sash rails!
I cut the sash rail grooves into the HDPE strips using a table saw. It would have been a bit easier to do if I had a dado blade for my table saw, but doing a bunch of runs with my skinny saw blade while adjusting the fence on the table saw a tiny amount each time worked with enough persistence. The rail grooves should be just a smidge wider than the 1/4in thickness of the sash window, so that the rails hold the sash snugly but still allow it to slide up and down freely. Once the sash grooves were cut, I marked out the holes for both the front rail attachment screws as well as the sash height adjustment pins. The holes for the front rail attachment screws were counter sunk to allow the attachment screws to sit flush with the front rails. The front rails are attached to the front edge of the enclosure side walls using 1-1/2in multipurpose screws.
Cable and Duct Pass-Throughs
The plastic cable pass-through grommets are simply press-fit into the holes cut into the sidewalls of the enclosure, with some occasional encouragement using a rubber mallet. The mounting flange for the 6in vent duct that enters the roof of the fume hood was 3D-printed out of PETG and mounted using a handful of #6 x 3/8in wood screws. If you were feeling especially extra, you could cover the heads of these screws in vinyl or some other sort of protective layer that could protect them from any corrosive vapors they could be exposed to while the fume hood is in use.
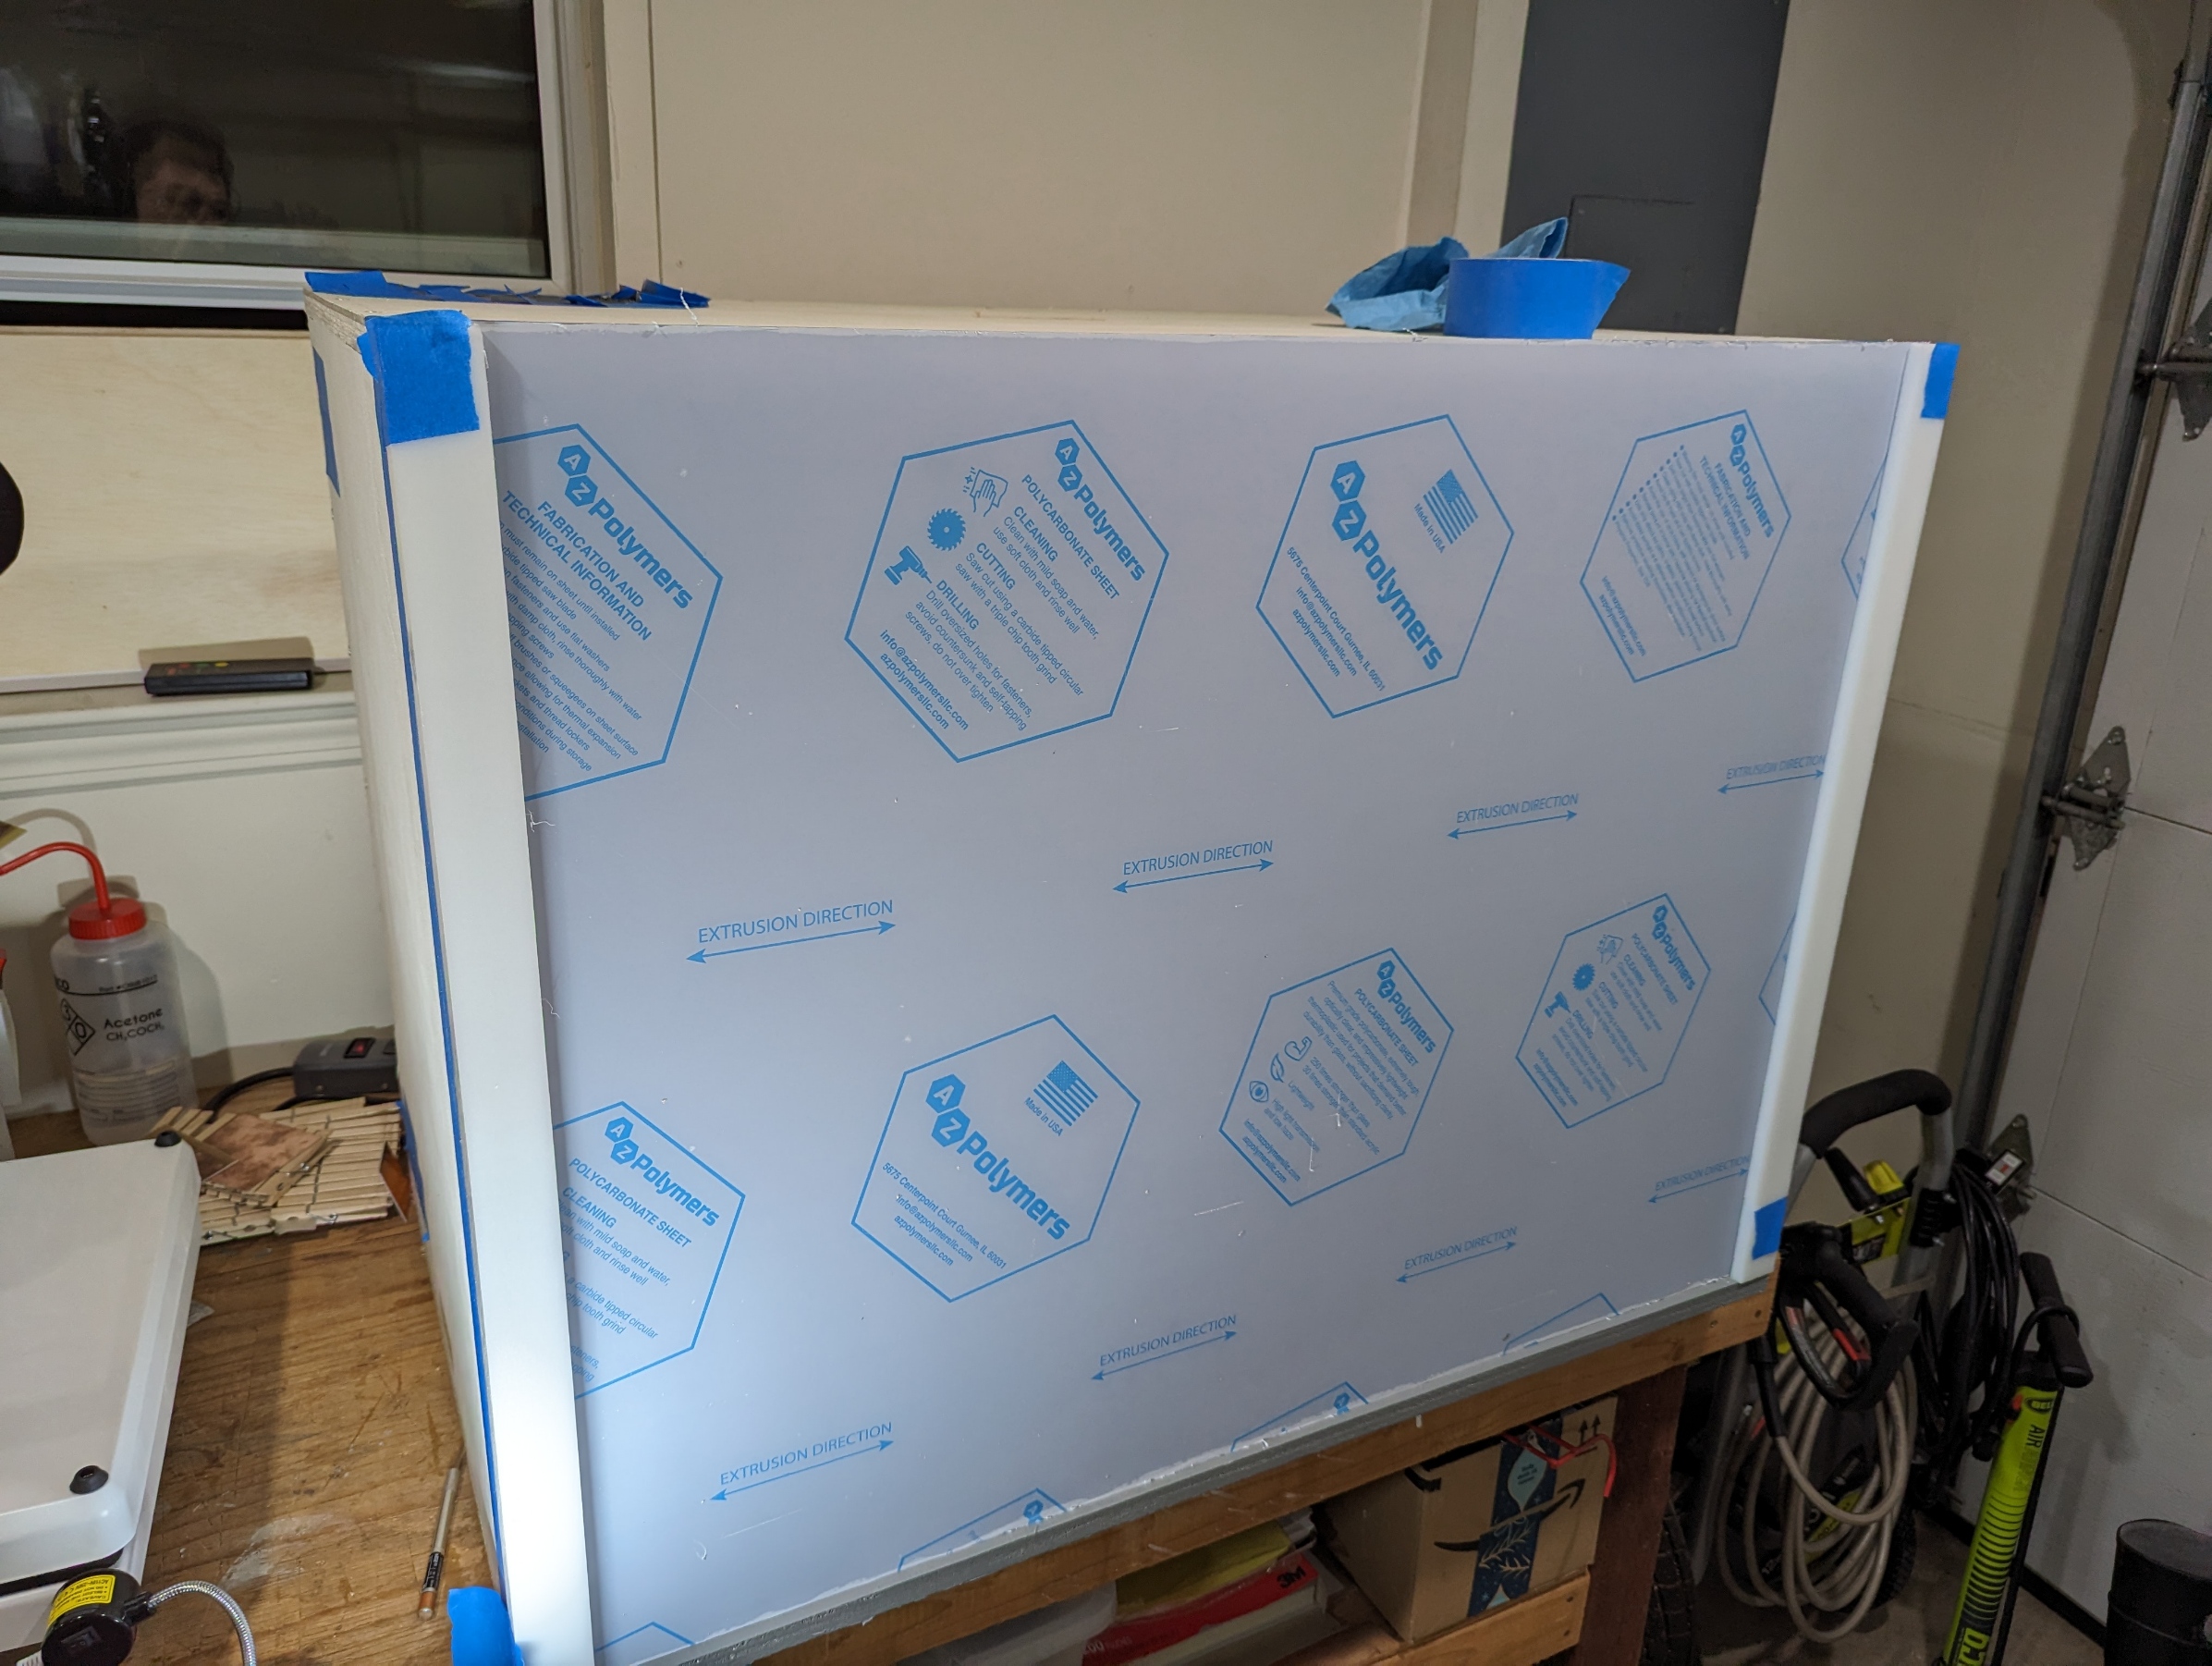
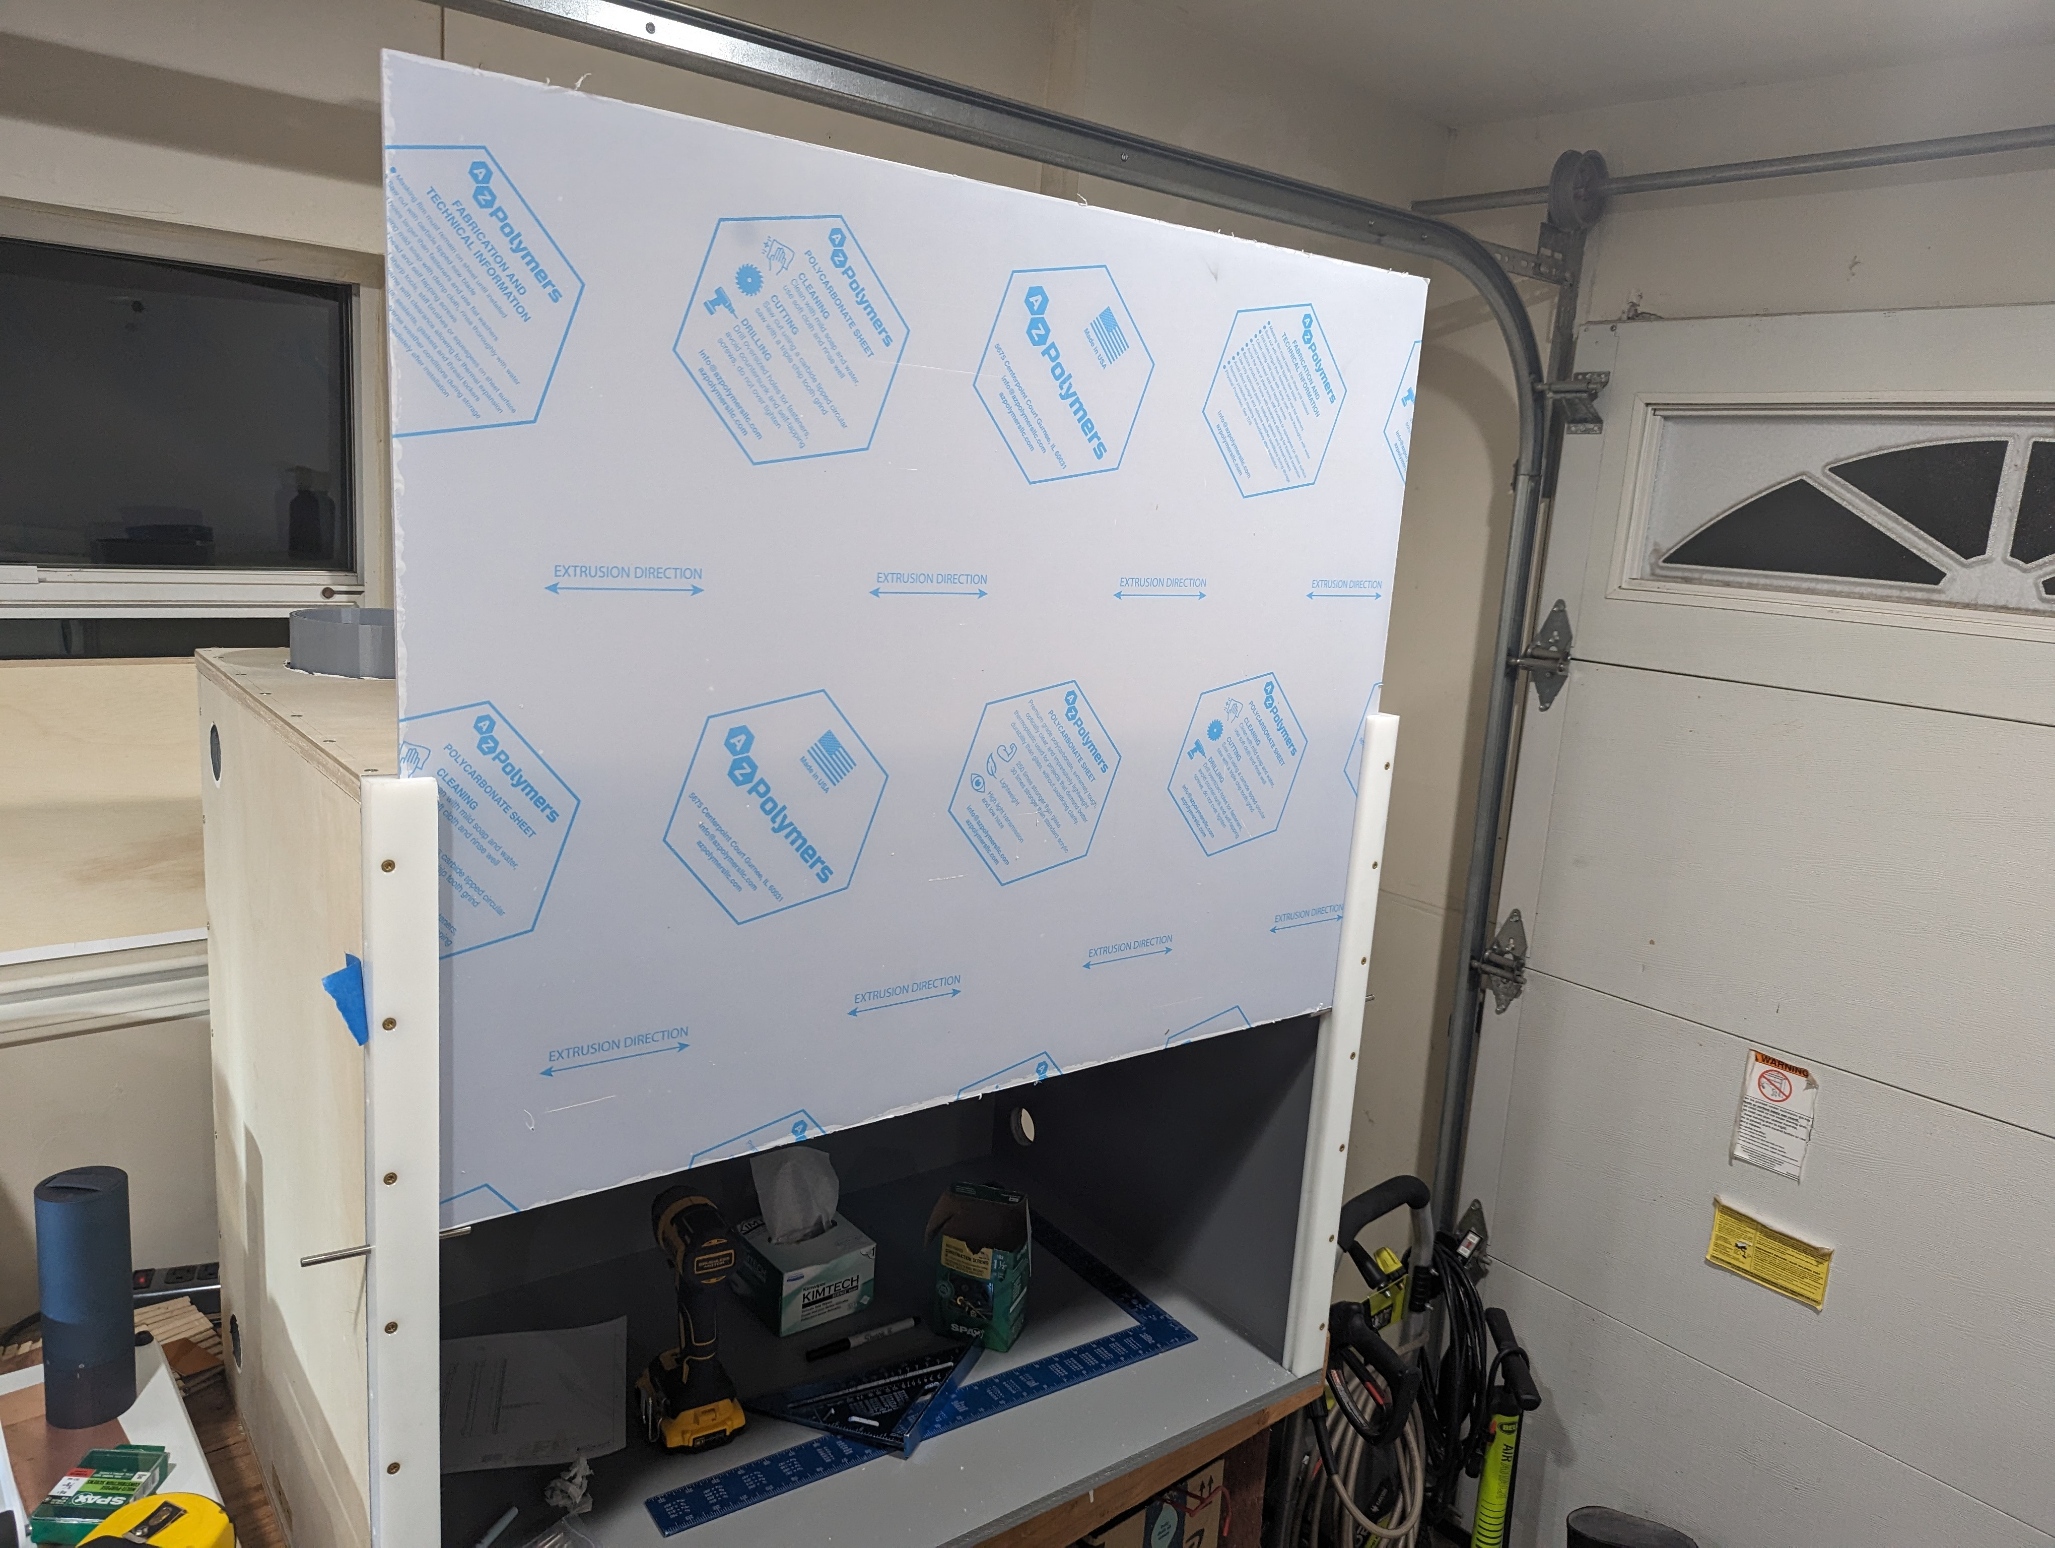
Sash Window
The sash window is a sheet of 1/4in thick 36in x 28in polycarbonate. Polycarbonate was chosen for this application due to its higher scratch resistance, impact resistance, and melting temperature when compared to acrylic (aka. “plexiglass”), which makes it more suitable for a fume hood application where it could be exposed to heat and frequent mechanical interactions. For easy single-handed operation of the sash, a custom handle was 3D-printed out of PETG and mounted through holes drilled in the middle of the sash window using heat-set inserts (set into the handle) and socket-head cap screws.
Before installing the sash window by sliding it into the top of the front rails of the enclosure, a 11/32in thick piece of adhesive-backed fuzzy weather stripping was installed along the top edge of the enclosure in order to close the air gap between the sash window and the top edge of the enclosure ceiling.
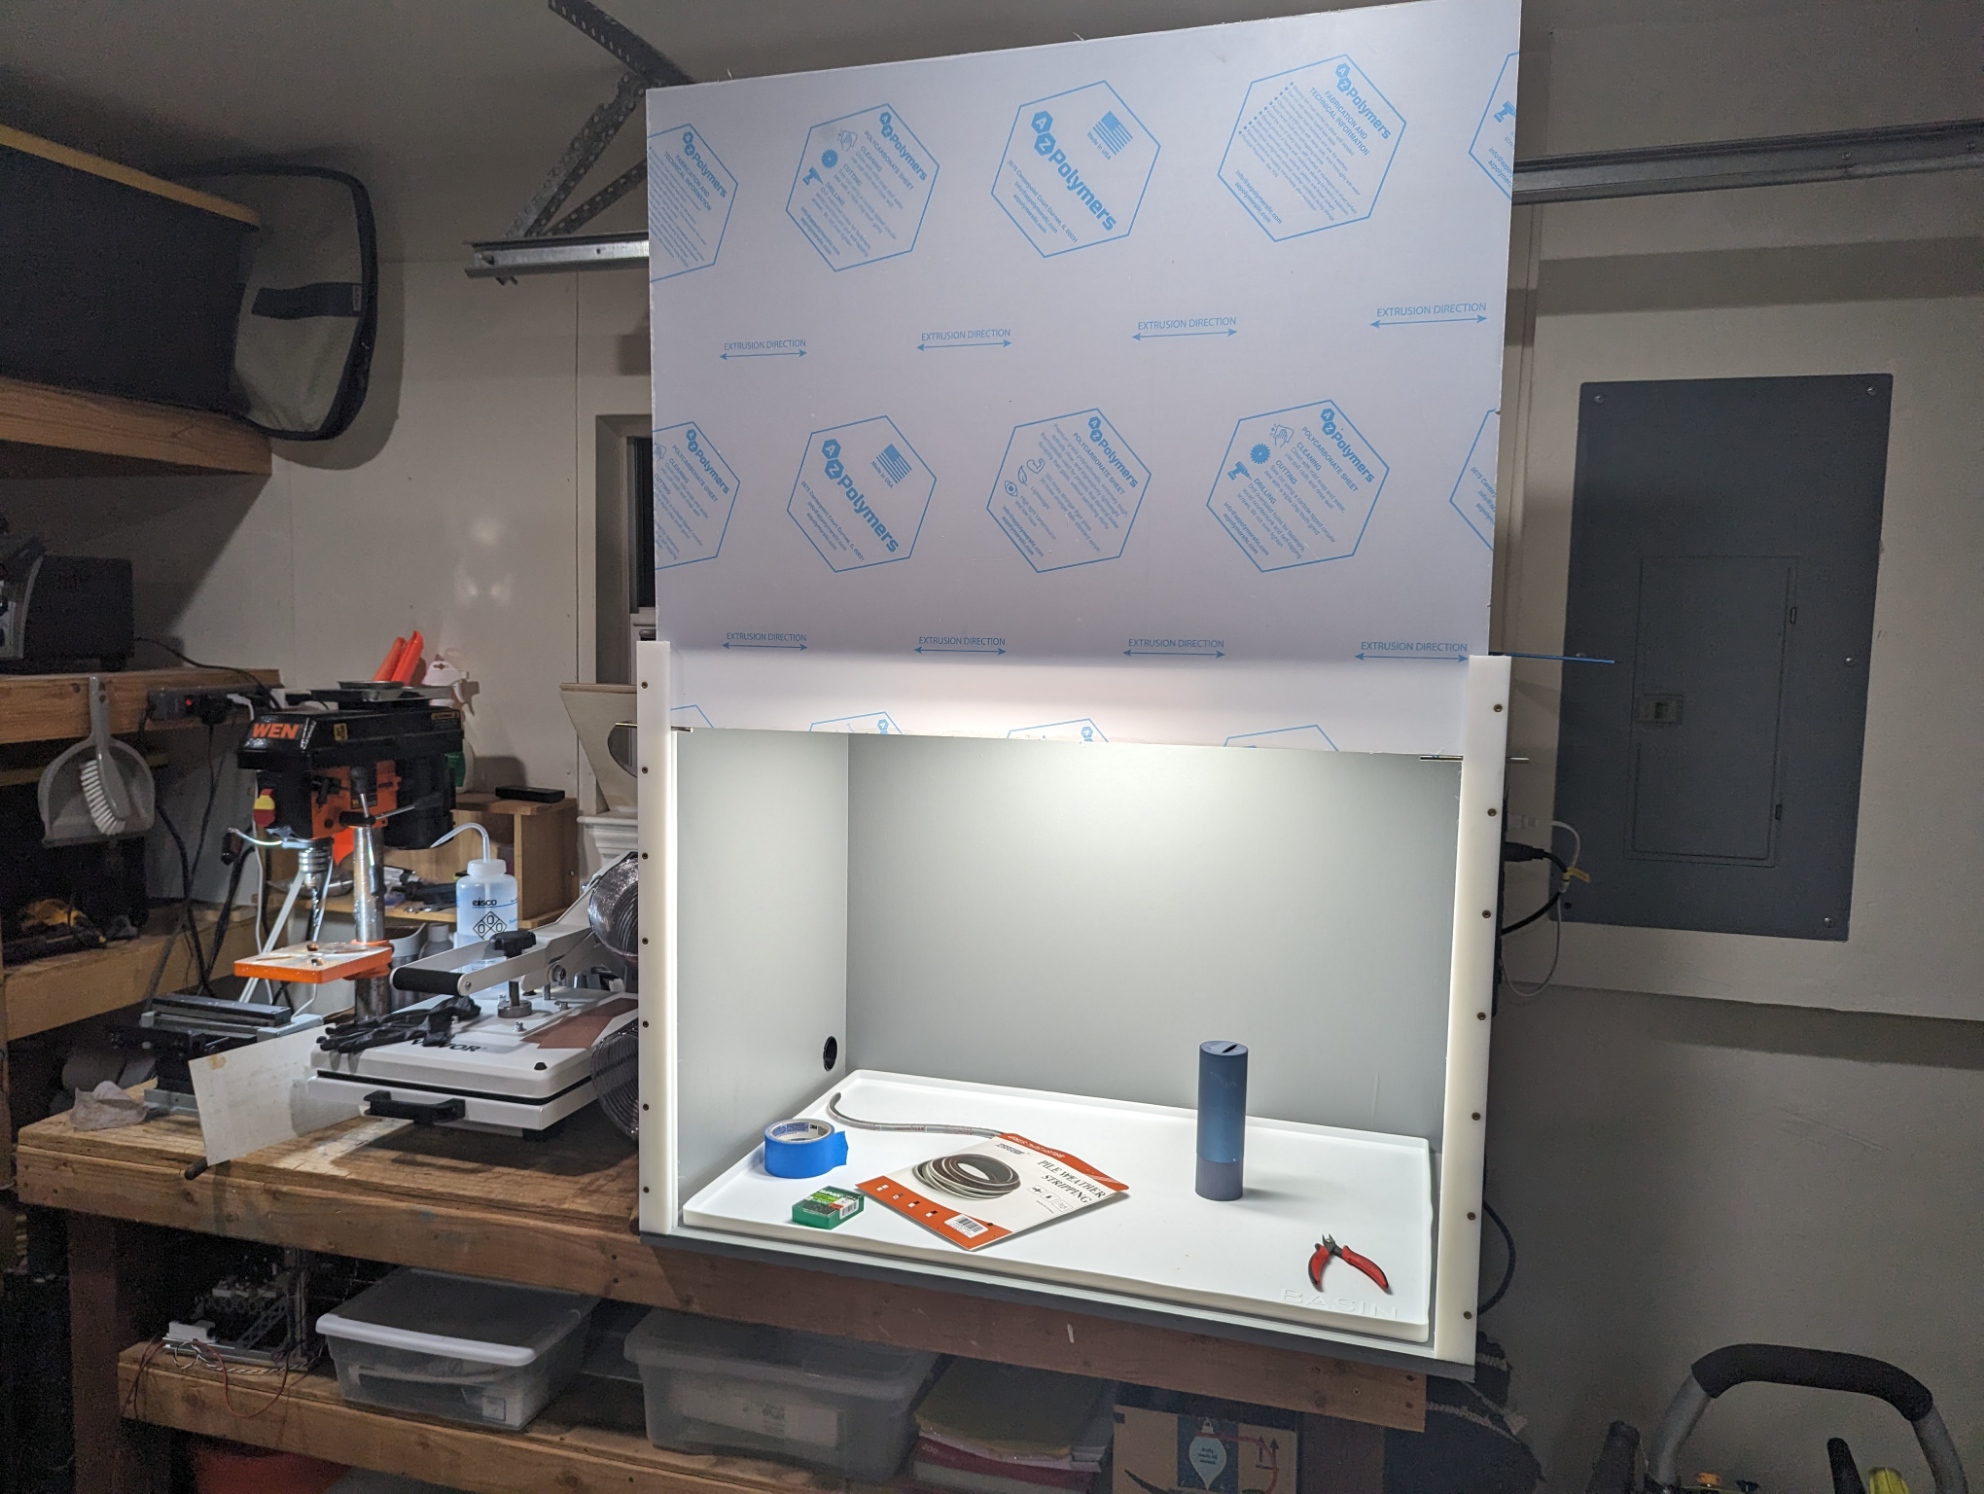
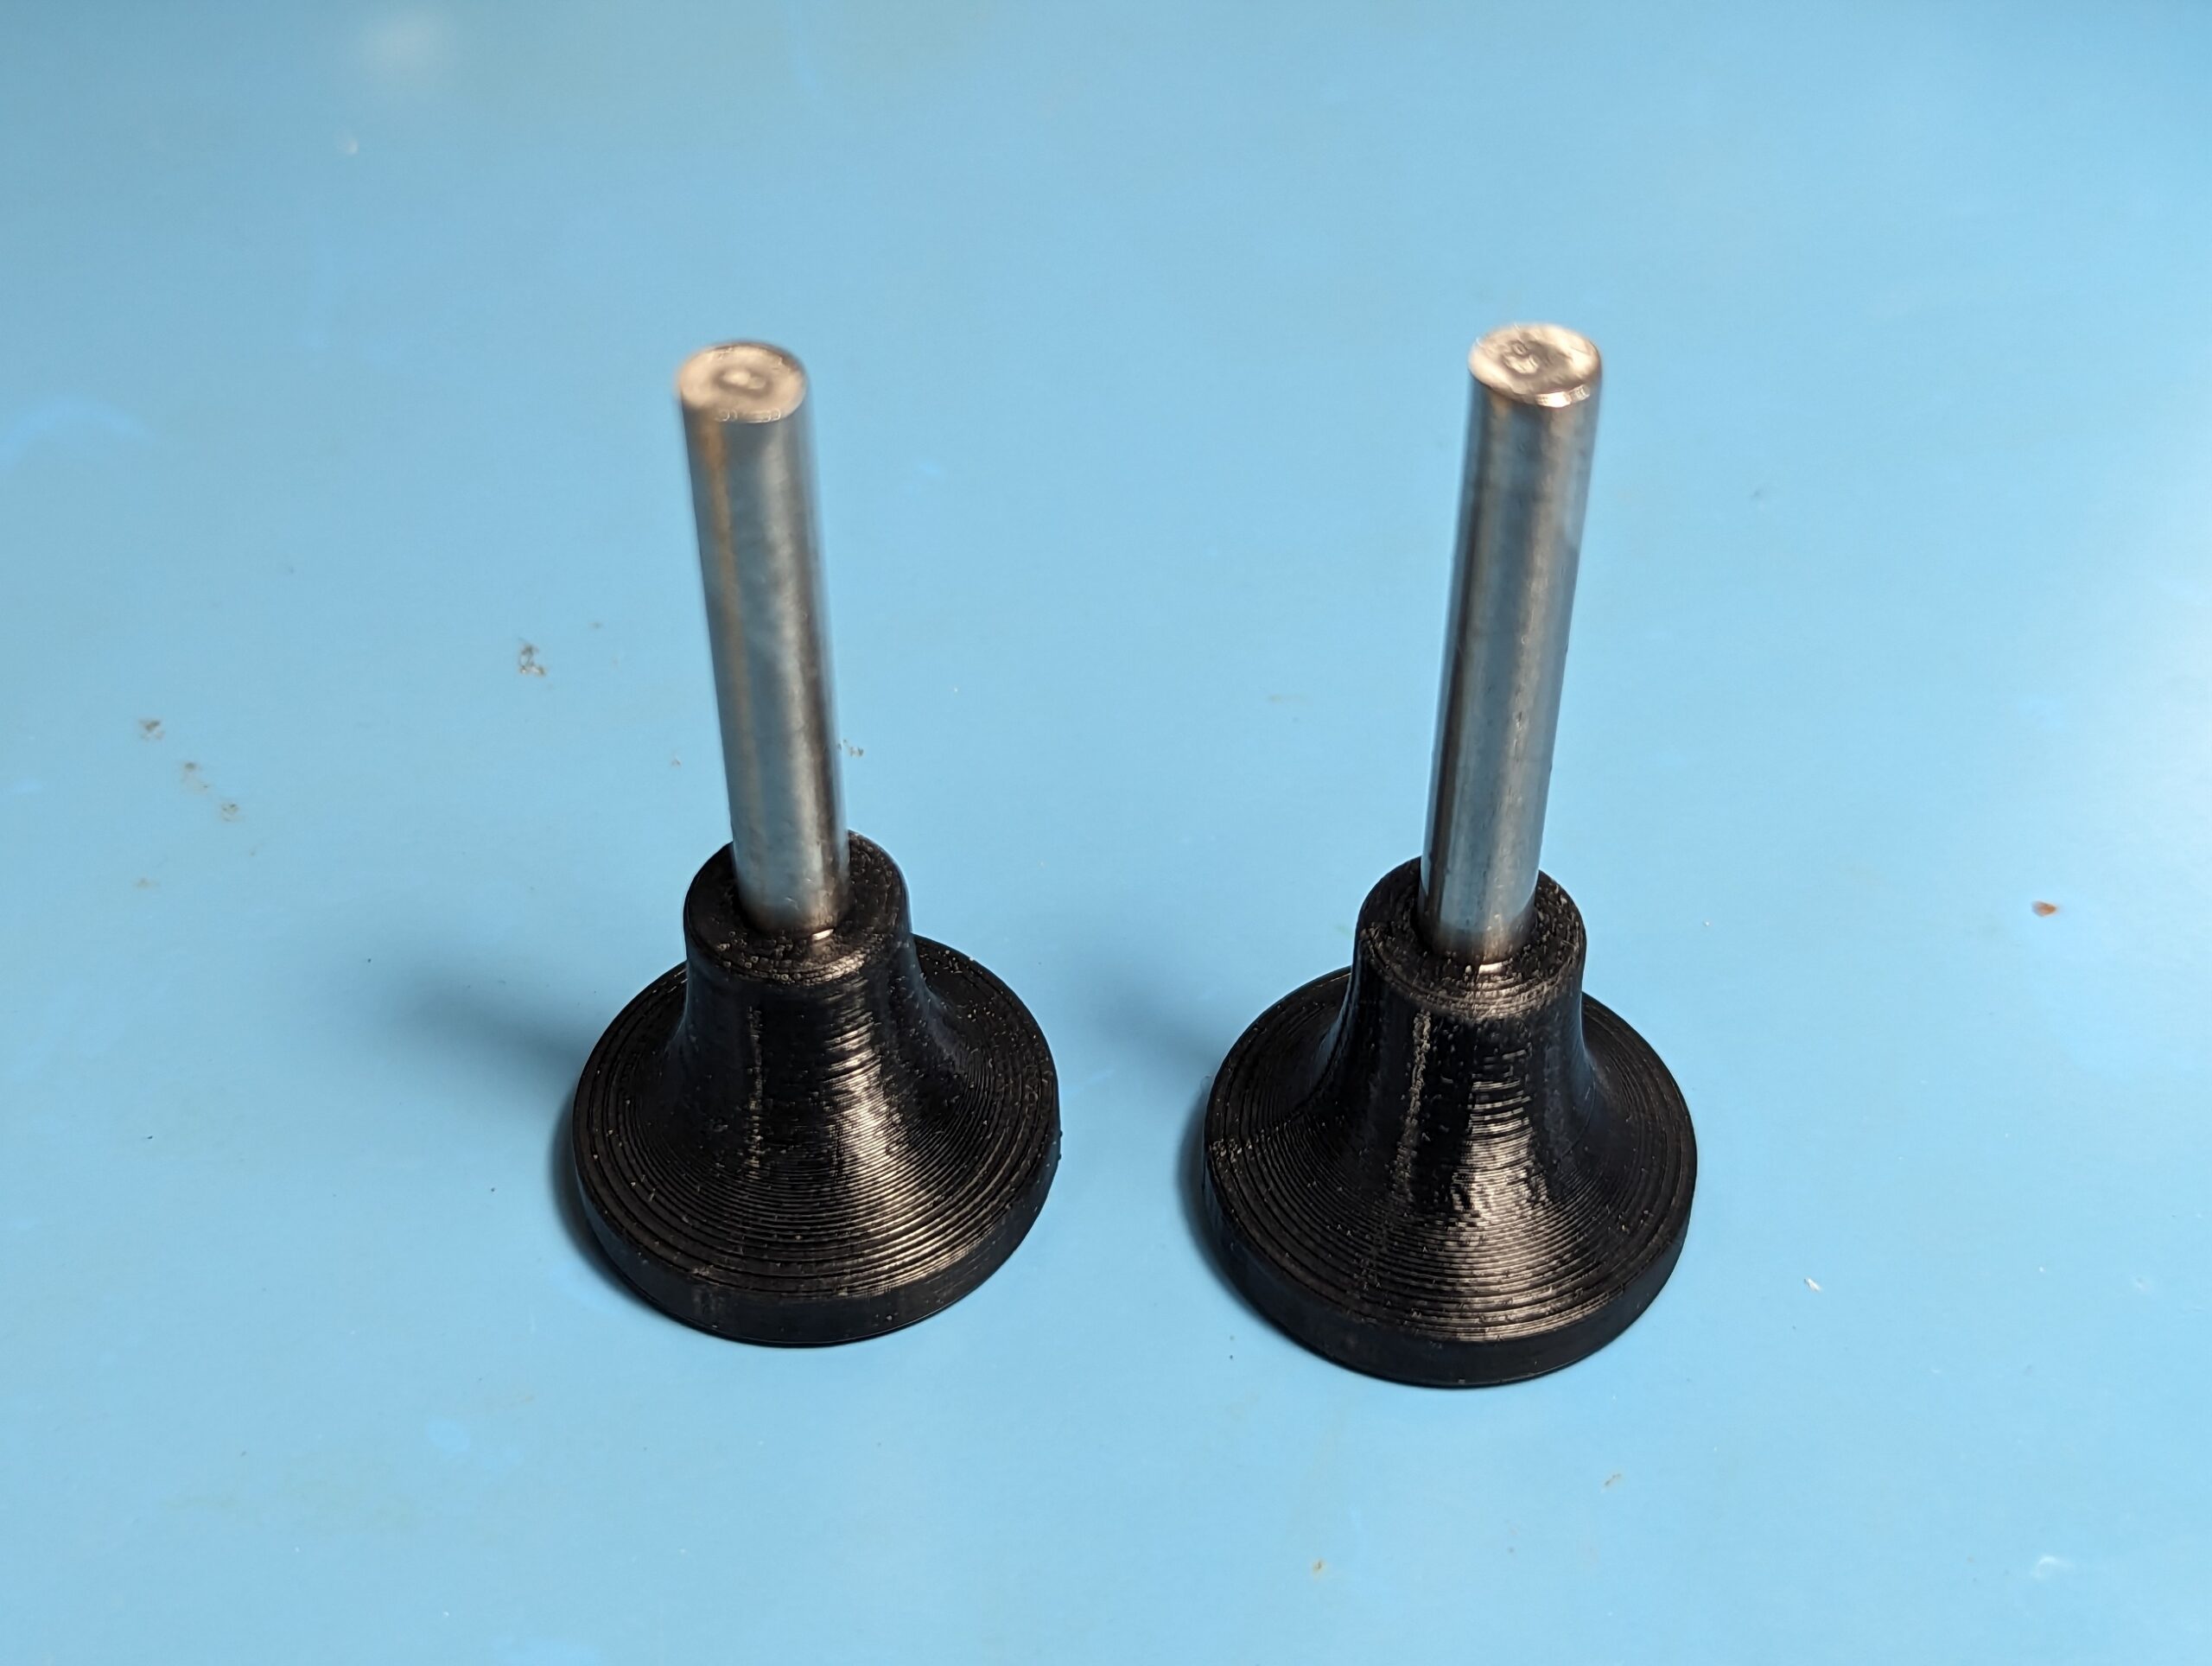
Positioning pins for the sash window were created by cutting a single 6mmx100mm in half. I didn’t have a lathe for this job, so I relied on the trusty albeit slightly janky “chuck it up in the drill press and use a Dremel tool” technique to get an even cut. The cut positioning pins were CA glued into some custom handles that were printed out of PETG to make the pins easier to grab.
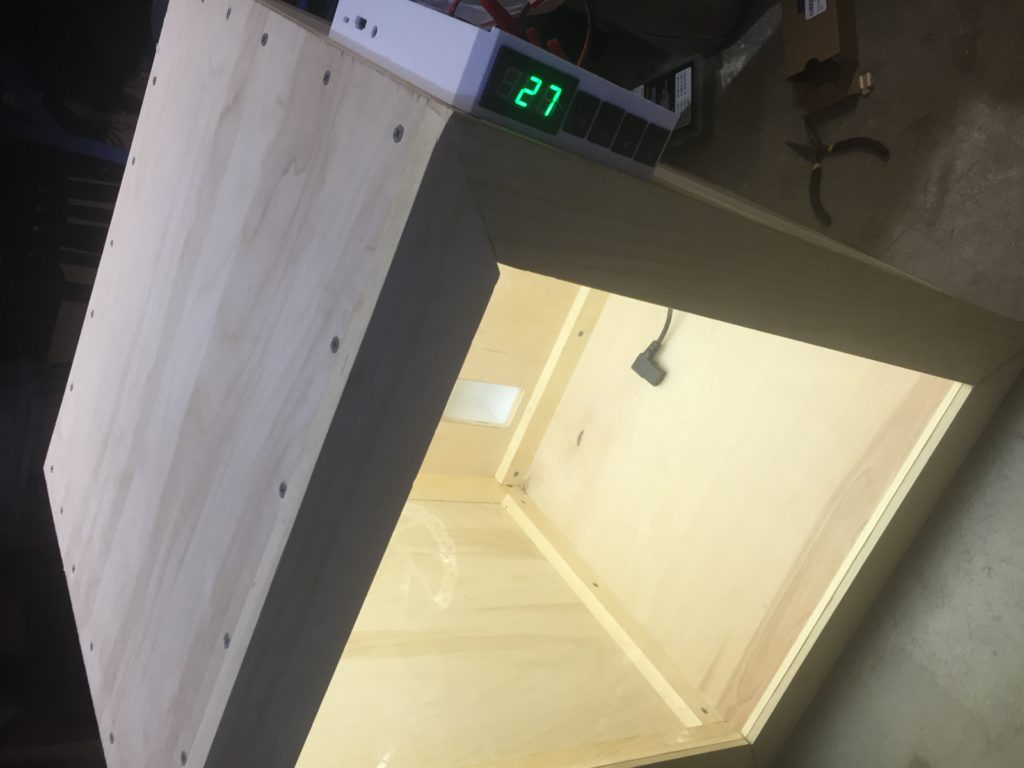
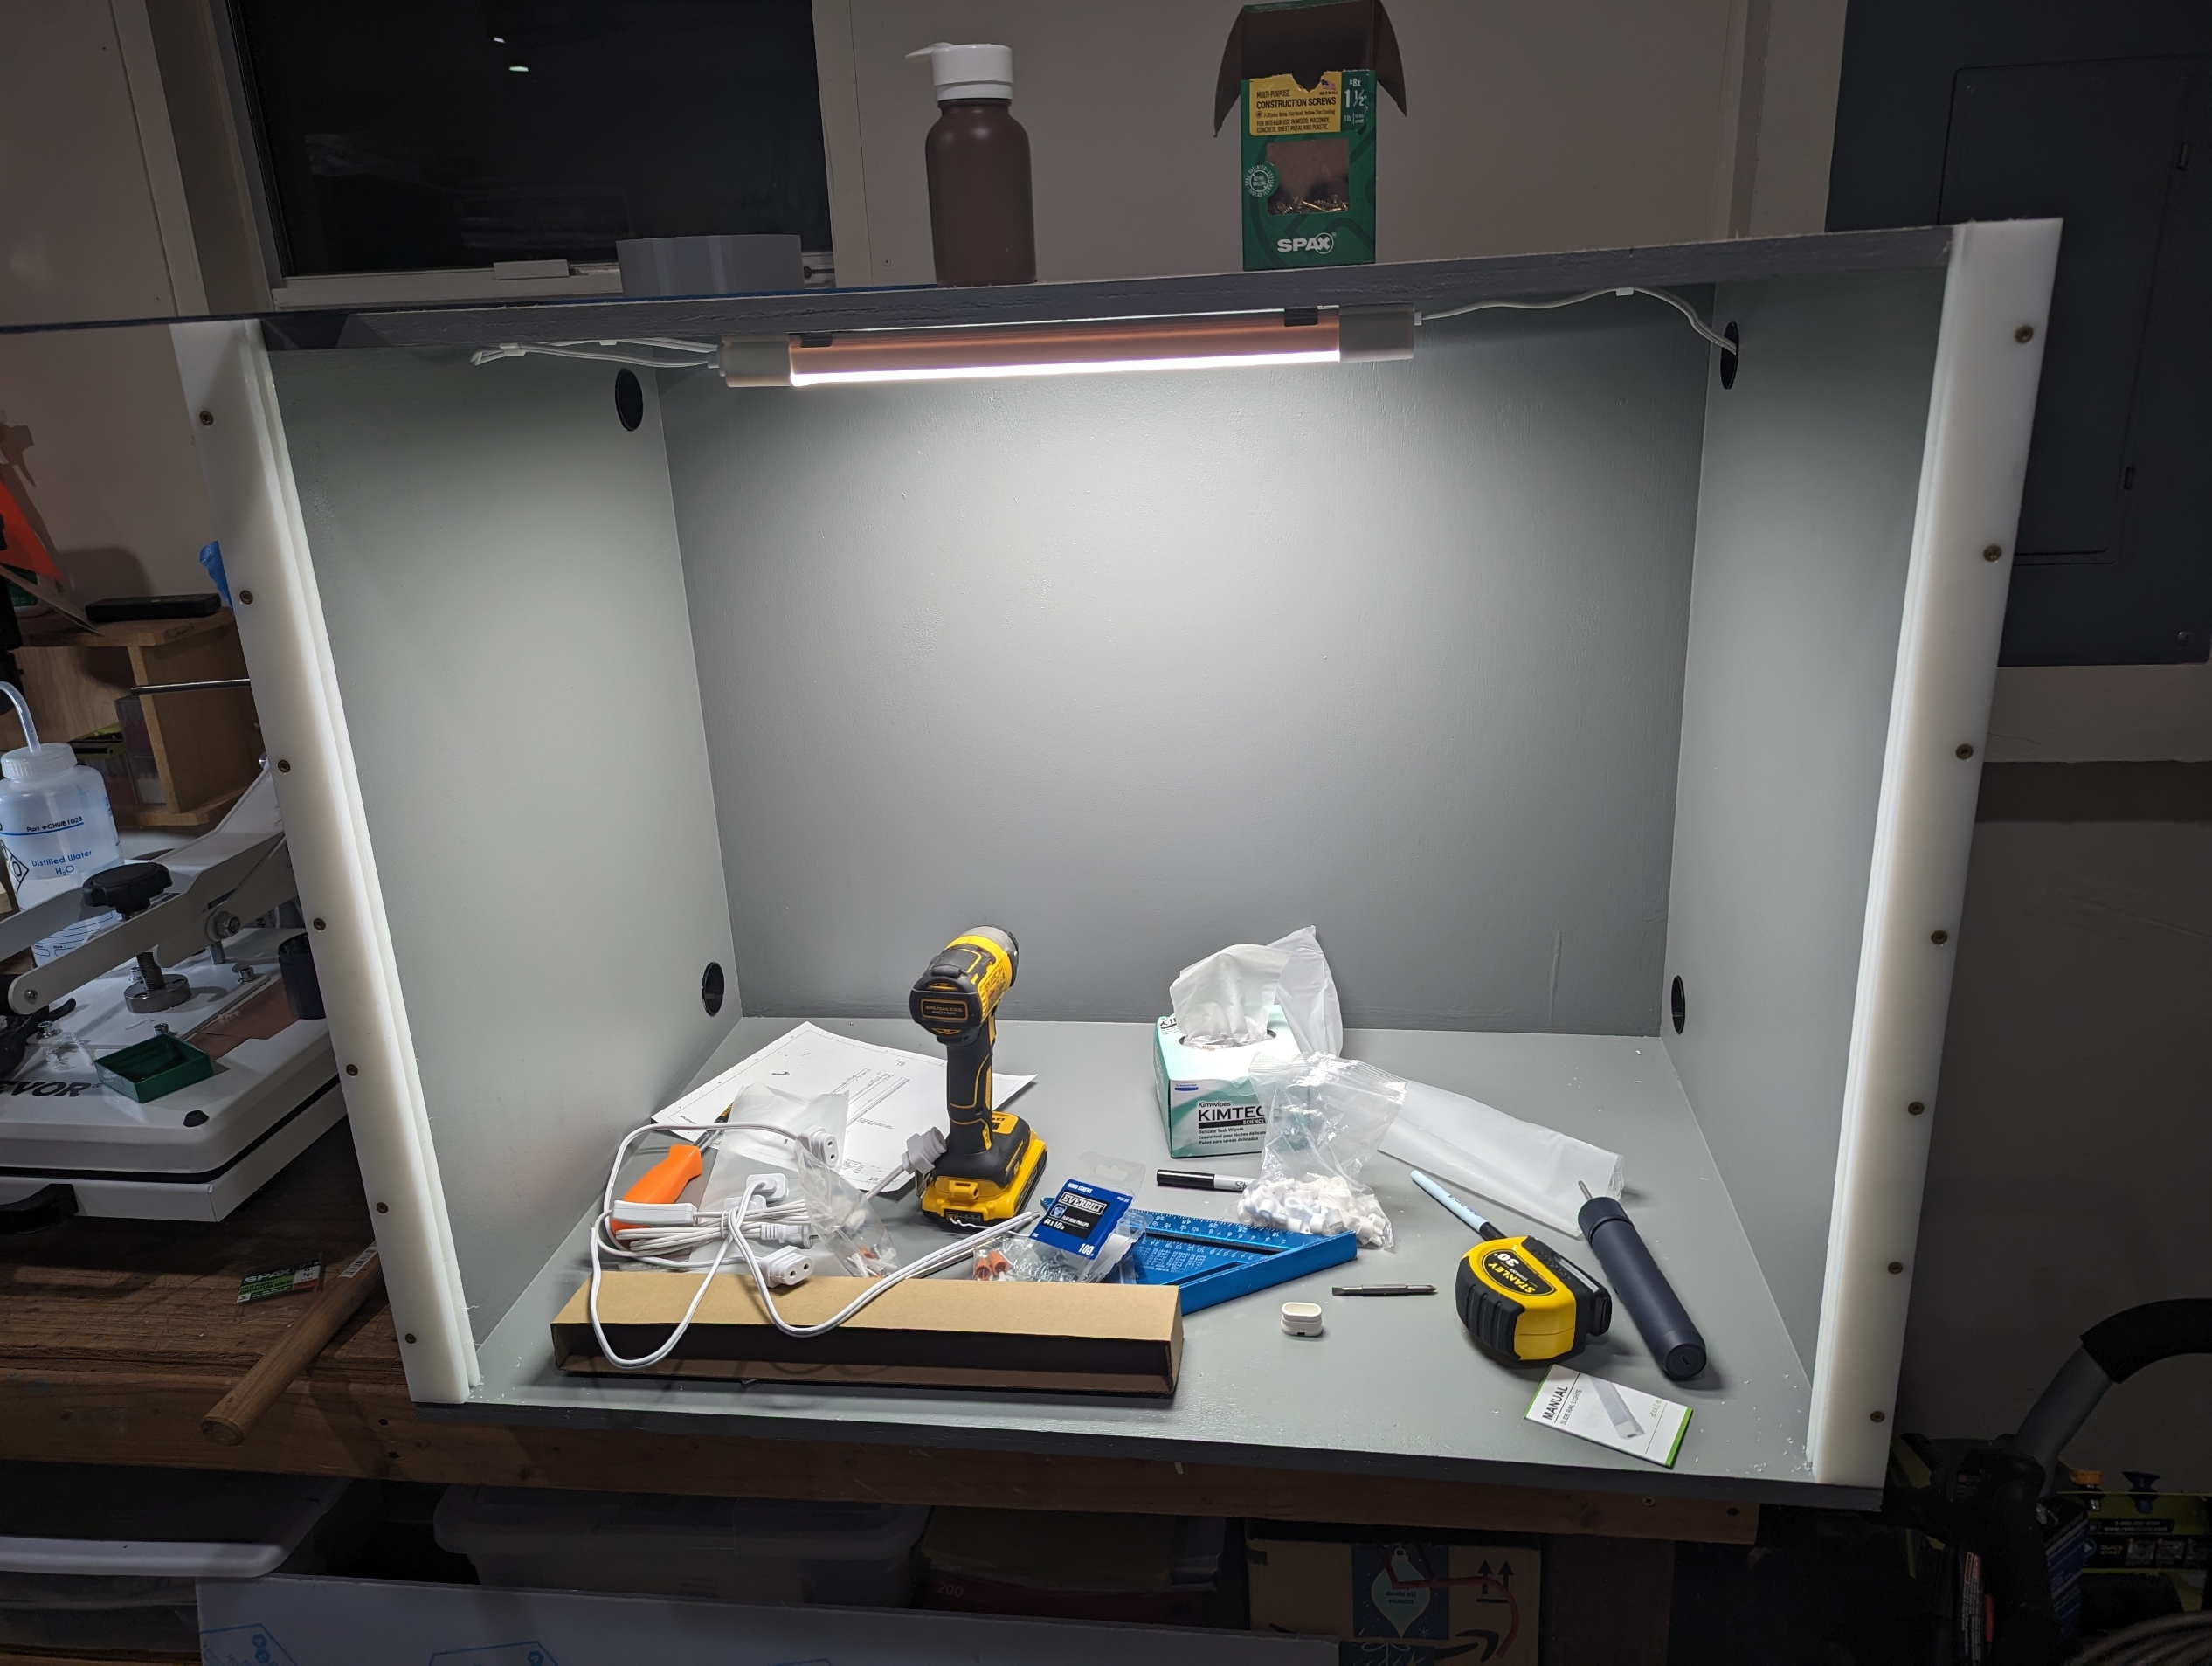
Lighting and Power
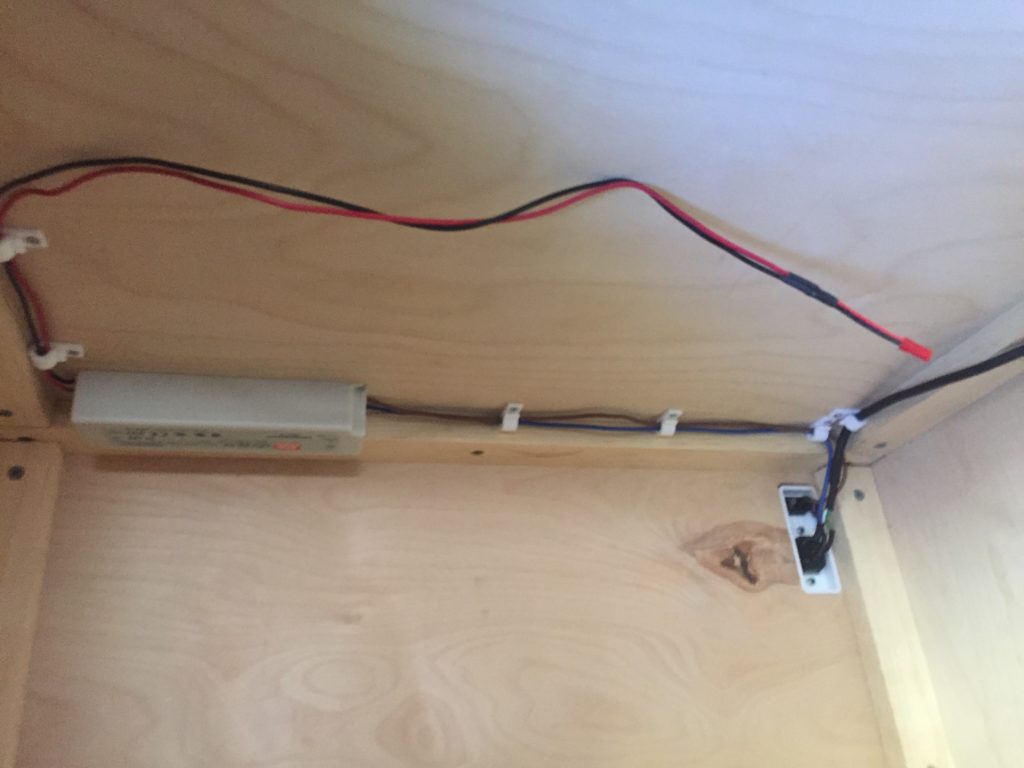
Lighting is provided by two IP65 daylight white LED light bars that are mounted to the ceiling of the enclosure. The light bars are installed on the front and back of the enclosure ceiling to reduce shadows and provide even lighting inside the box. Power is provided to the enclosure lights and vent fan by a power strip mounted to the outside of the enclosure, allowing the whole box to be powered on and off with the power strip’s integrated breaker switch.
Window Exhaust Port
I cut the window exhaust port panel to fit a sliding window in my garage that is situated behind the fume hood. I cut the duct opening into the exhaust port panel using a paper stencil and a jigsaw, then coated the exterior surface of the panel with adhesive-backed vinyl (I was getting tired of painting things at this point). The 6in PVC exhaust duct was mounted to the exhaust panel using another 3D-printed PETG duct adapter and #6 x 5/8in wood screws, and the 400CFM blower fan was mounted to the interior side of the exhaust port panel.
Basic Testing
While the fume hood isn’t intended for work with really nasty stuff, I did want to check how effective it would be at keeping negative pressure relative to the ambient environment, and how well this would contain various smells. With the sash at various heights and the extraction fan turned on, I dangled a Kimwipe near the sash opening to see where there was strong airflow into the enclosure. I was pleased to note that there seemed to be a decent amount of negative pressure across the entire area of the sash opening, even with the sash open as wide as 8 inches or so (more than enough room for my arms while performing most basic chemistry tasks)! Due to the relatively small extraction fan and lack of baffles along the back of the enclosure to force airflow along the floor of the box, I wouldn’t advise using this homemade fume hood at the standard 18 inch maximum sash height for industrial fume hoods, but depending on the application and location of the reagents within the enclosure, sash heights above 8 inches could still be effective.
In addition to the Kimwipe test, I’ve sprayed aerosols of some very aromatic compounds, such as limonene, inside the box with the fume extractor on, and have been unable to detect their scent from outside the fume hood (normally, I can smell a bottle of limonene if it’s opened on the other side of the room)! These tests were enough to satisfy my concerns that the fume hood would function properly for the applications I plan to utilize it for, but other DIY fume hood builders may want to research and run some additional tests to confirm that the enclosure will satisfy their needs as well. As always, I’m very open to learning new things! If you have suggestions for tests to try (or aspects of the box design that could be improved), please send them my way!
Fume Hood Operation
I usually keep the sash completely closed unless the extractor fan is running. To set up the fume hood for working with some smelly bits, I first set the sash height to my desired altitude using the positioning pins, then turn on the extractor fan (if I turn on the fan first, the negative pressure causes the sash to suction itself into the enclosure, making it difficult to open). With the sash opening set to the correct position and the extractor fan running, I then can open my reagent containers one by one and begin working inside the enclosure.
After my task inside the enclosure is complete, I perform the setup steps in reverse, by closing each reagent container, waiting for fumes to clear, turning off the extractor fan, and closing the sash. If any of my reagent containers or equipment inside the fume hood were heated during the task, I turn off all my hot plates and let the equipment cool down before turning off the extractor fan and closing the sash.
For more detailed operational guidelines intended for Real Equipment™, see this guide that I shamelessly ripped off a university’s EHS website:
Parts List
For drawings / cut lists, part files, 3D print STLs, and hole templates, please visit the GitHub repository.
Note: The links below are affiliate links, so if you use them, Amazon may kick me a few Bezos Bucks™. I promise to use said bucks for more projects!
- Fume Hood Interior
- Sash Hardware
- Exhaust System
- Building Materials
- 1x 3/4in x 48in x 96in Sandeply Plywood Sheet
- 0.5x 1 Gal Primer
- 0.5x 1 Gal Exterior Grade Floor and Patio Paint
- 2x 1in Thick HDPE Block (custom cut)
- 1x 1/4in thick 36in x 28in Clear Polycarbonate Sheet
- Accessories