I love working with the Pi Pico / RP2040 microcontroller, but setting up the pico SDK can be a bit of a pain in the butt, especially while hopping across a few separate devices and operating systems (as I was for a while).
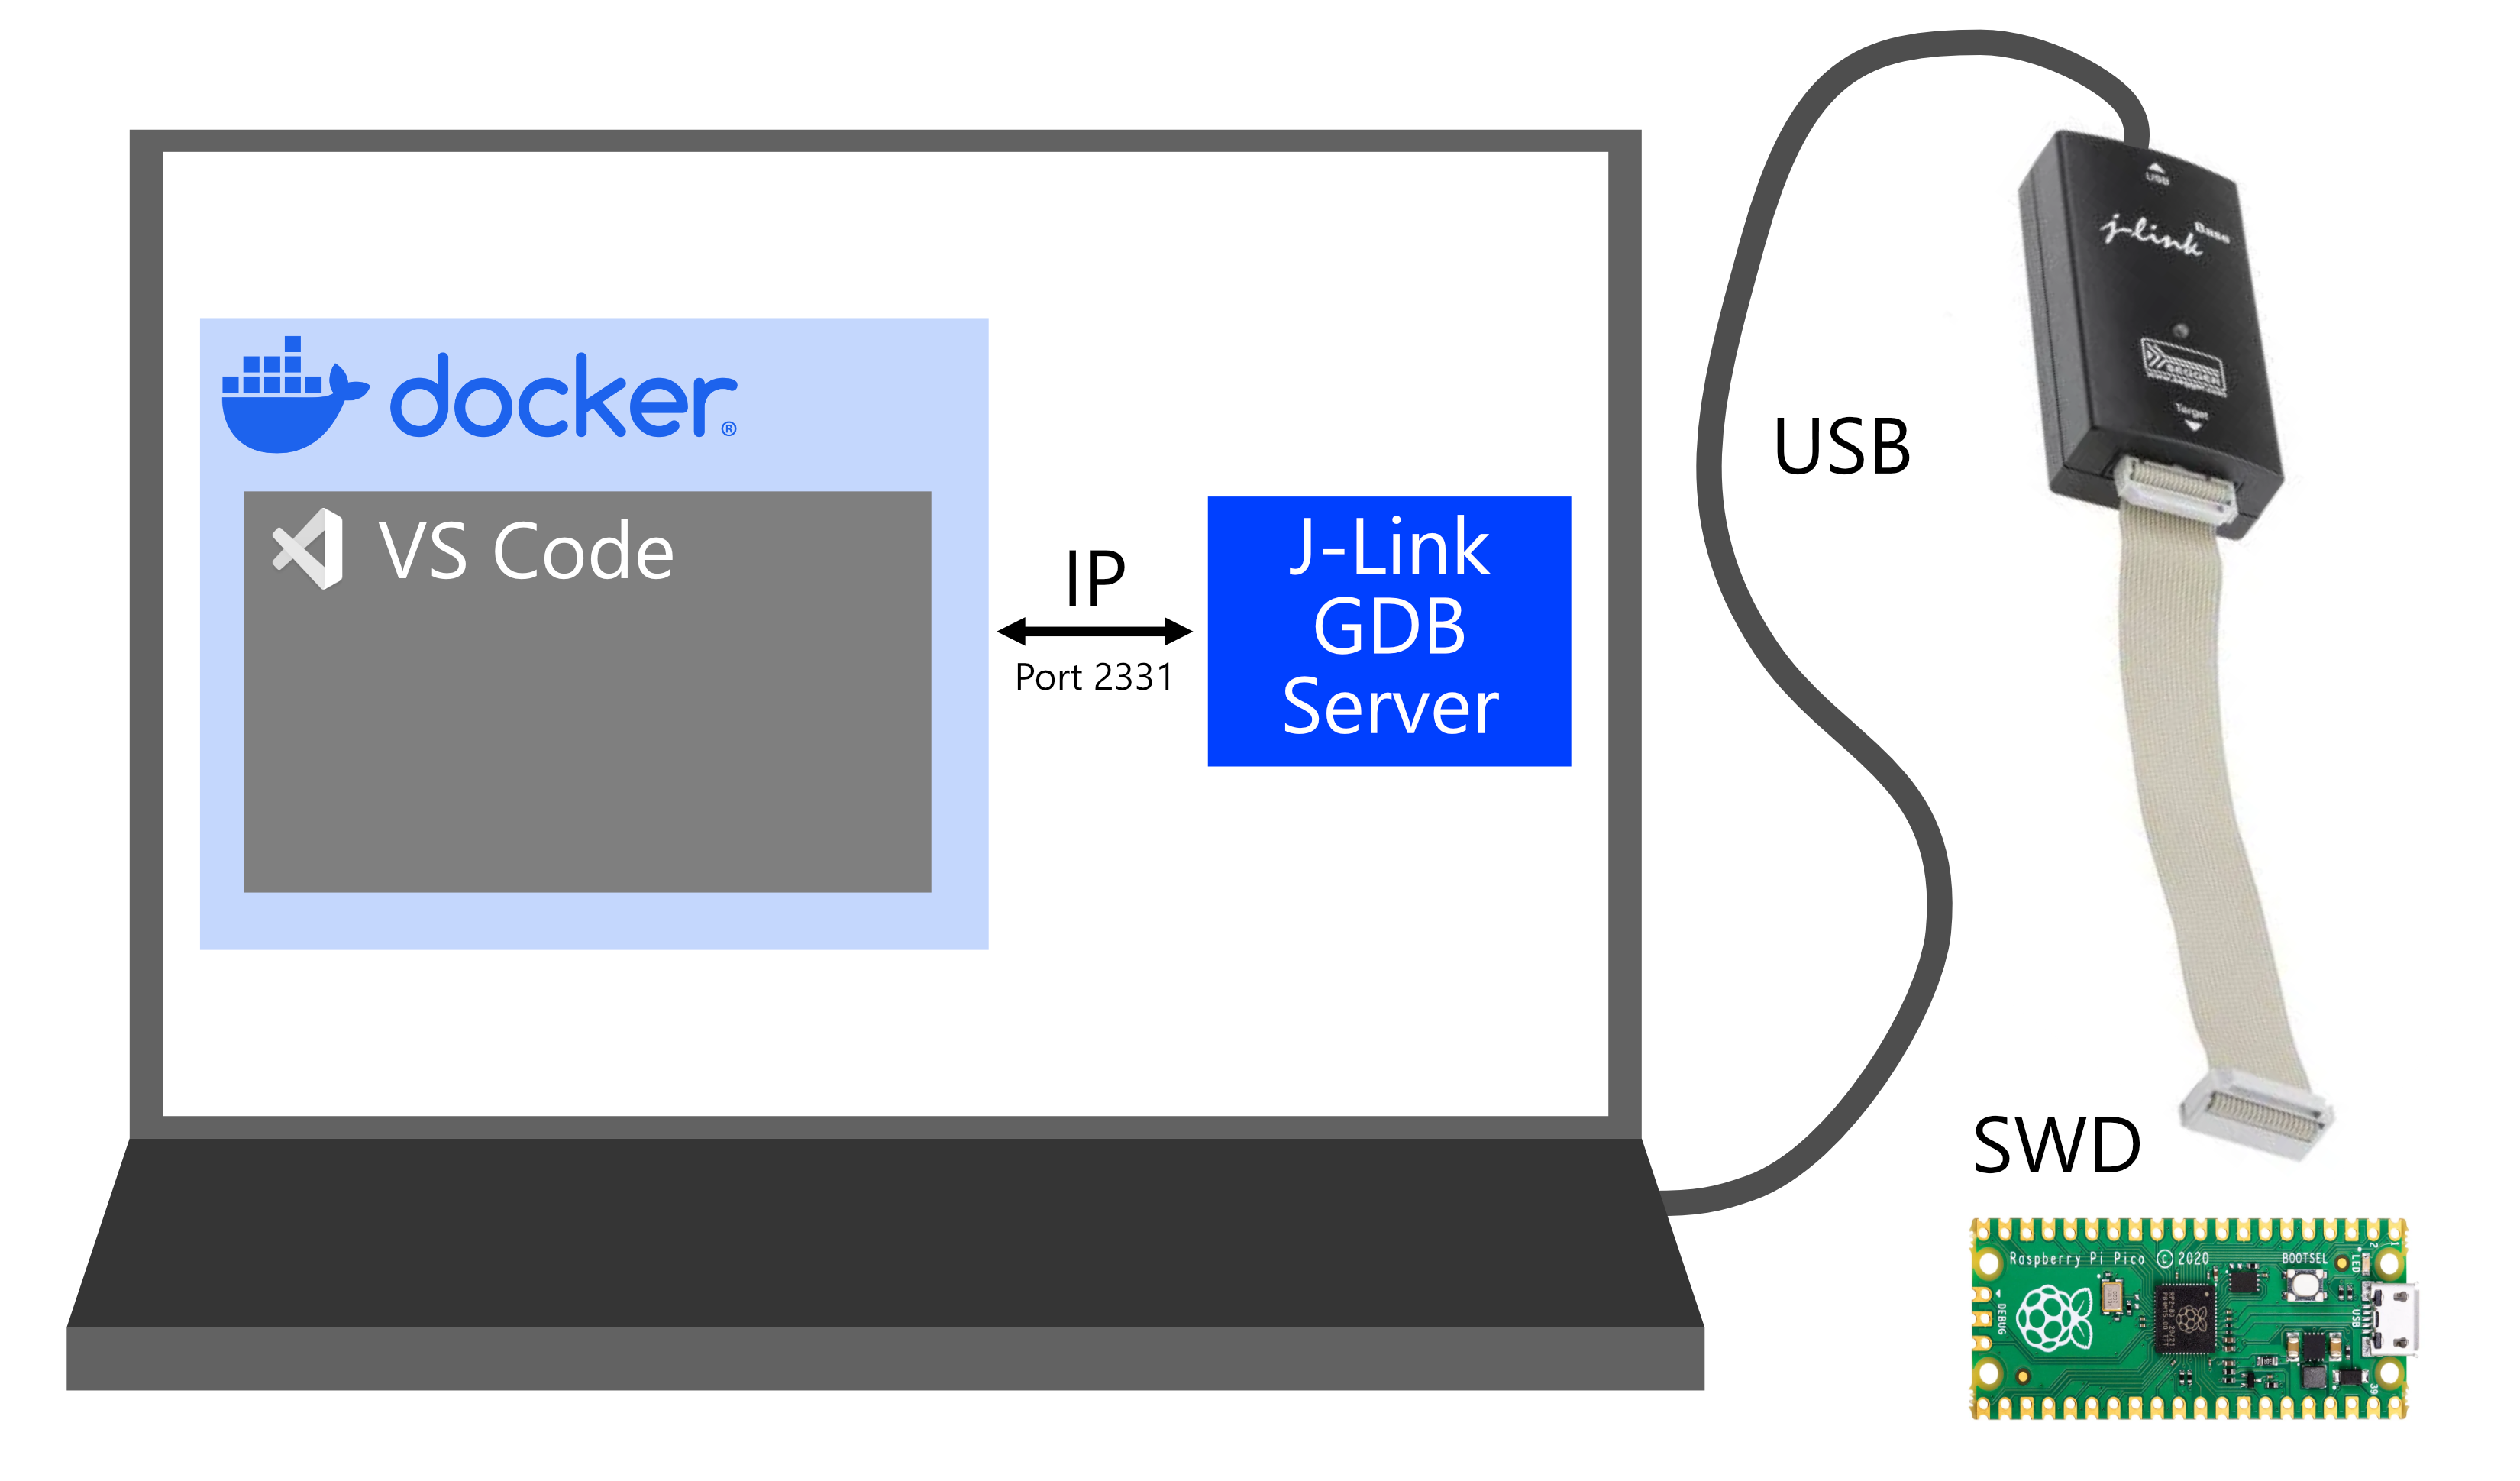
After a few years of messing around with it, I’ve settled on a reasonably painless solution for developing with the Pico that uses a custom-built docker container loaded with the pico SDK, arm-none-eabi compiler and debug tools, and the JLink debugger utility. With this setup, you can easily compile and debug programs for the Pi Pico / RP2040 by adding a single docker compose file to your project repo, mapping in the directories that you want to be bind mounted into your docker container, and setting up a VS Code .launch file to work with JLink.
Software and Hardware Requirements
You’ll need the following software installed on your computer:
- VS Code
- Docker Extension
- Cortex Debug Extension
- Docker Desktop
- JLink GDB Server
This workflow is intended for use with a J-Link debugger, like the J-Link EDU, J-Link Base, and J-Link Plus. I personally use a J-Link Base, please let me know if there are any issues with other debuggers!
Installation
Docker Compose File (compose.yml)
Add the following code into a file called compose.yml in your project directory.
version: "3.2"
services:
  pico-docker:
    image: coolnamesalltaken/pico-docker:latest
    volumes:
      - type: bind
        source: . # Which directory from the host computer gets mounted to the container.
        target: /project_directory # Where the directory gets mounted in the Docker container.
      # You can bind additional project directories to the container with more - type: bind commands,
      # or create volumes that give the container its own storage.
    command: tail -f /dev/null # keep the container running forever
VS Code Configuration (launch.json)
This file is still somewhat a work in progress, but works well enough for me as it is. I do notice that I have to reset the device using the VS code debug buttons to get a firmware upload to complete properly, so there might still be some settings that I’m missing. Anyways, adding this file into your .vscode folder as launch.json will allow you to connect to your RP2040 from within the docker container, via an IP connection to the JLink GDB server running on your host machine (which in turn is connected to your JLink debugger via USB).
{
    // Use IntelliSense to learn about possible attributes.
    // Hover to view descriptions of existing attributes.
    // For more information, visit: https://go.microsoft.com/fwlink/?linkid=830387
    "version": "0.2.0",
    "configurations": [
        {
            "name": "Remote Debug",
            "type": "cortex-debug",
            "cwd": "${workspaceRoot}",
            "executable": "${command:cmake.launchTargetPath}",
            "request": "attach",
            "servertype": "external",
            "gdbPath": "arm-none-eabi-gdb",
            "gdbTarget": "host.docker.internal:2331",
            "showDevDebugOutput": "raw",
            "svdFile": "/usr/local/pico-sdk/src/rp2040/hardware_regs/rp2040.svd",
            "preRestartCommands": [
                "file ${command:cmake.launchTargetPath}",
                "load",
                "monitor reset"
            ],
            "device": "RP2040",
        }
    ]
}
J-Link GDB Server Settings
These are the settings I use for the J-Link GDB server that I run on my host computer.

Usage
When everything is set up and running, the development workflow looks like:
- Launch Docker Desktop on the host computer.
- Run
docker compose upin your project directory where the docker compose file resides on your host computer. - Launch VS Code on the host computer and attach a remote VS Code editor to the pico-docker container.
- Launch J-Link GDB Server on the host computer and connect to the RP2040 over USB.
- In the remote VS code editor, you can edit your code, compile and debug your code on the container with GNU gcc/g++/gdb, compile your code for the target with arm-none-eabi gcc/g++, and upload your code to the target via J-link using the
launch.jsonfile provided. Additional directories with libraries like googletest can be bind mounted to the docker container by editingcompose.ymlif you want to use unit tests!

