For Halloween 2022, we wanted to top our previous record attempt for “Most Complicated Way to Make Trick-Or-Treaters Suffer in a Haunted Maze of Endless Bureaucracy”, and settled on the perfect idea: the DMV.
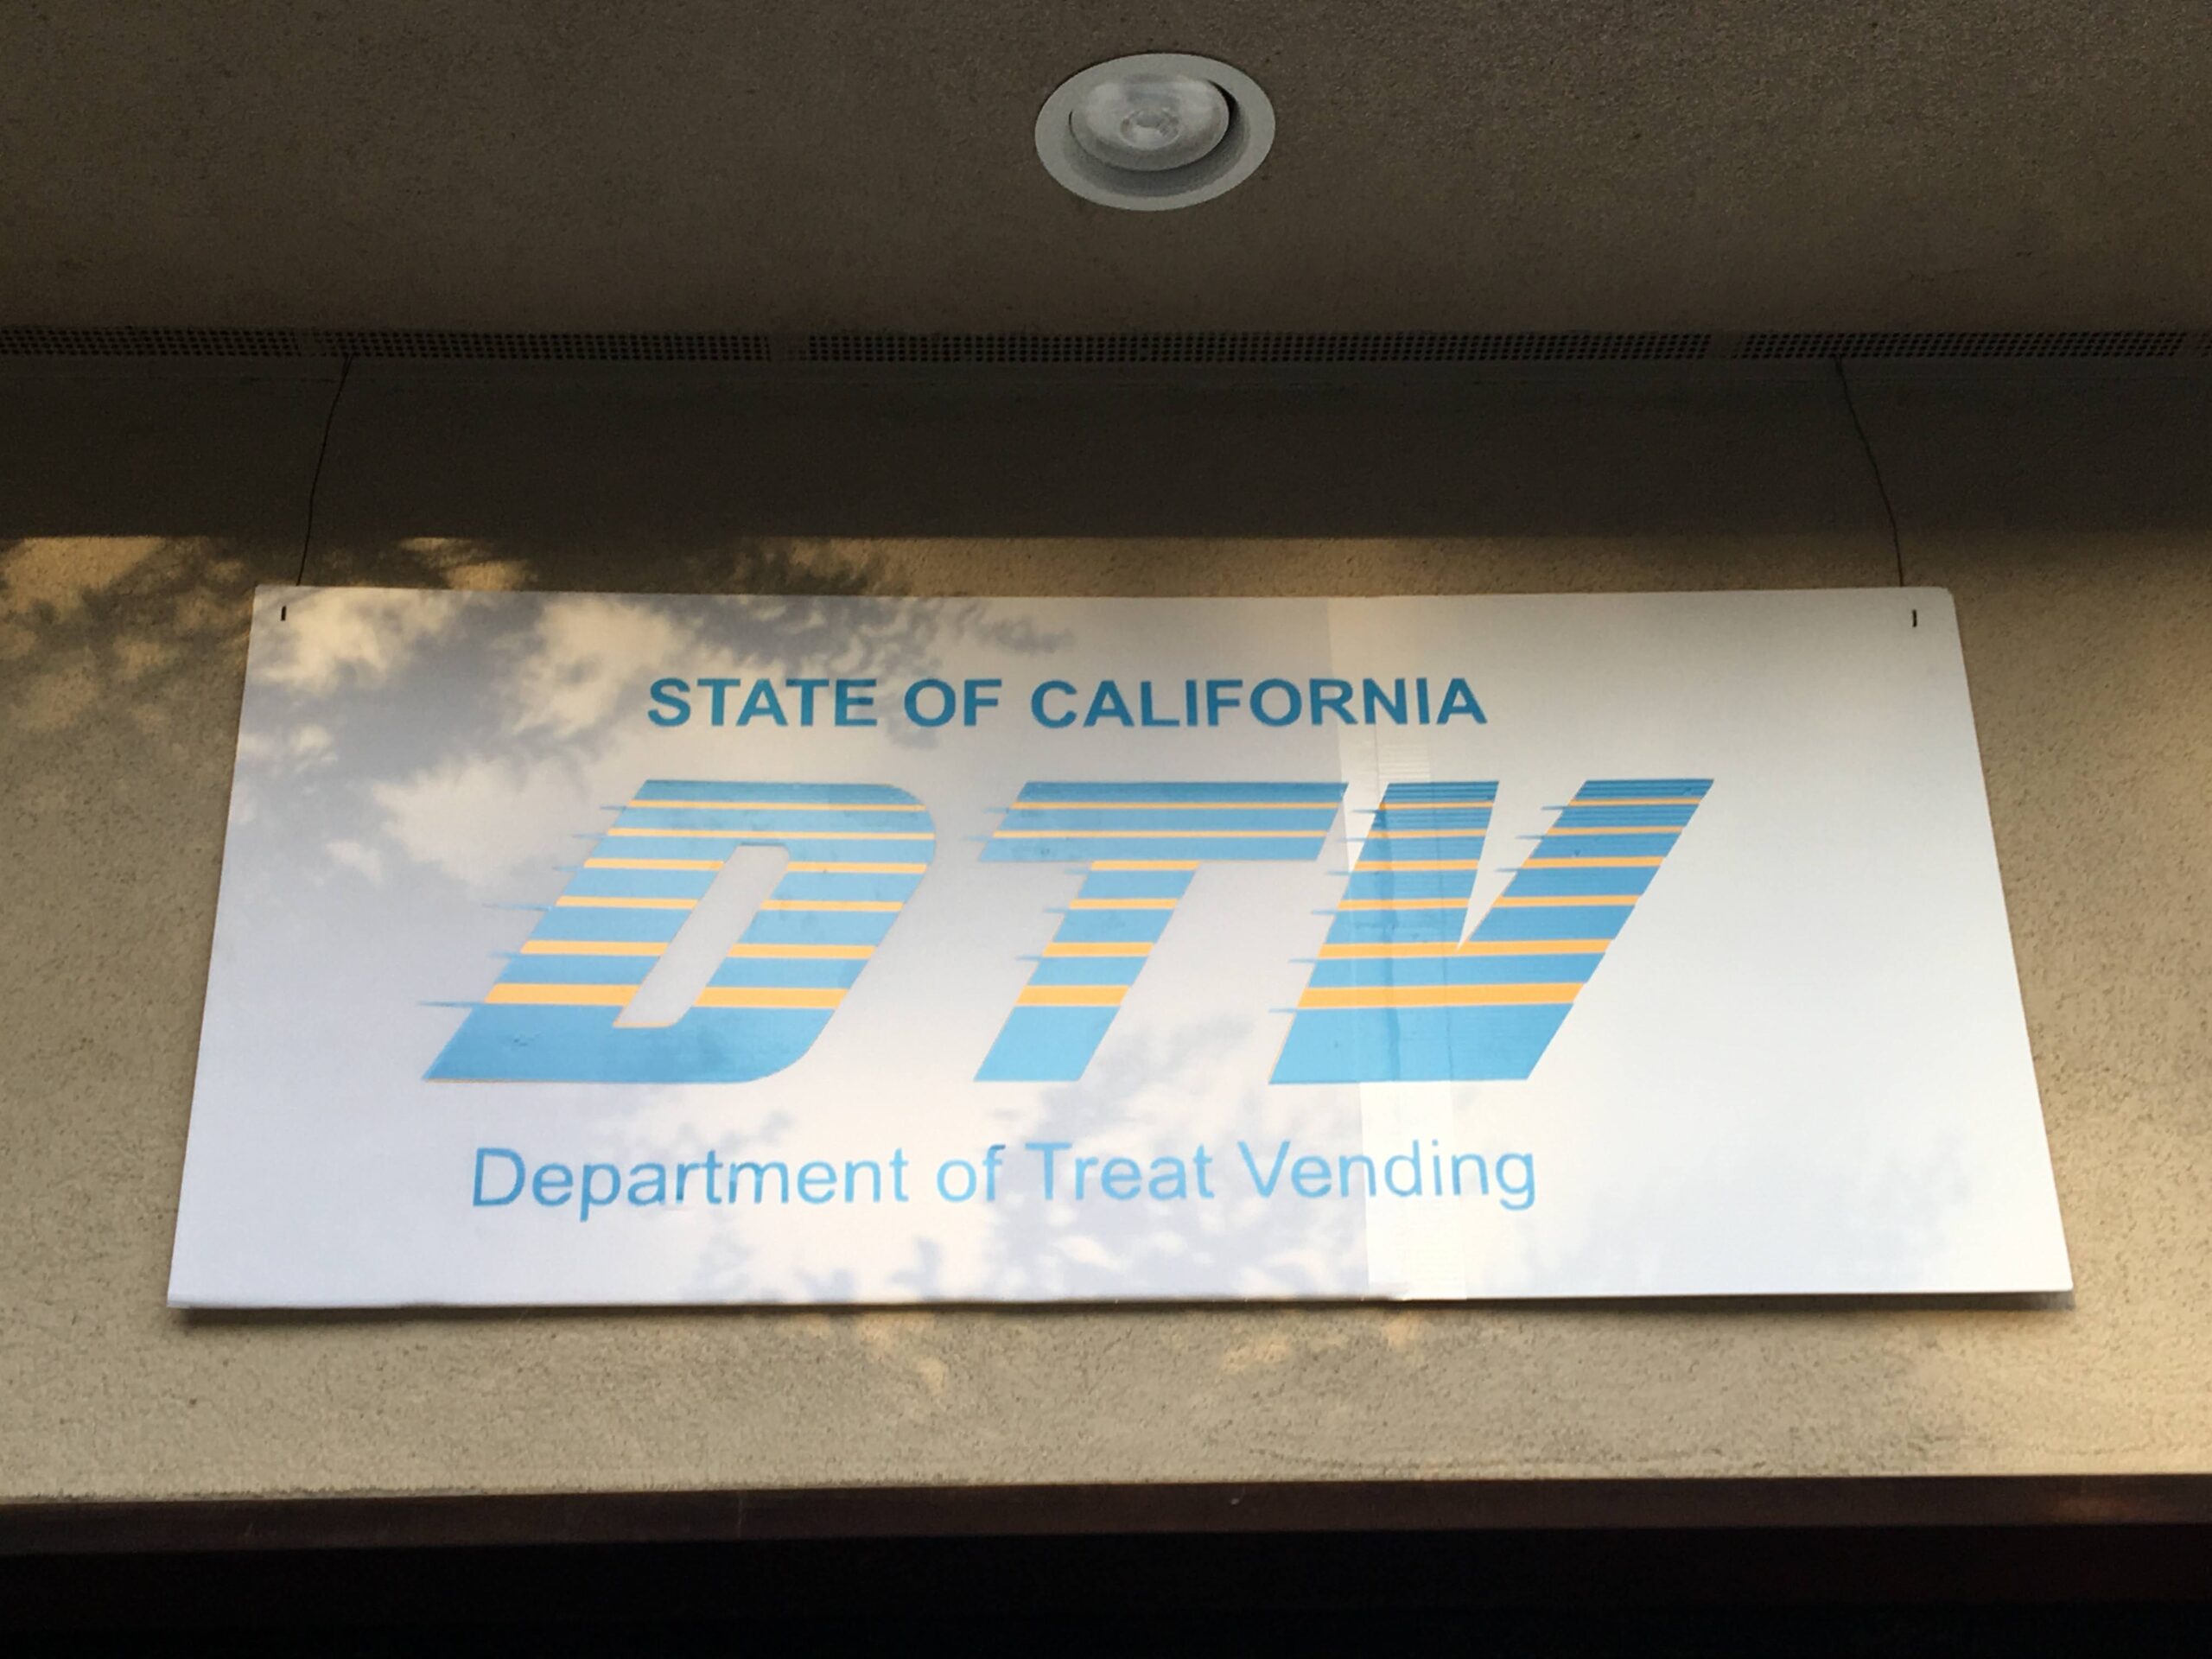
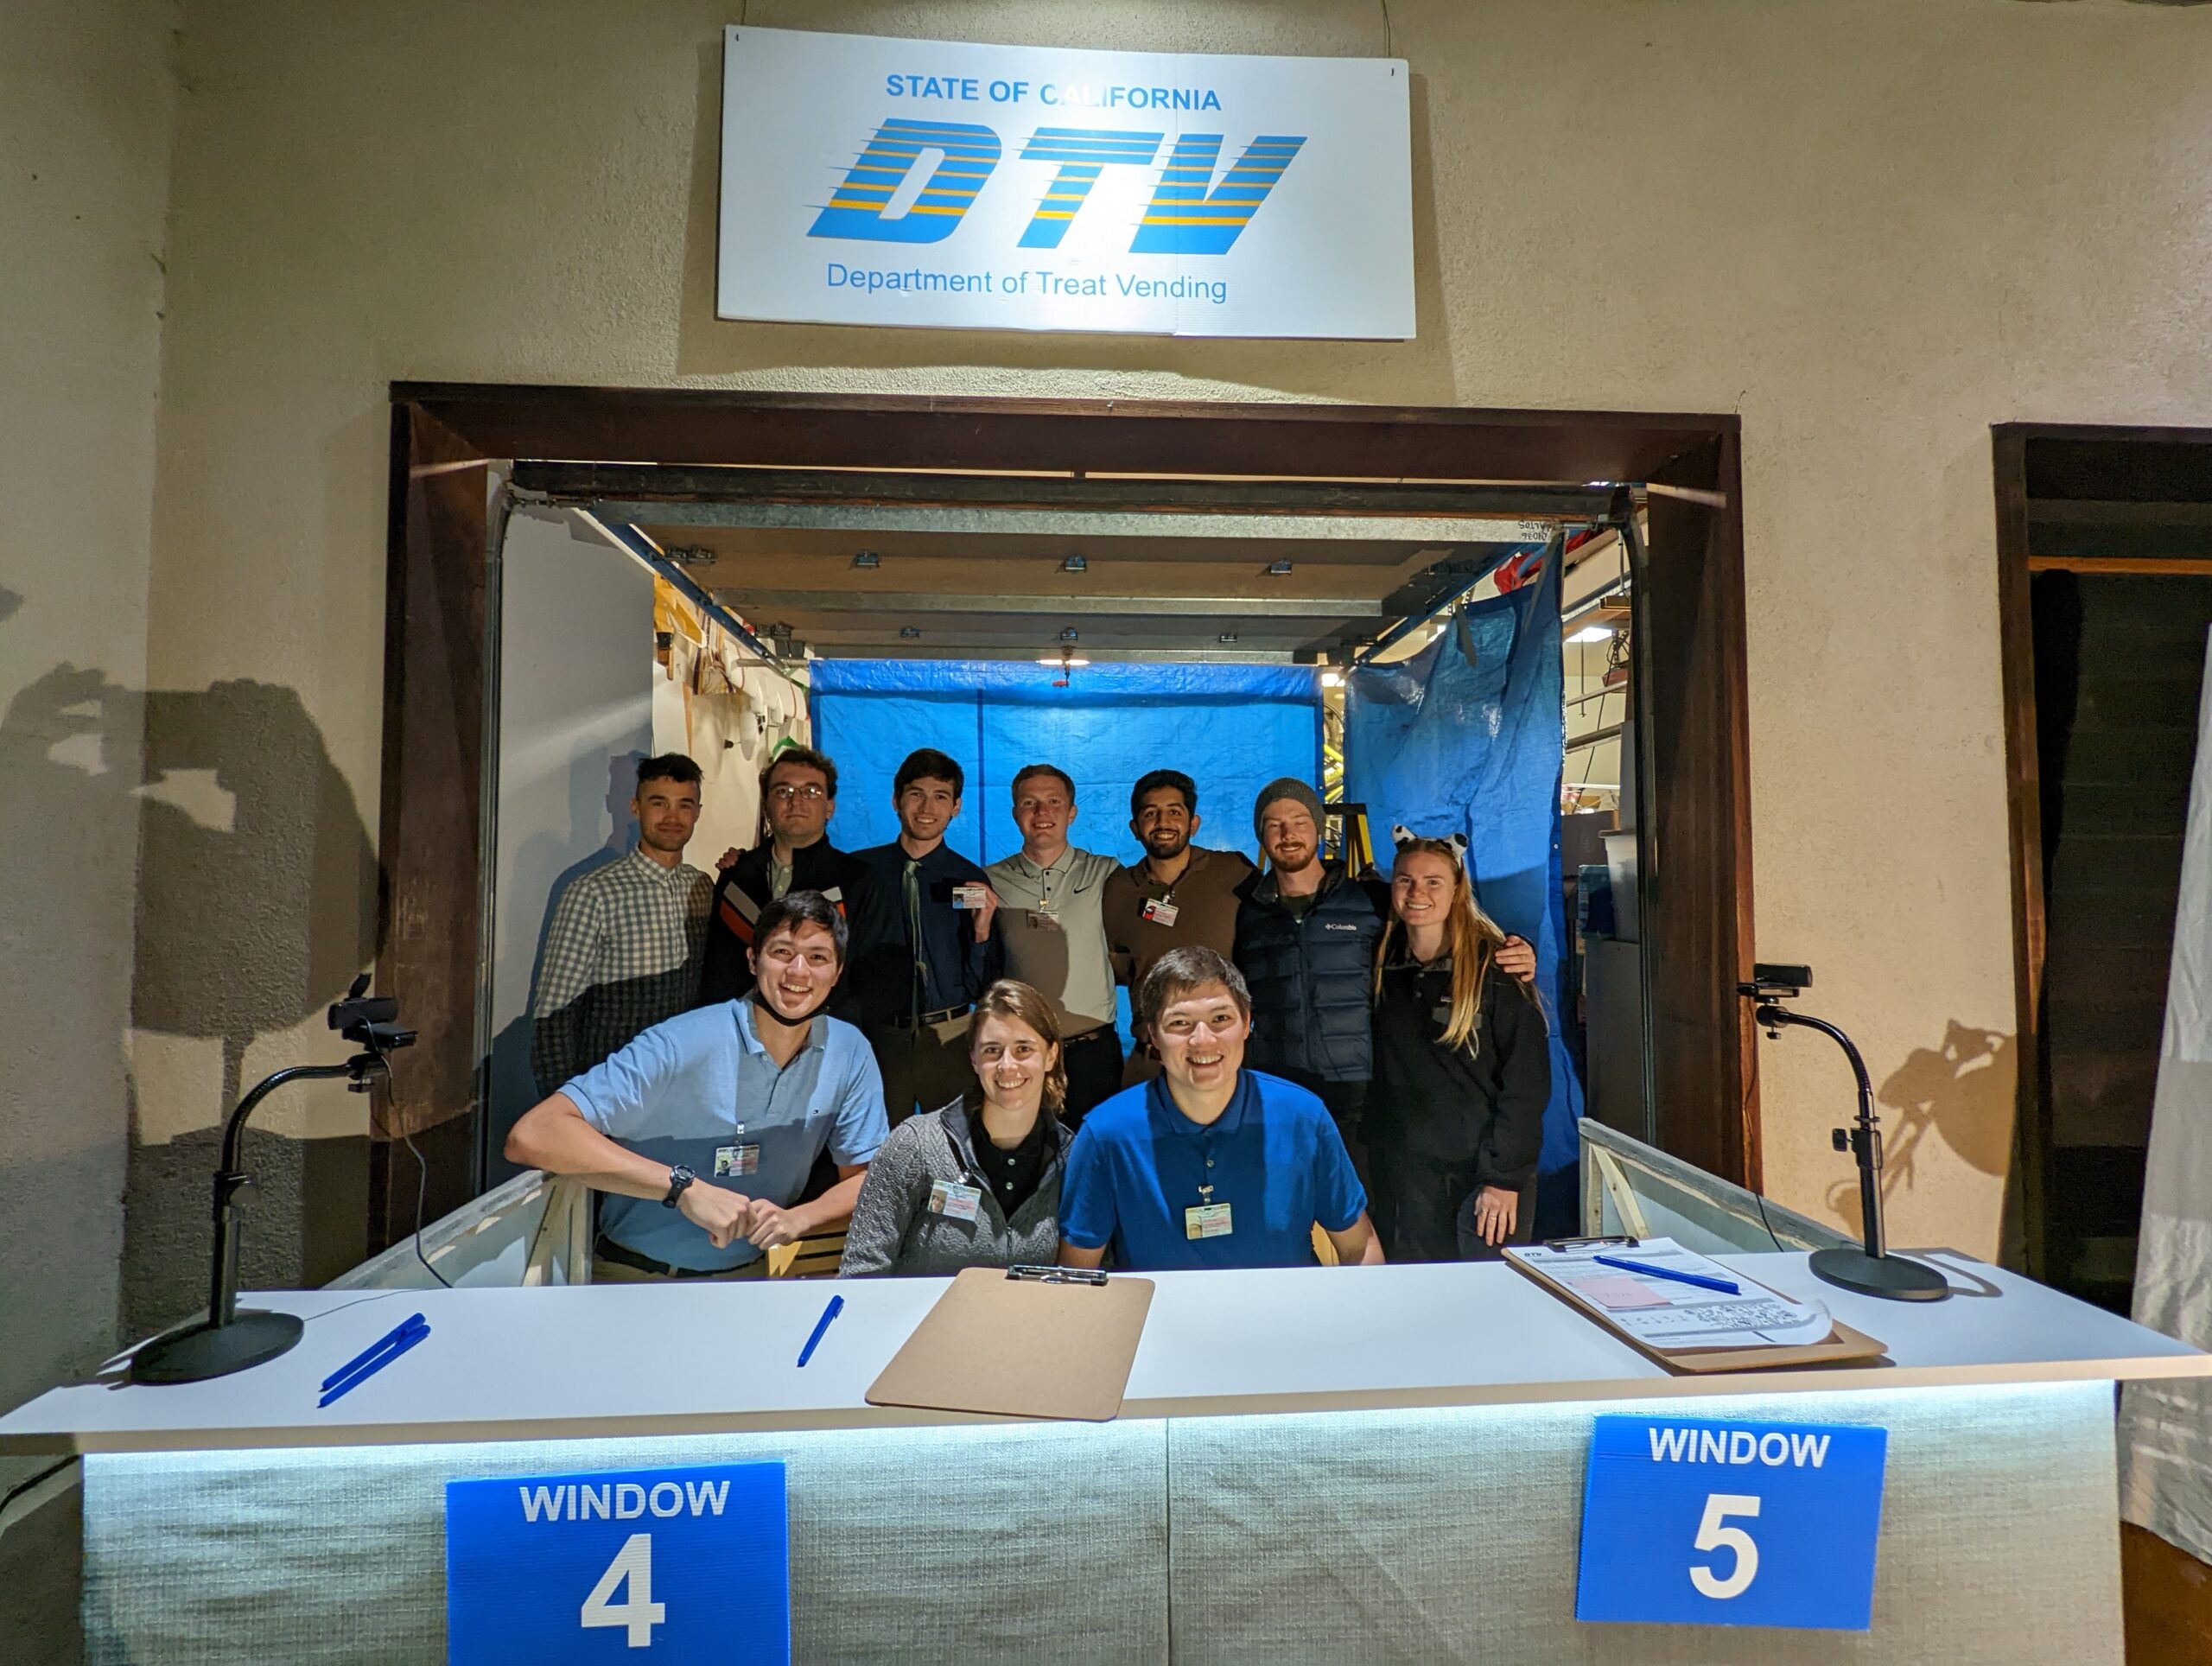
With some slight candy-adjacent-holiday themed rebranding, ten yards of cubicle fabric, over $1k in off-theshelf and government-surplus IT equipment, and a sizable band of willing volunteers, the California DTV (Department of Treat Vending) was born.
The DTV
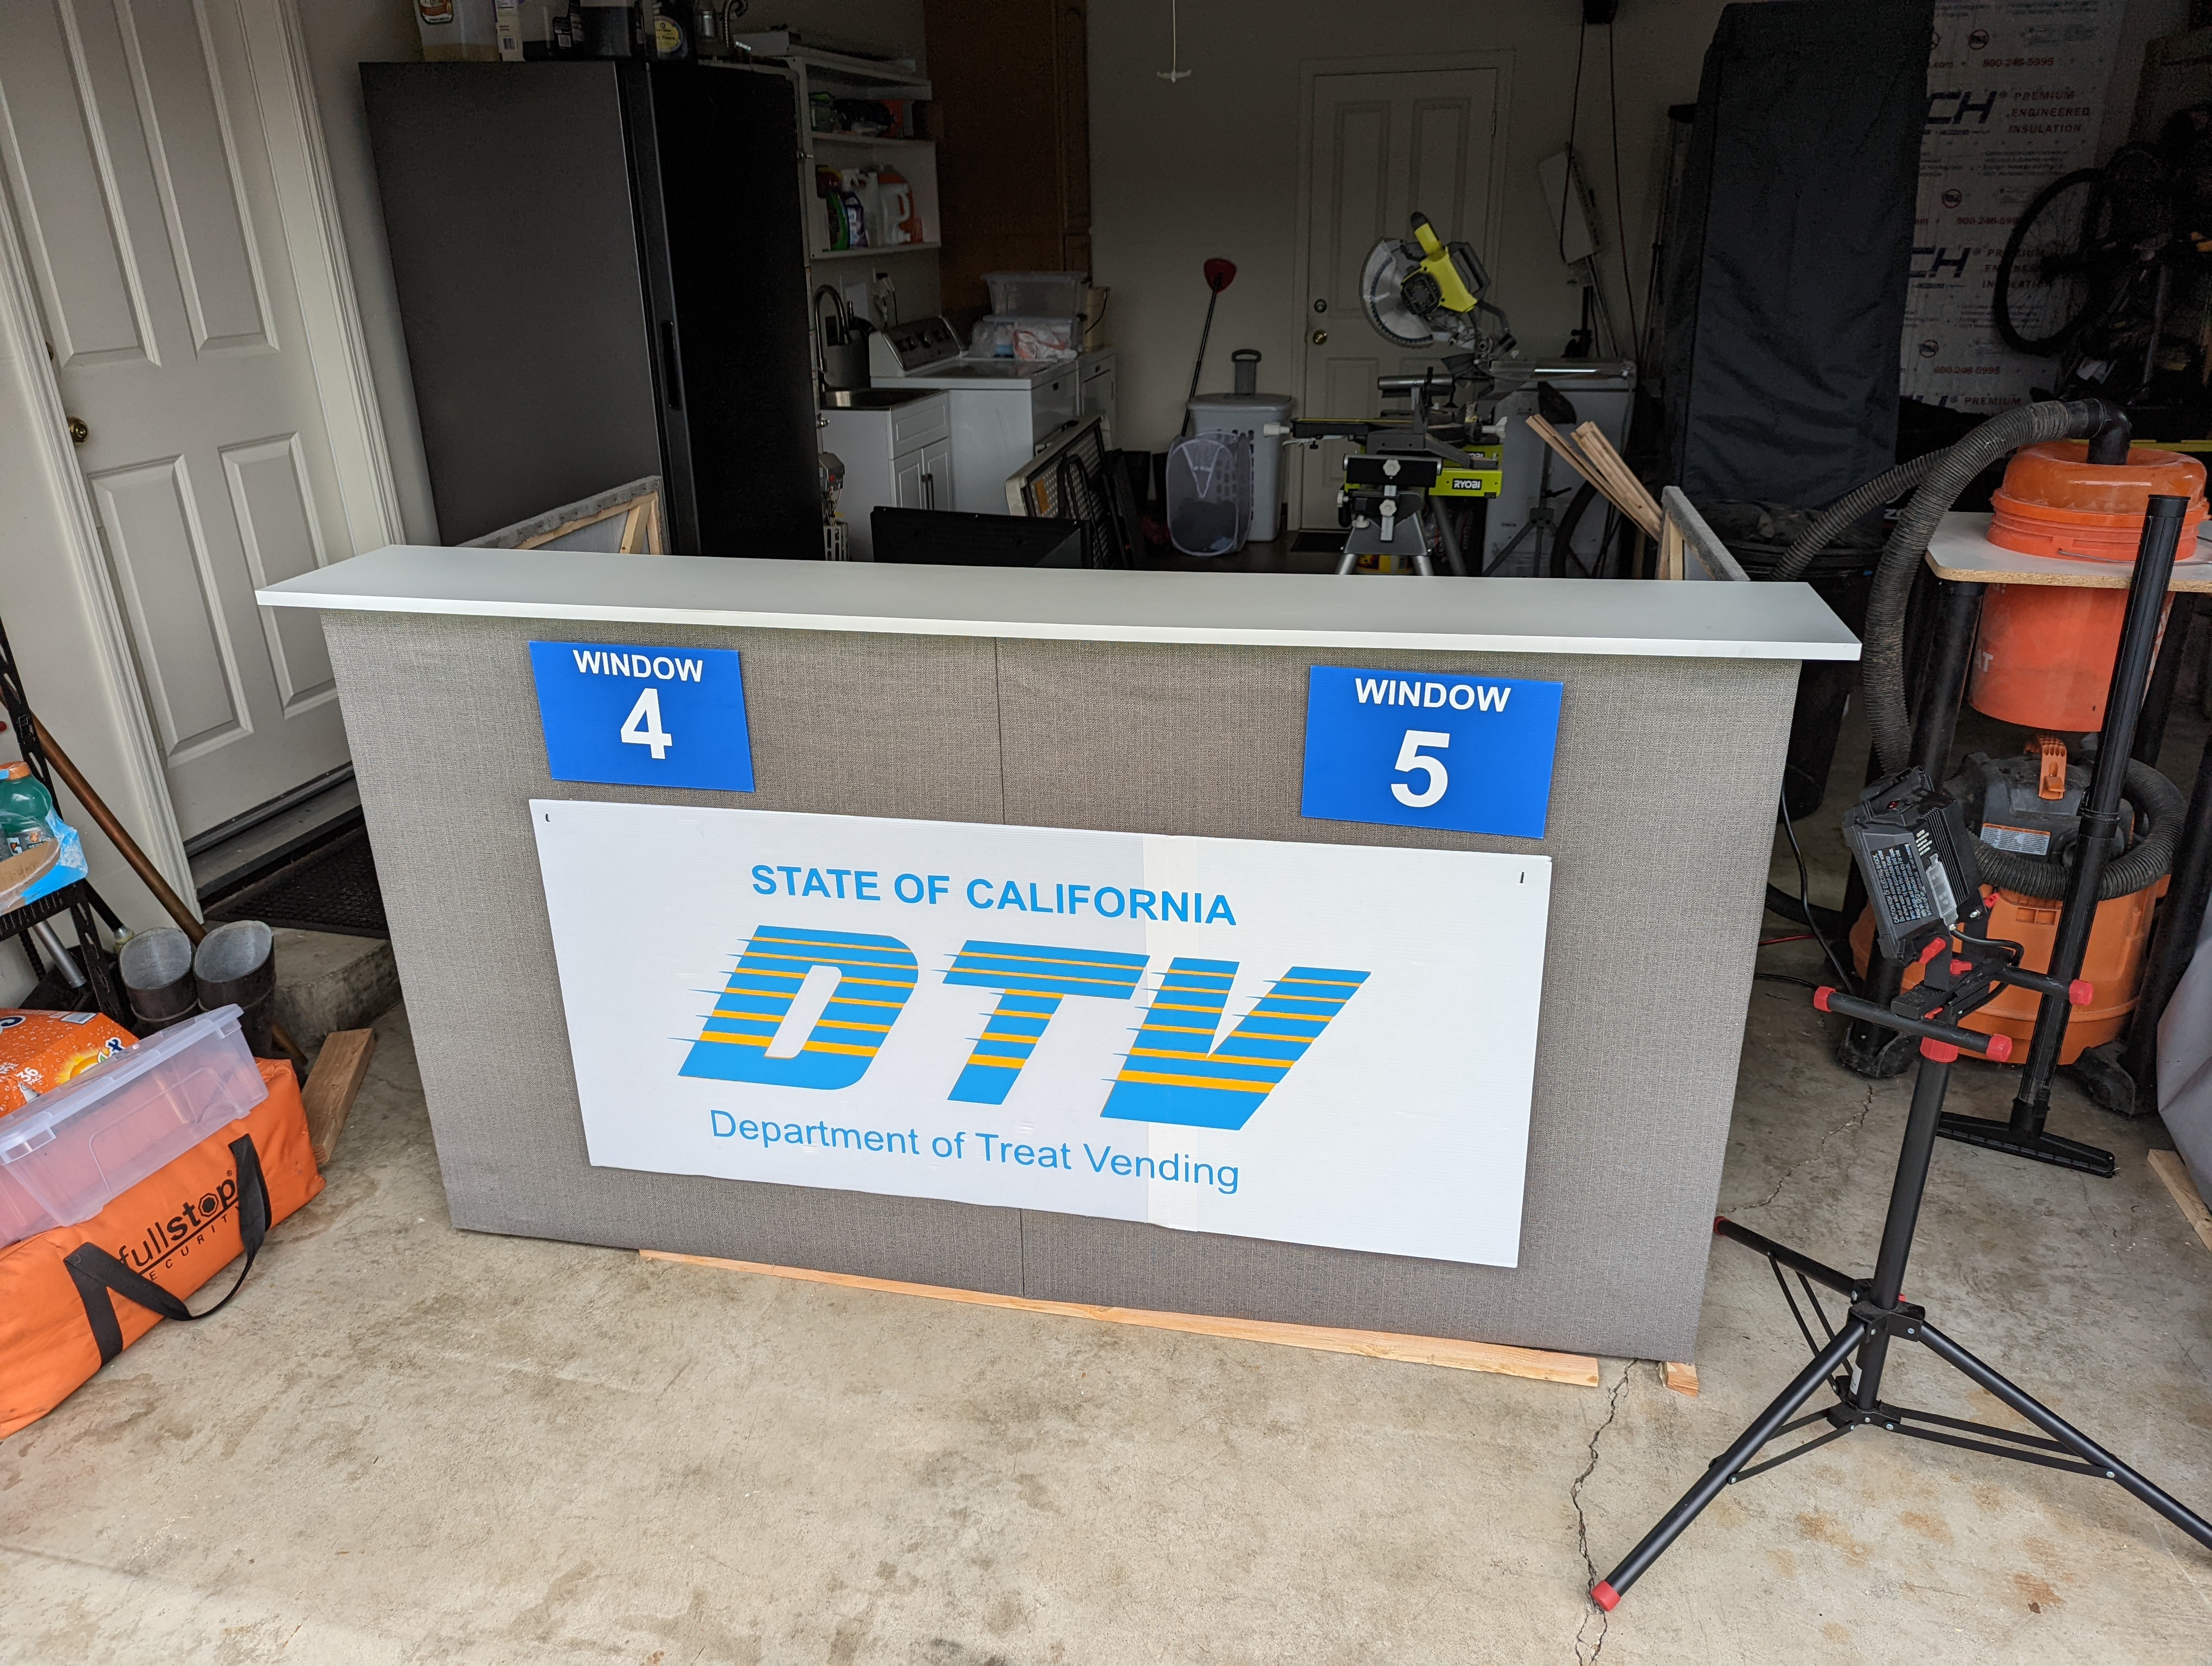
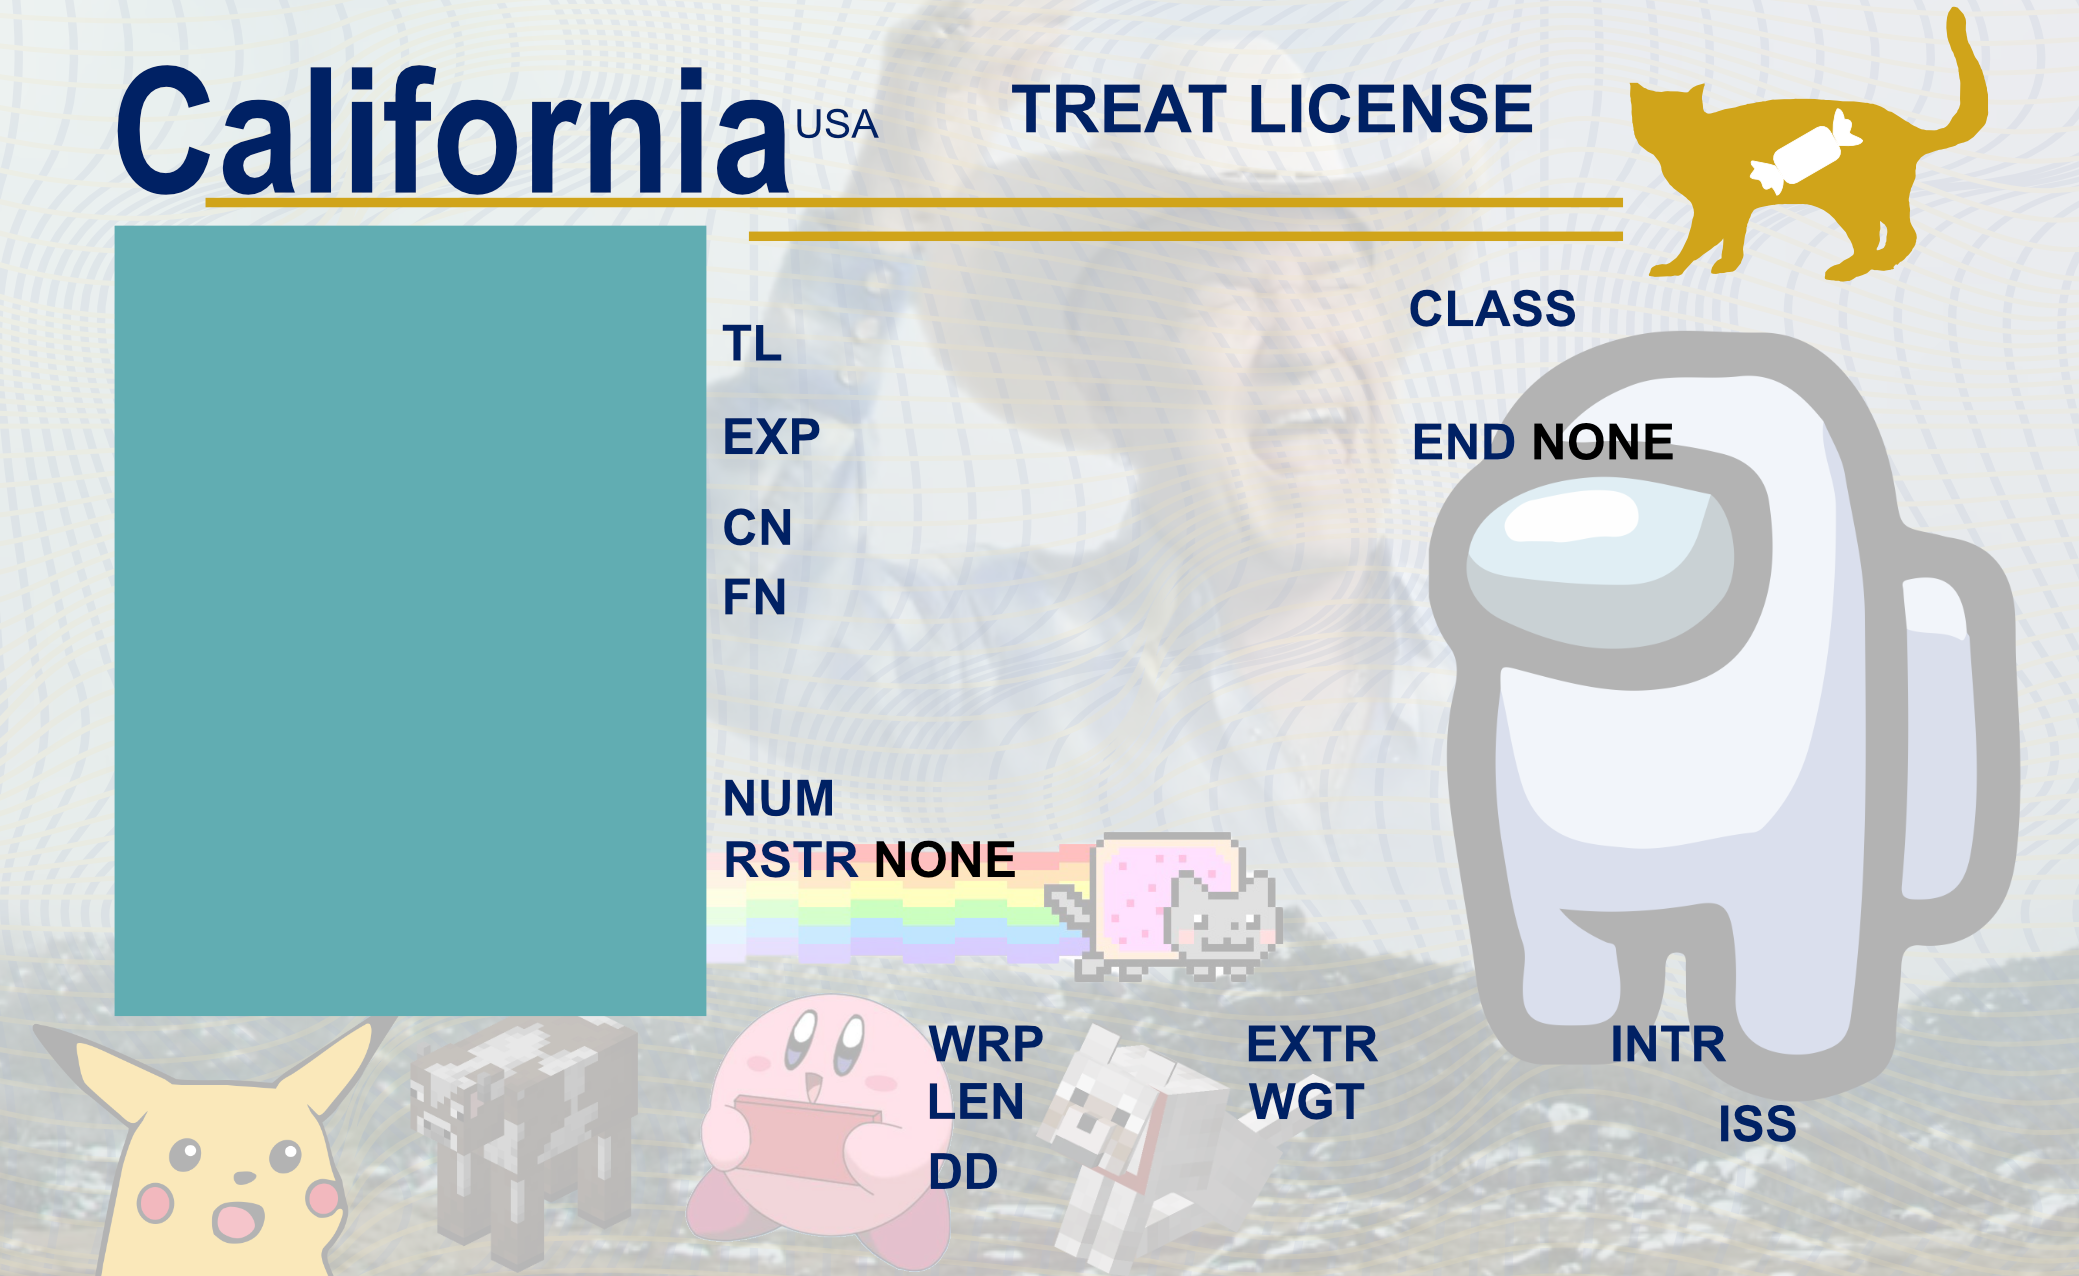
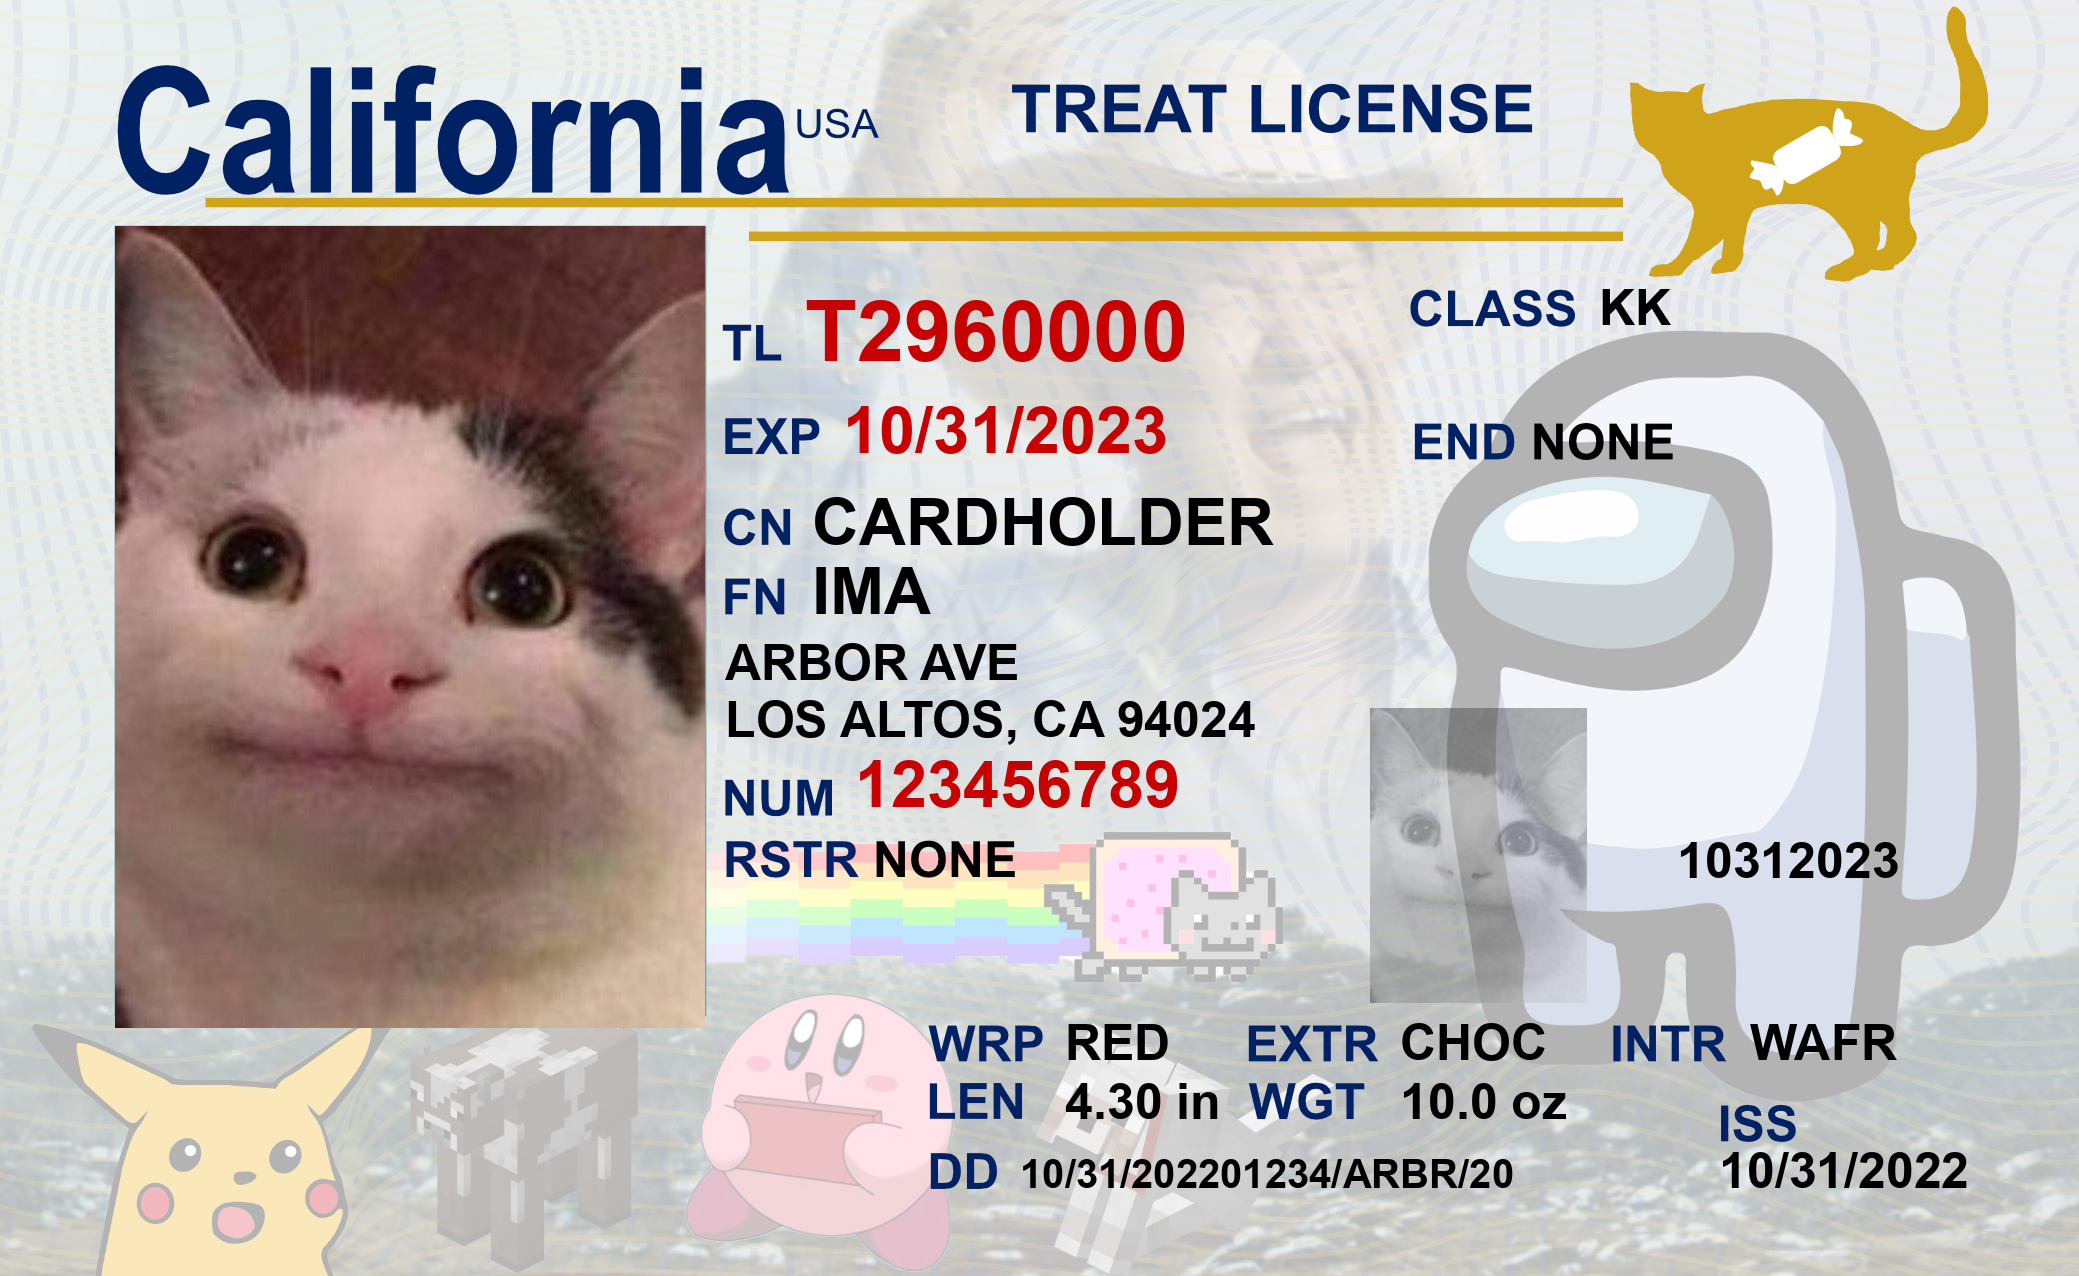
The DTV (Department of Treat Vending) is responsible for issuing Treat Licenses (which look kind of like California driver’s licenses, but with a cat instead of a bear, random memes in the watermark, and no personally identifying information other than first name and favorite color) to trick-or-treaters. Holders of a Treat License may present their card at any participating DTV branch (currently just the one) in order to acquire a full-size candy bar.

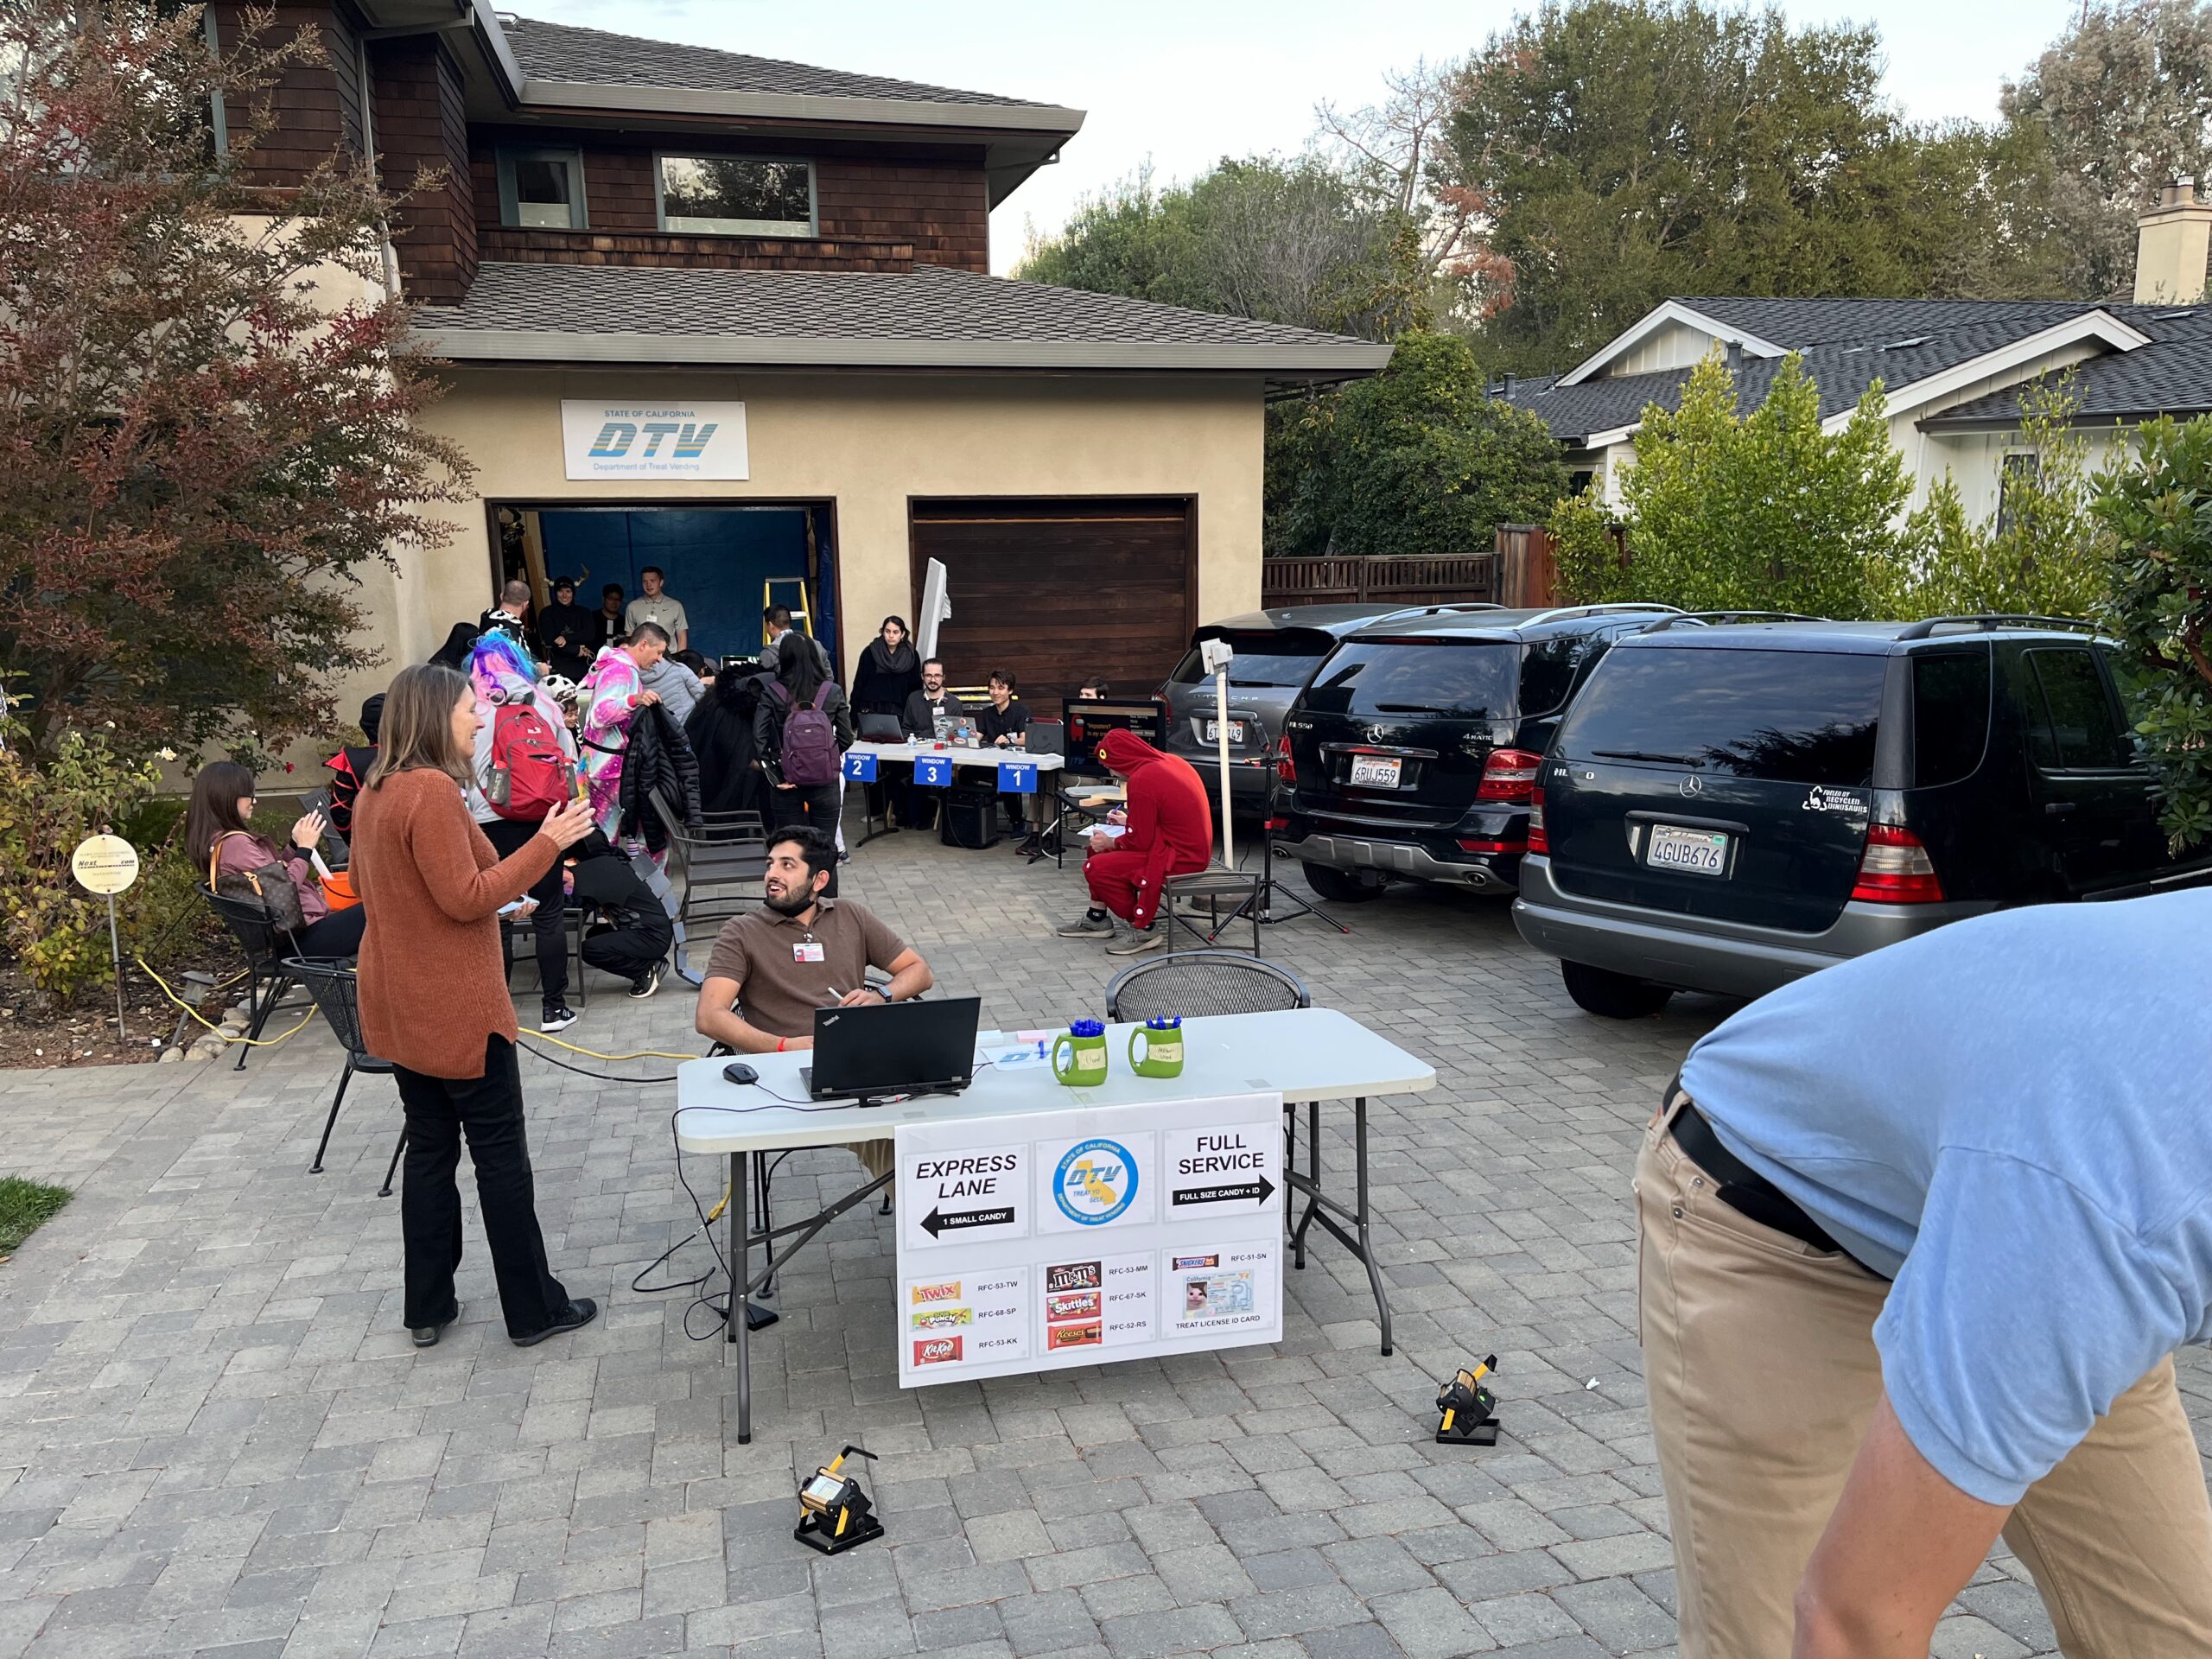
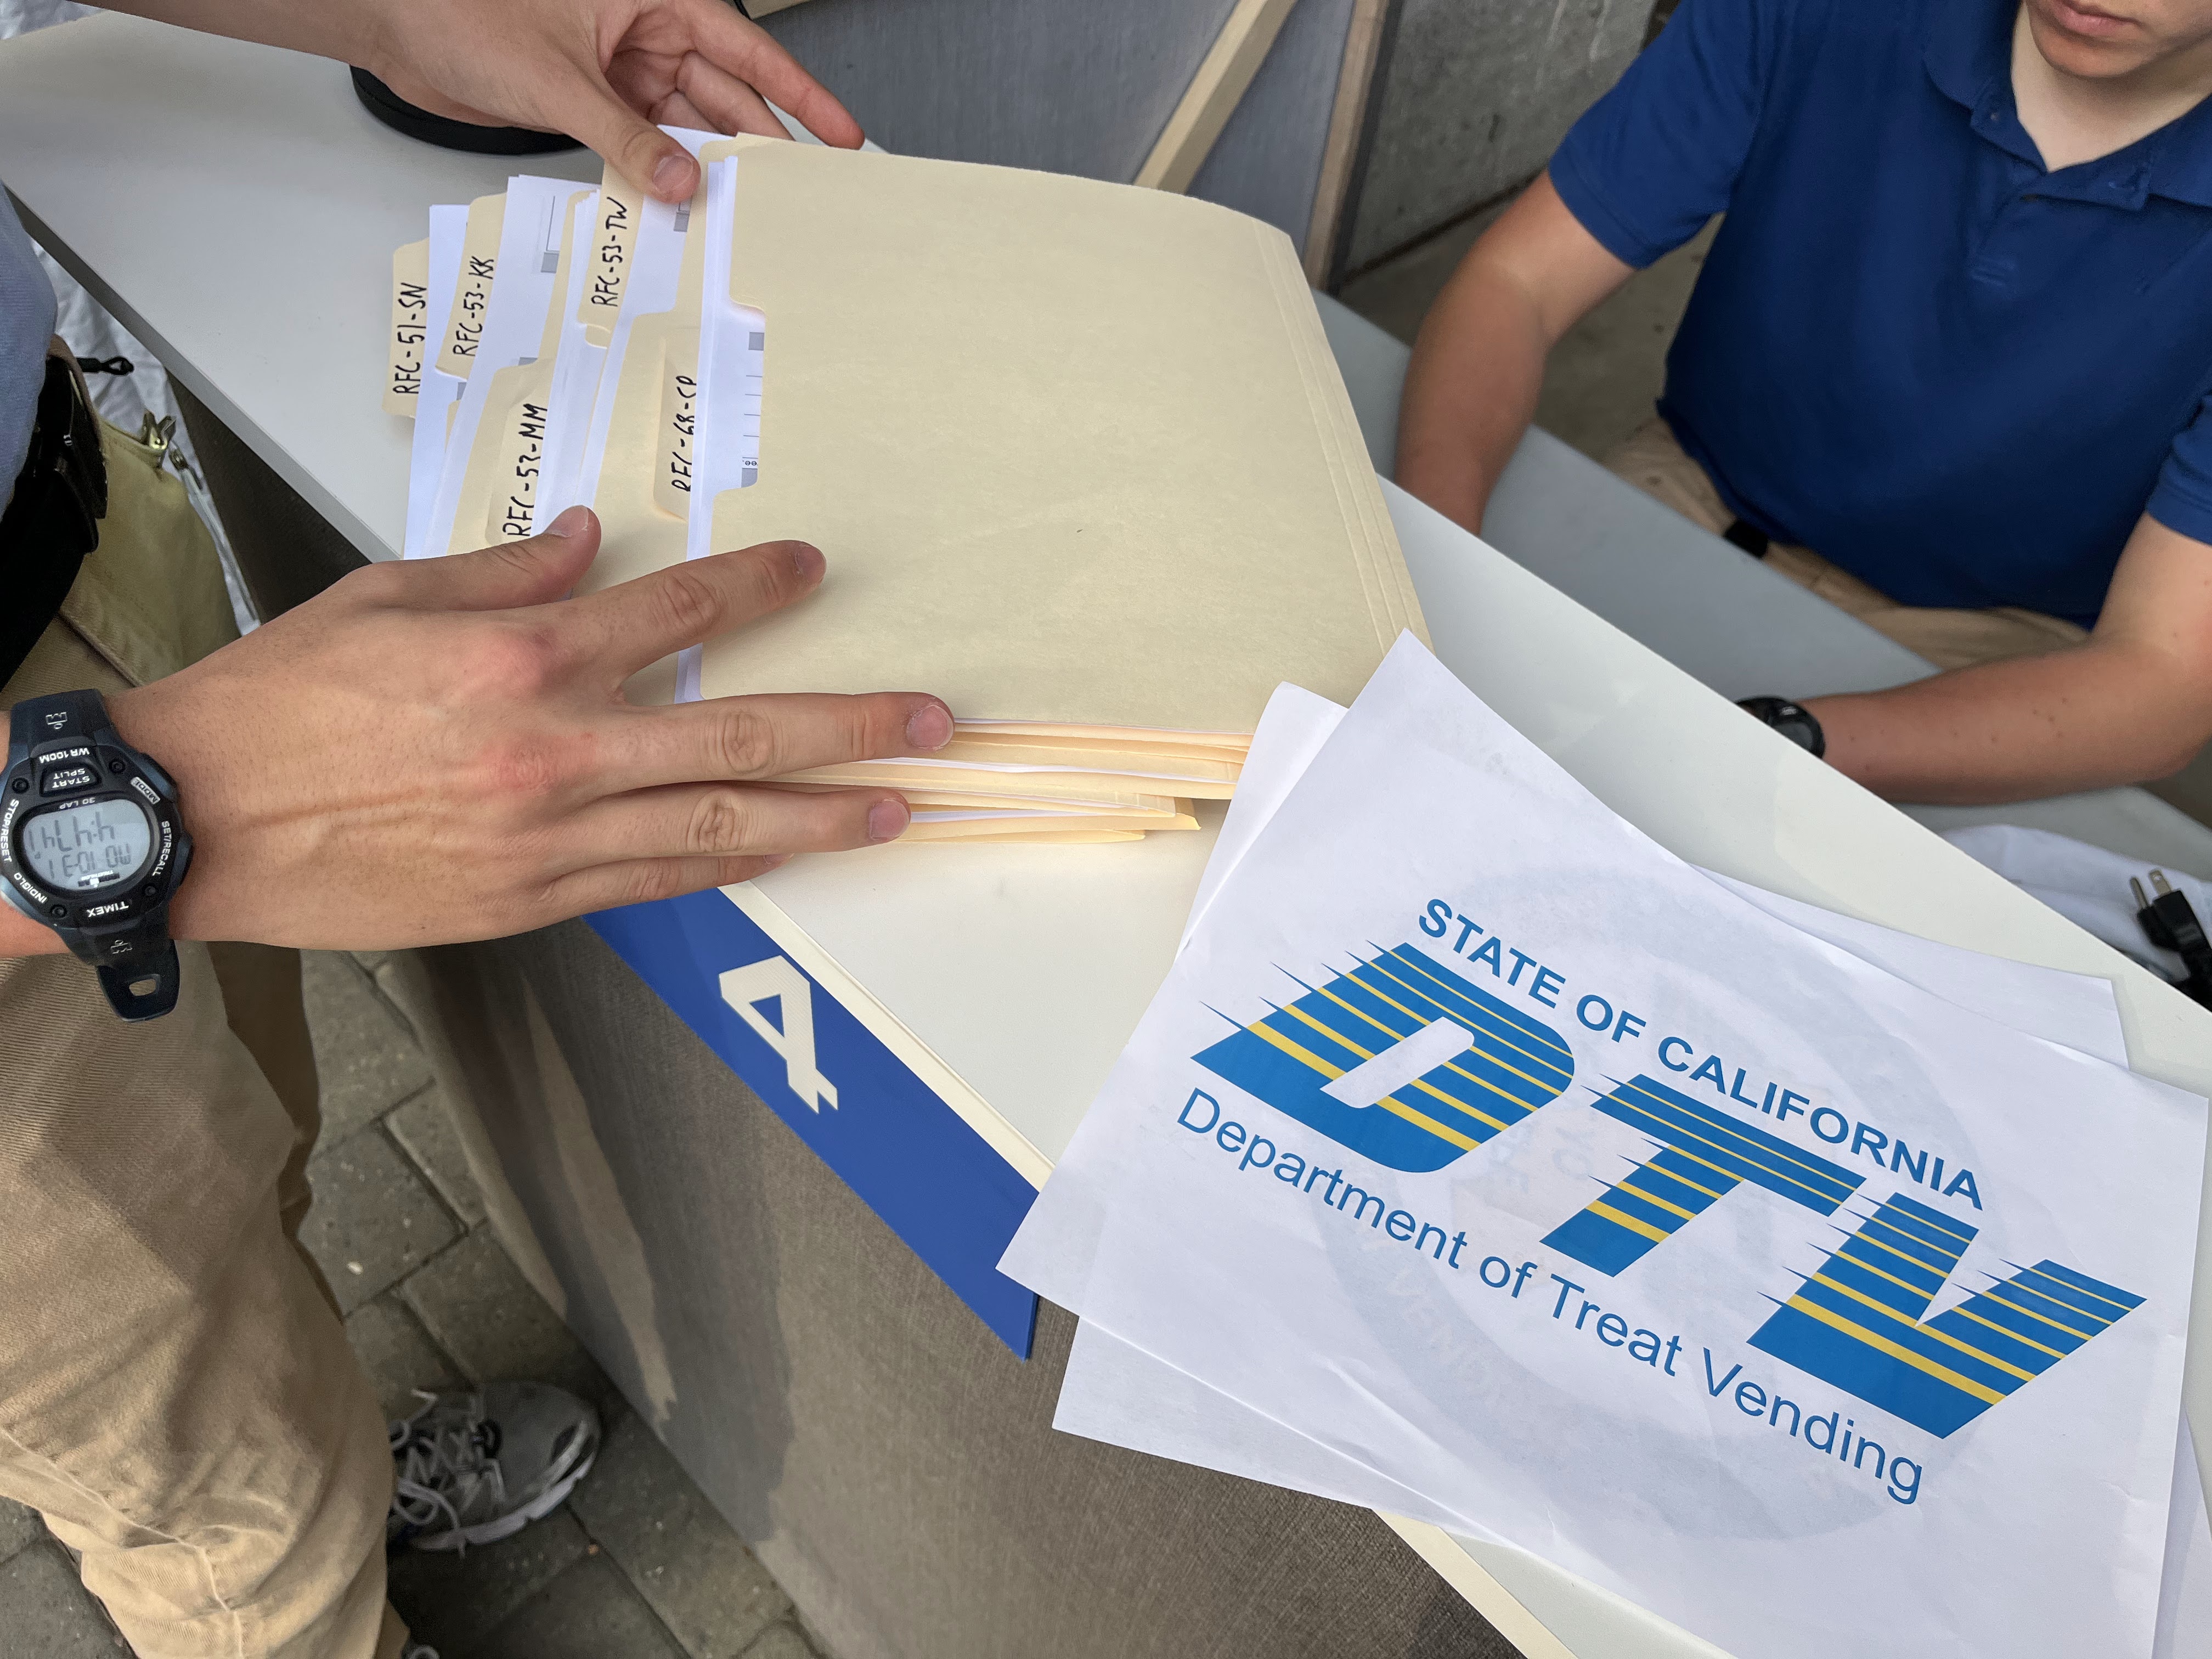
Of course, acquiring an ID card is not a simple process. In order to acquire an ID card (and the associated candy bar), trick-or-treaters must arrive at the DTV and wait in line for a Request For Candy (RFC) form. At the end of the RFC form line, each trick-or-treater is provided with a clipboard and an RFC form corresponding to the type of candy bar they wish to receive a Treat License for, as well as an auto-generated ticket number corresponding to their slot in the DTV ticketing system. The number of RFC forms is tied to the number of available candy bars of each kind, so after a few hours of operation, many DTV branches may run out of the more popular variations of the RFC form.
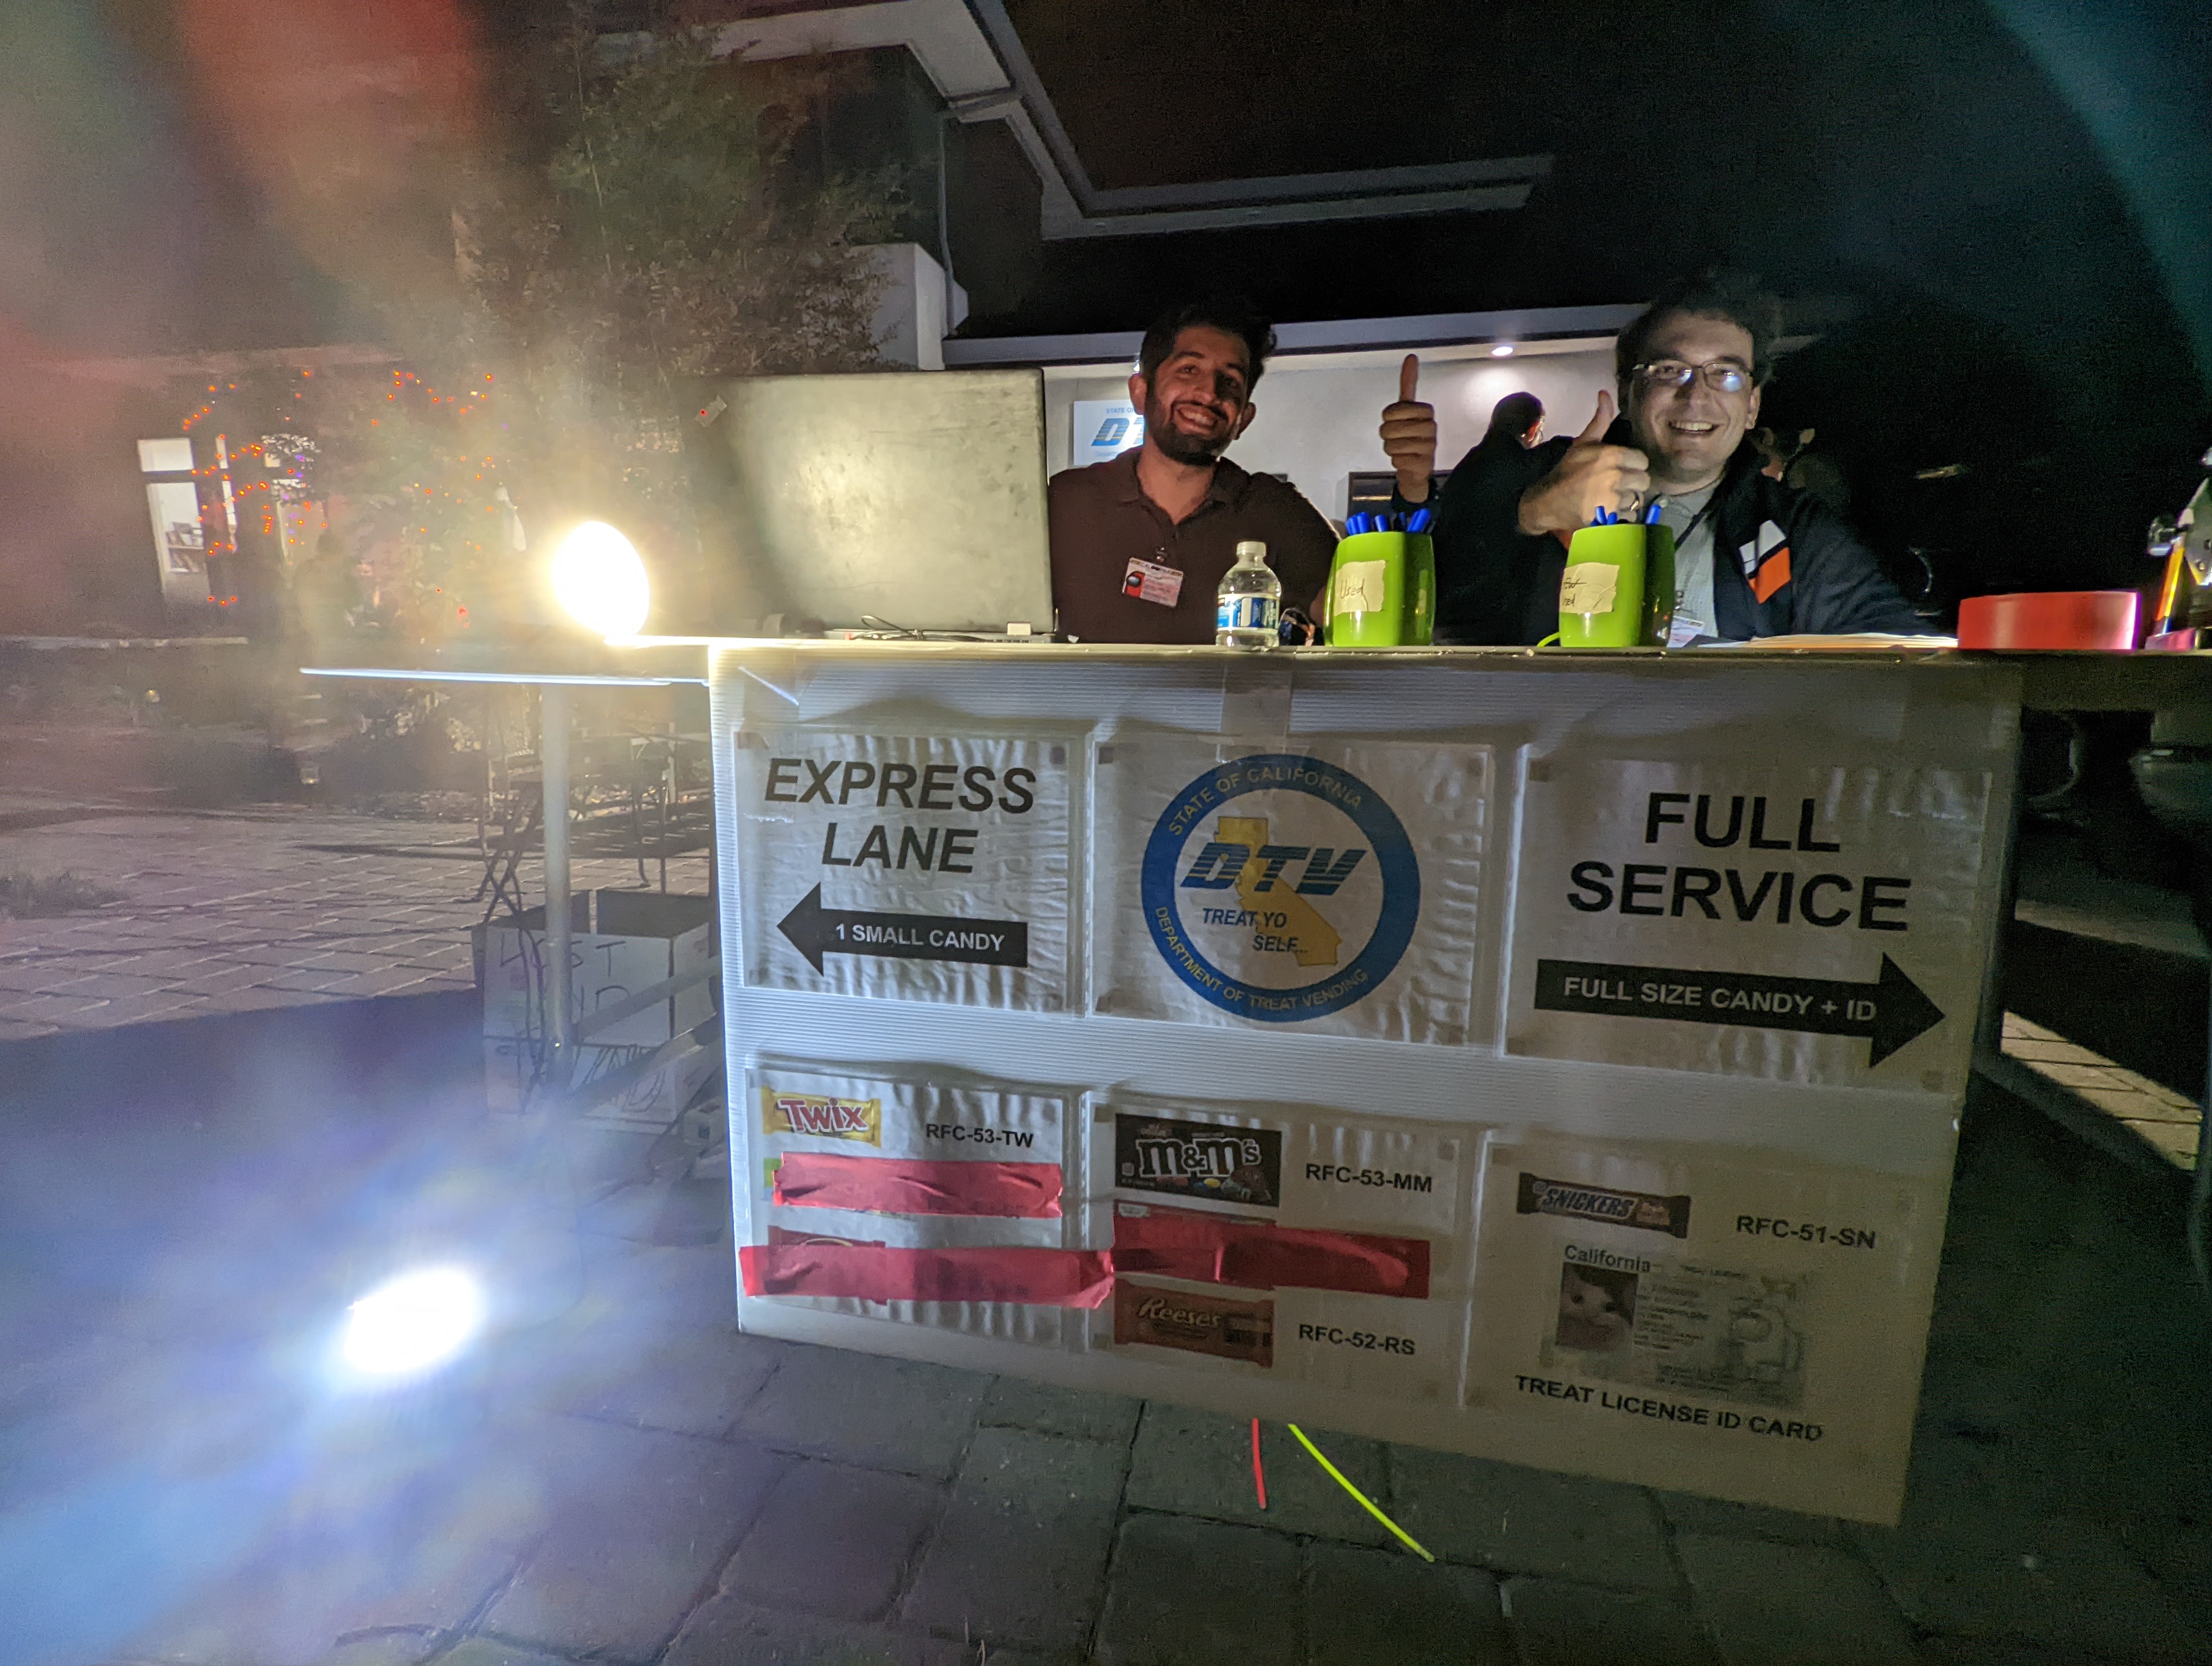
RFC forms are available for a number of candy bar variants. The different types of ID forms are listed below.
- Twix: RFC-53-TW
- M&M’s: RFC-53-MM
- Snickers: RFC-51-SN
- Sour Punch Straws: RFC-68-SP
- Skittles: RFC-67-SK
- KitKat: RFC-53-KK
- Reese’s: RFC-52-RS
Each RFC form has identical fields except for Section 3 (Verification), which varies by form type.
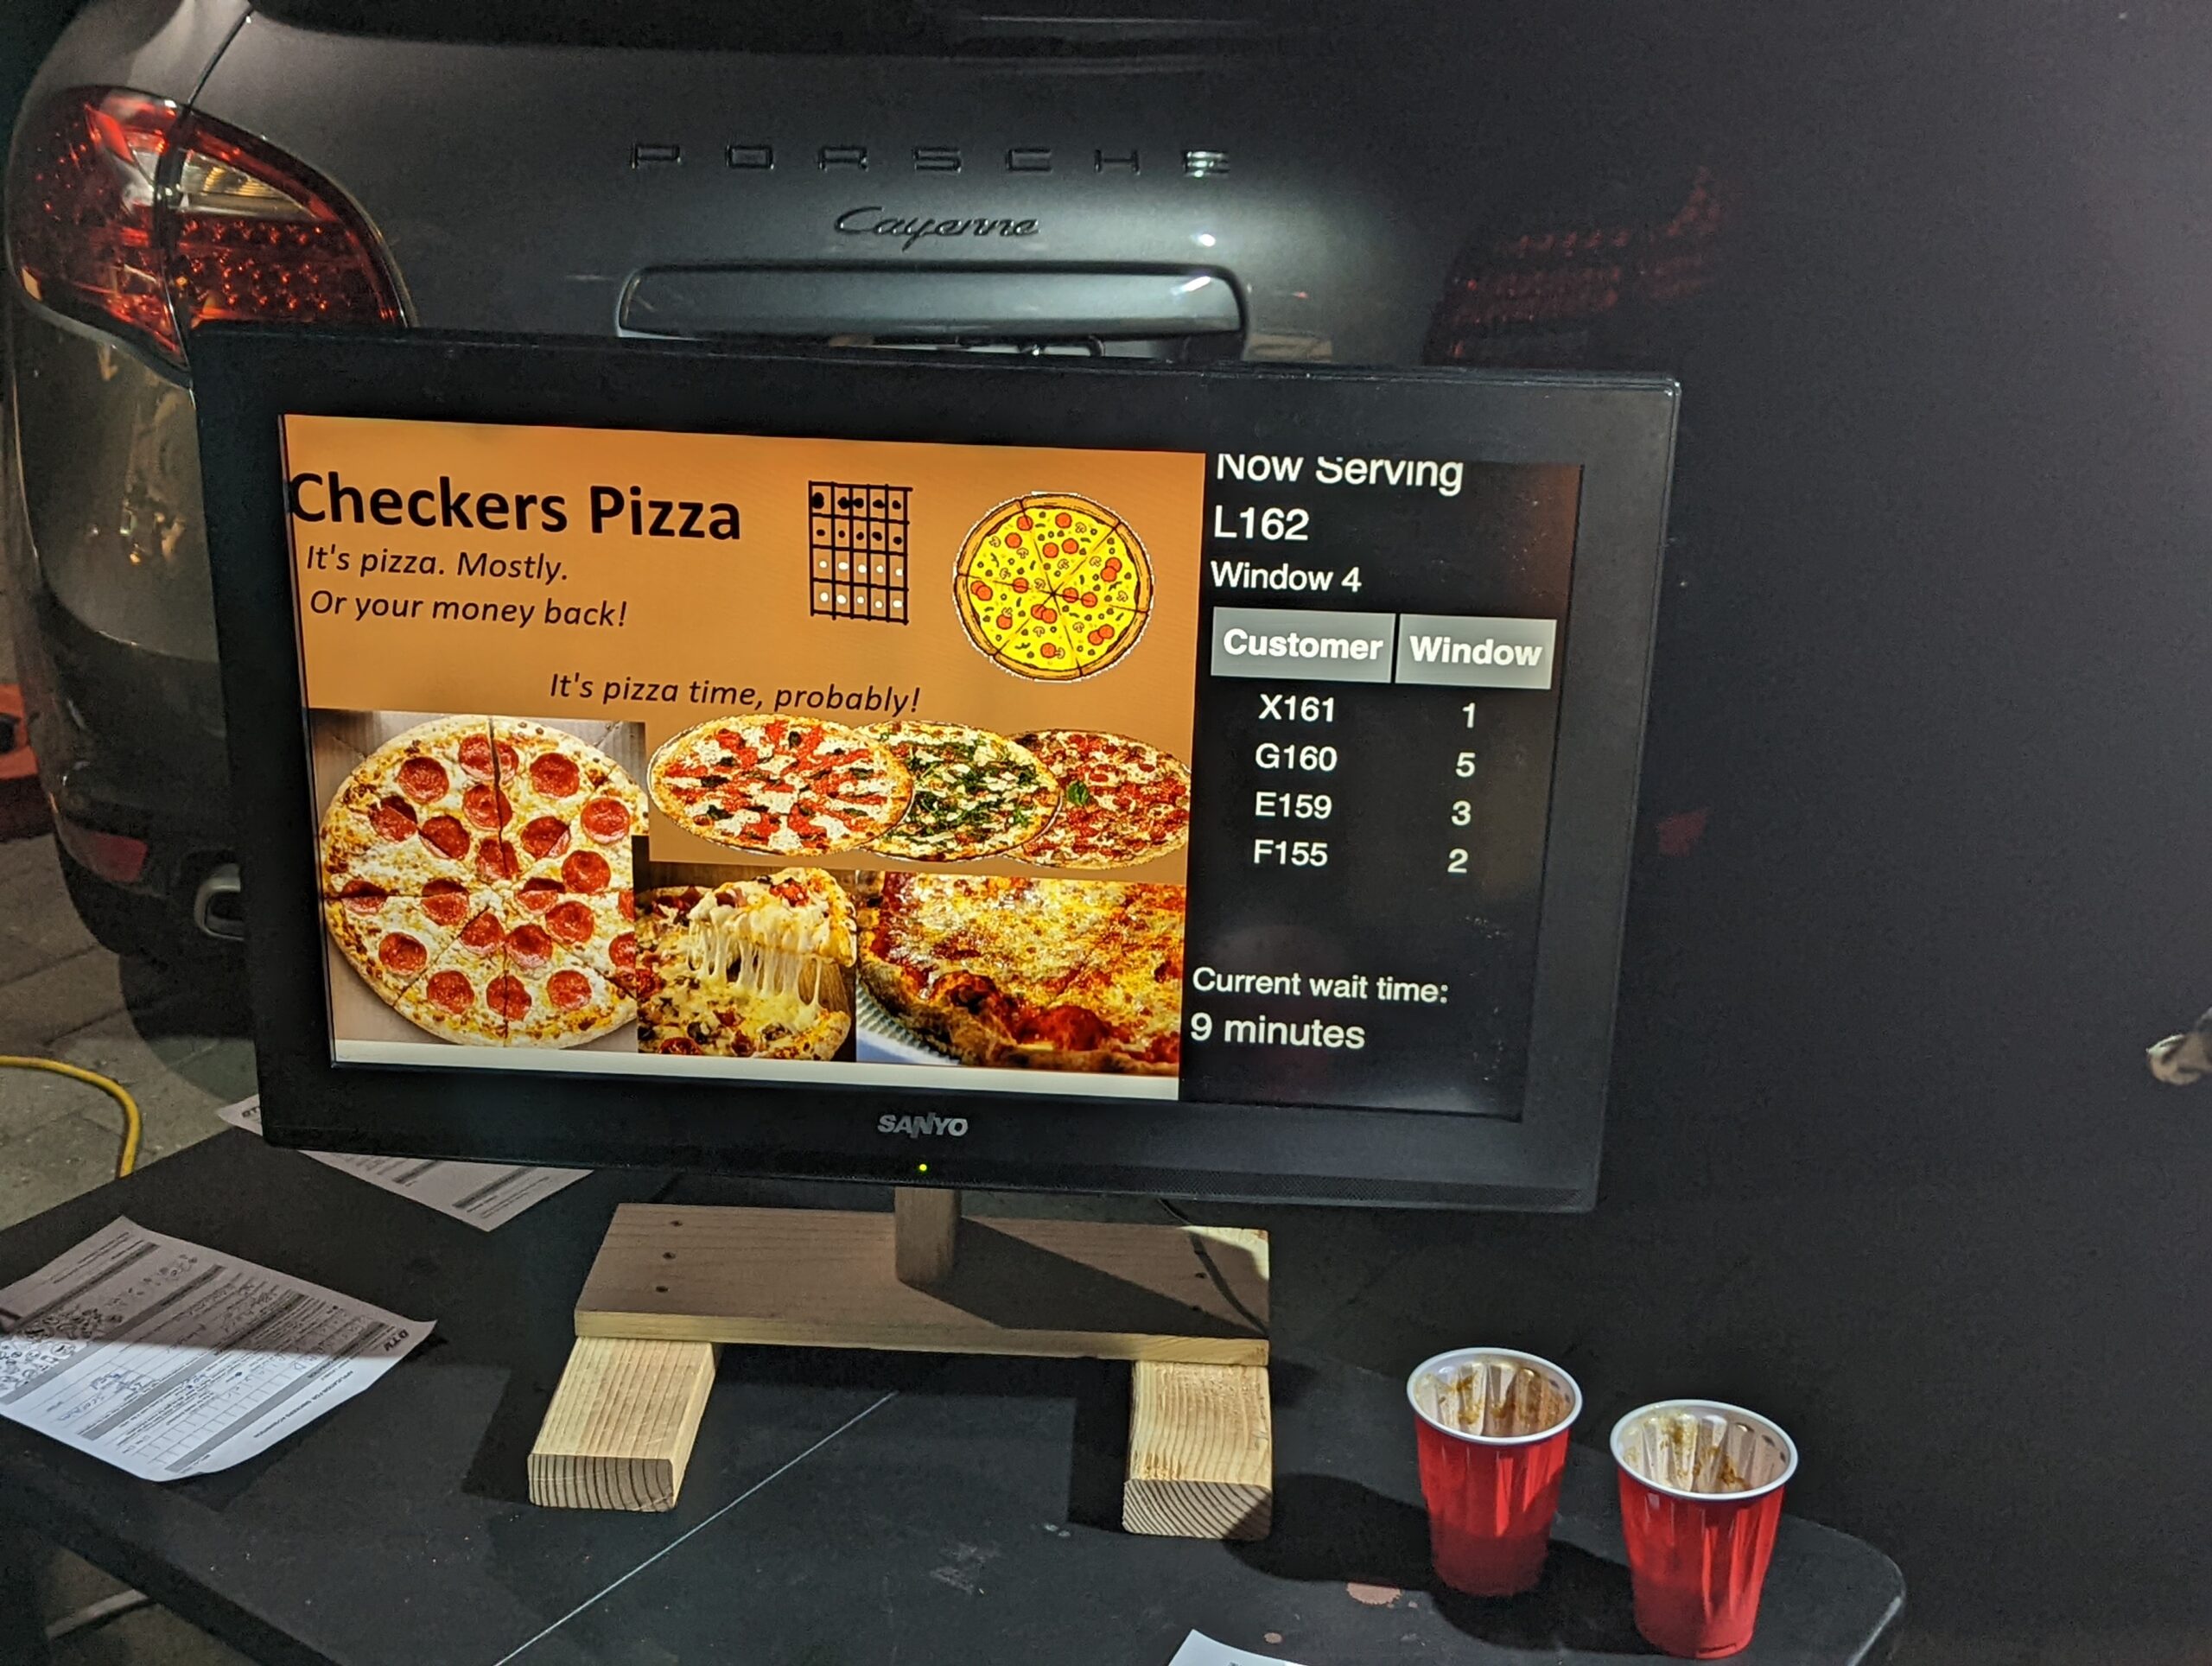
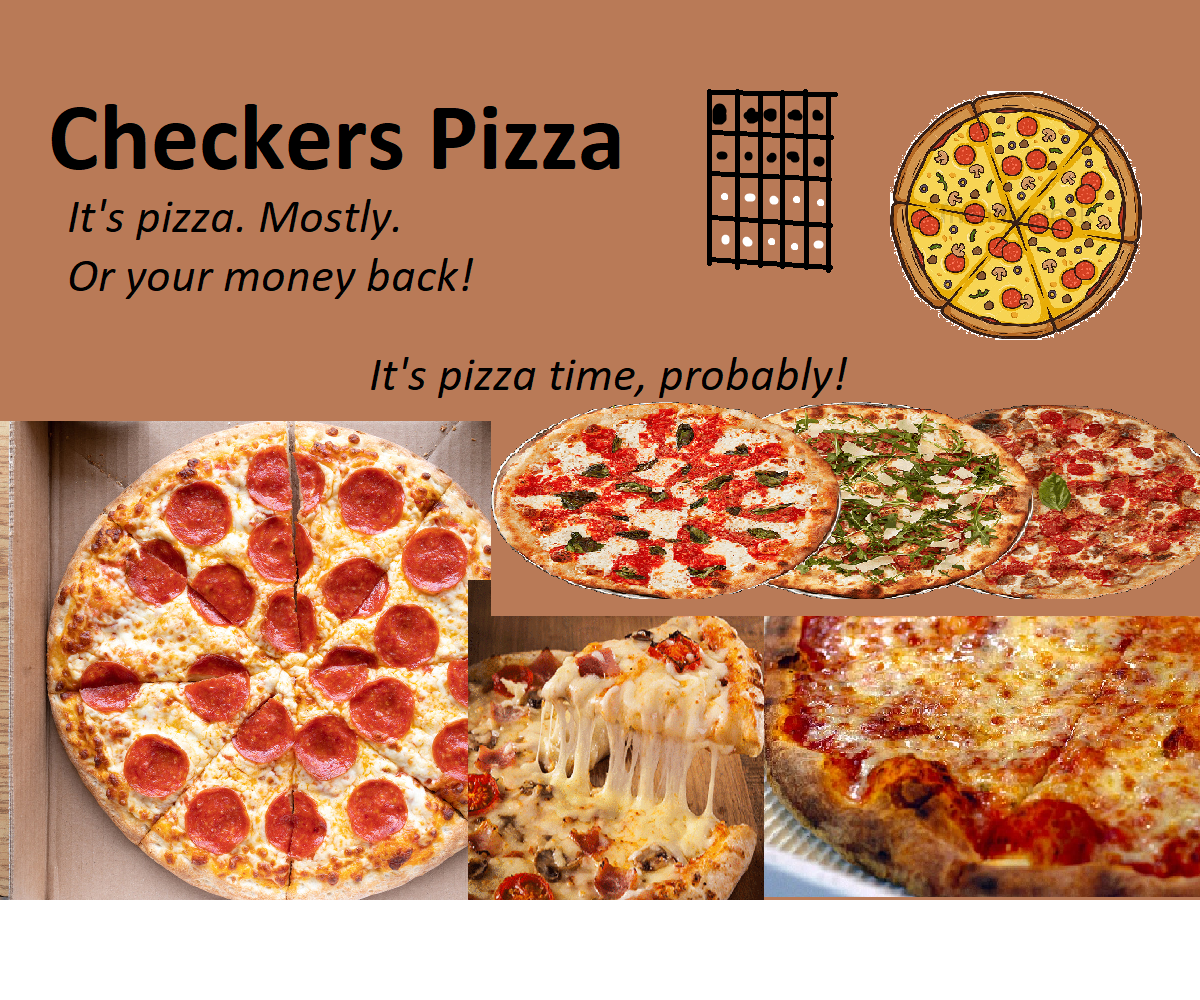
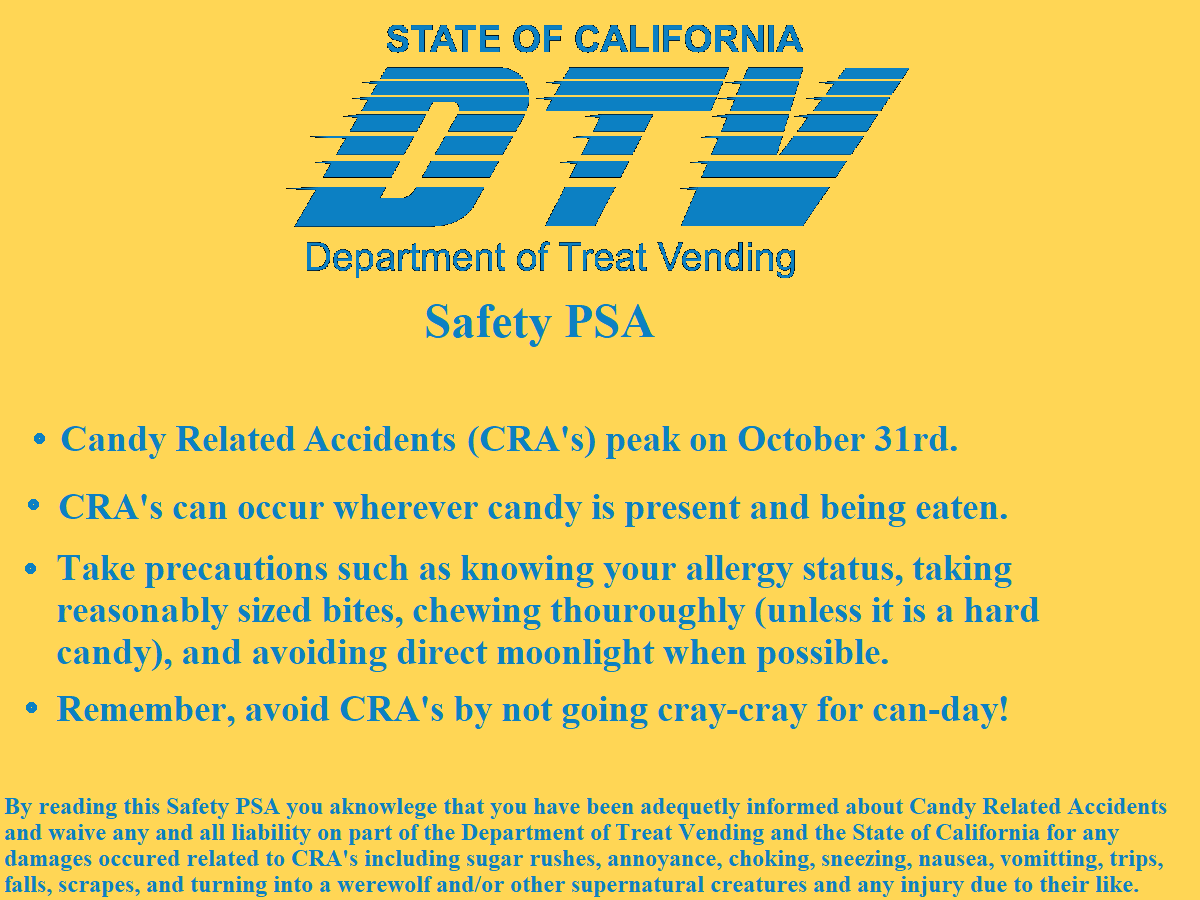
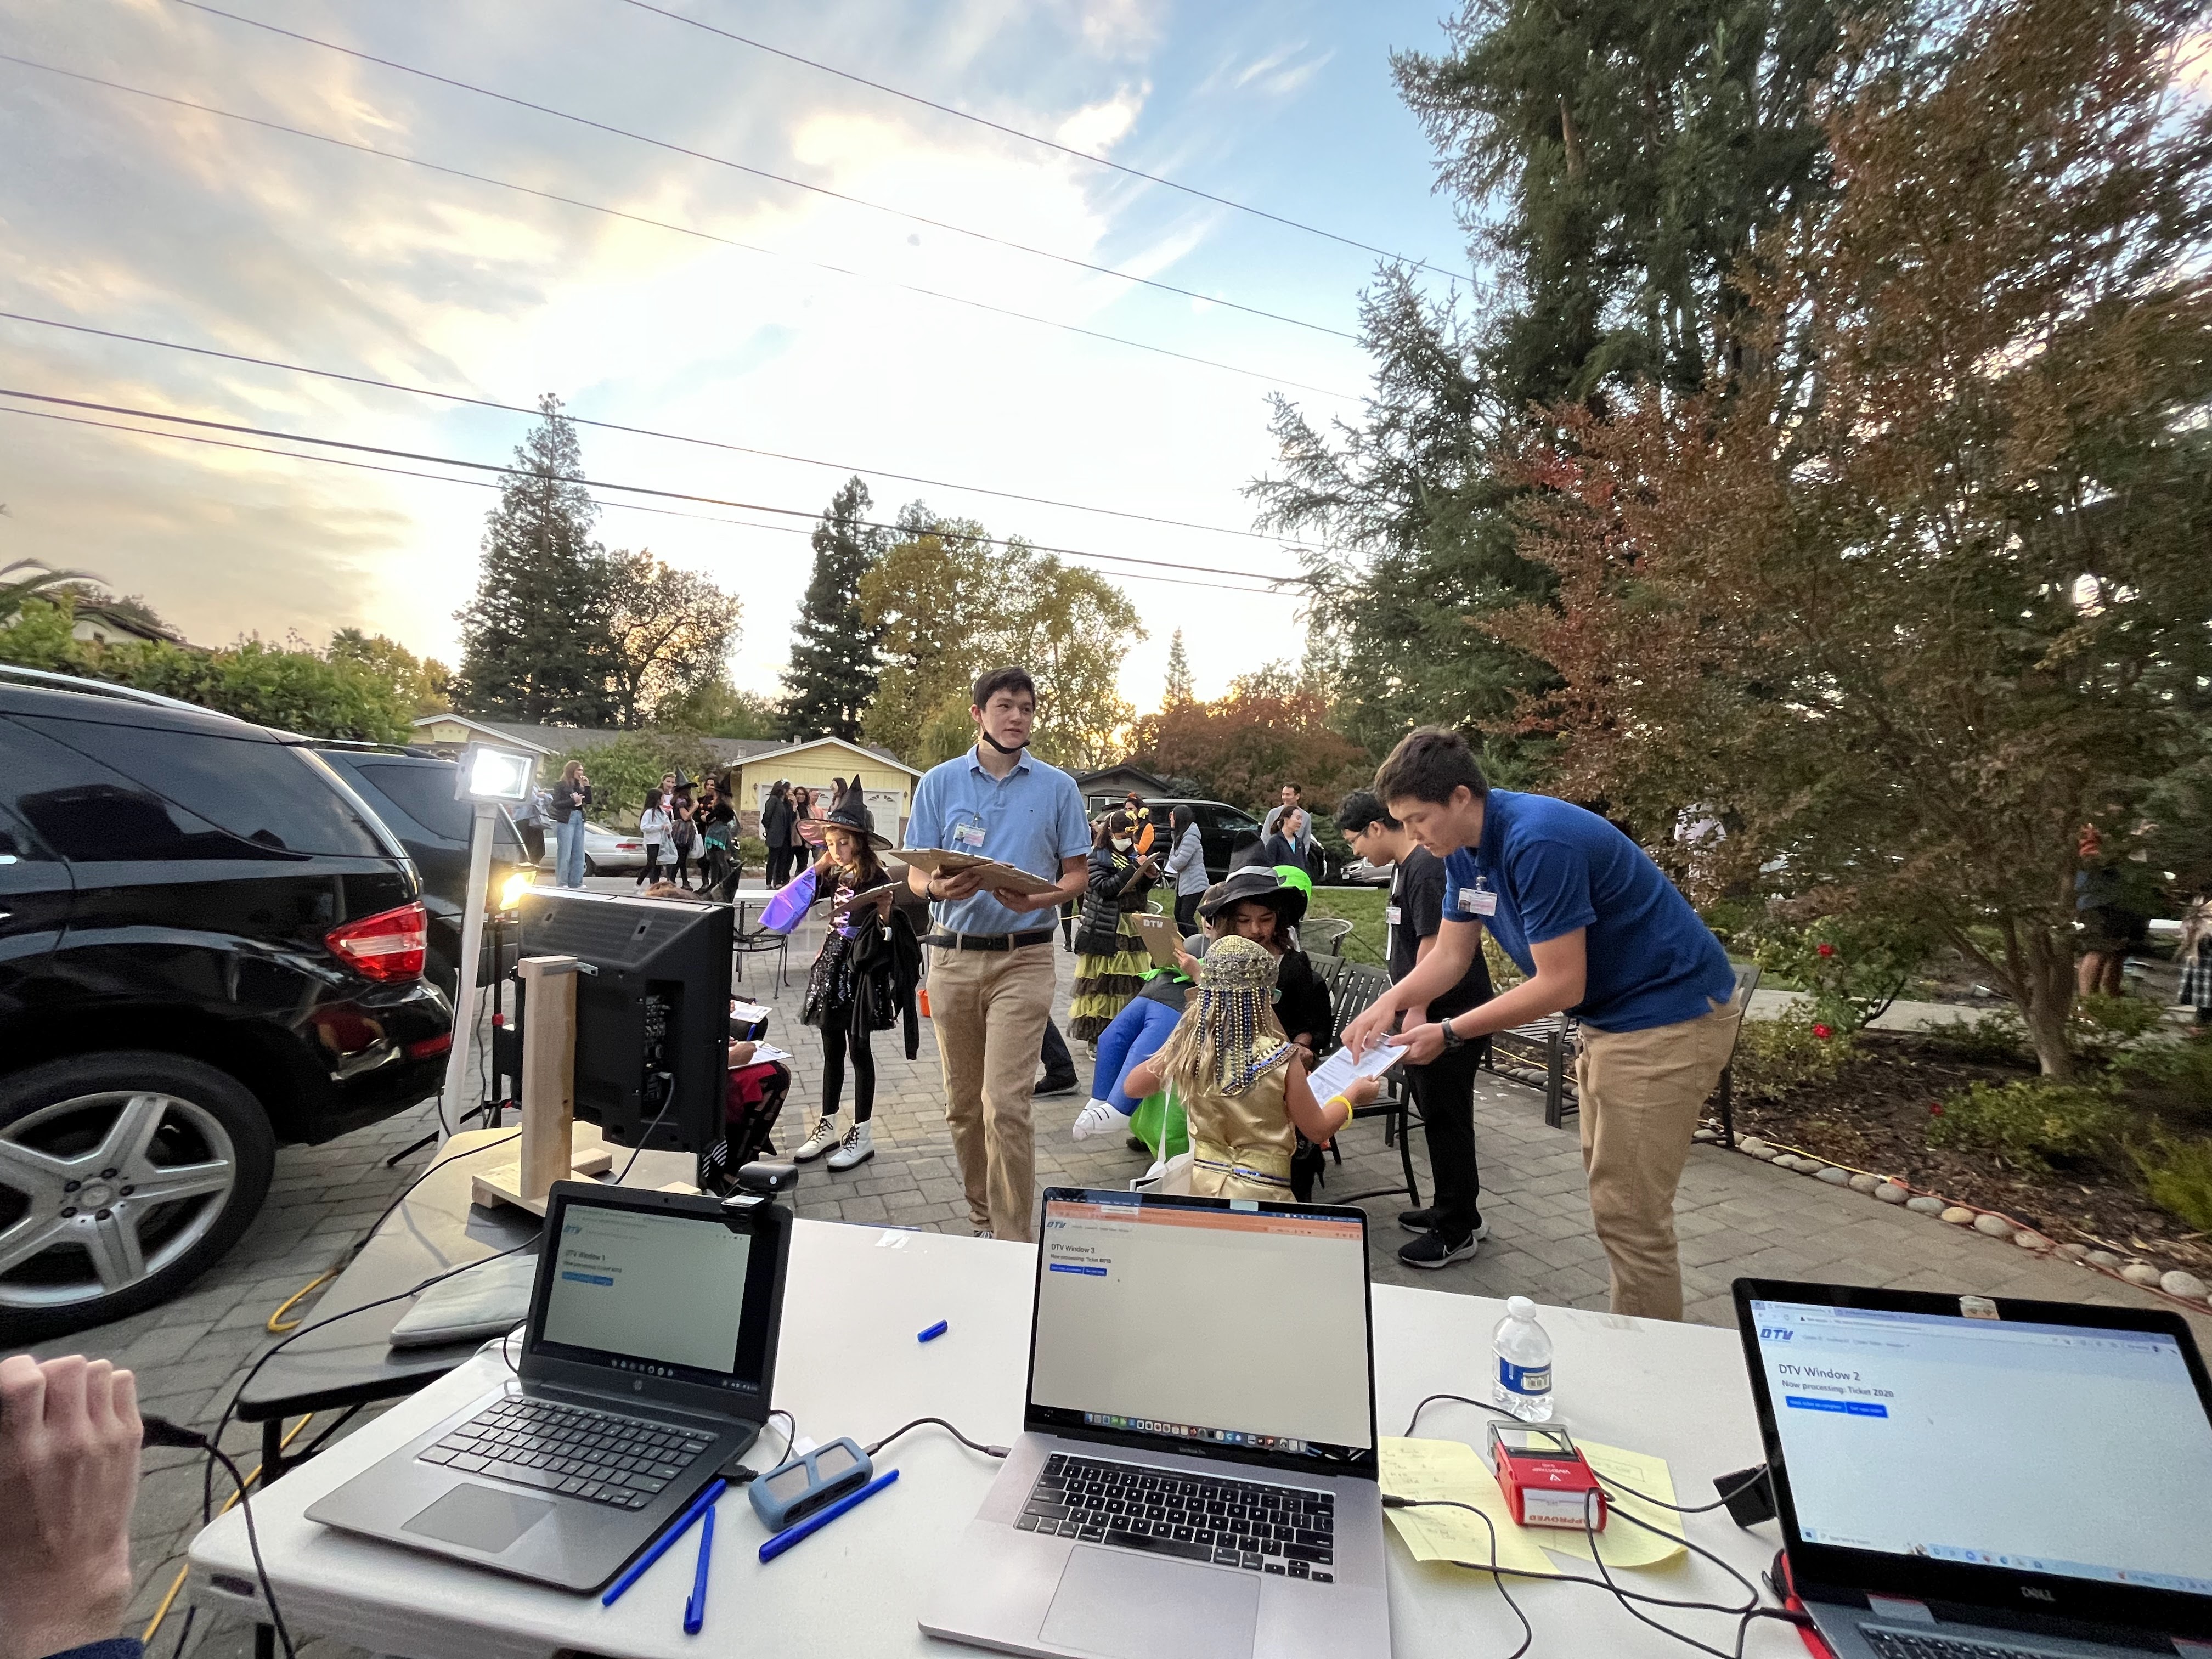
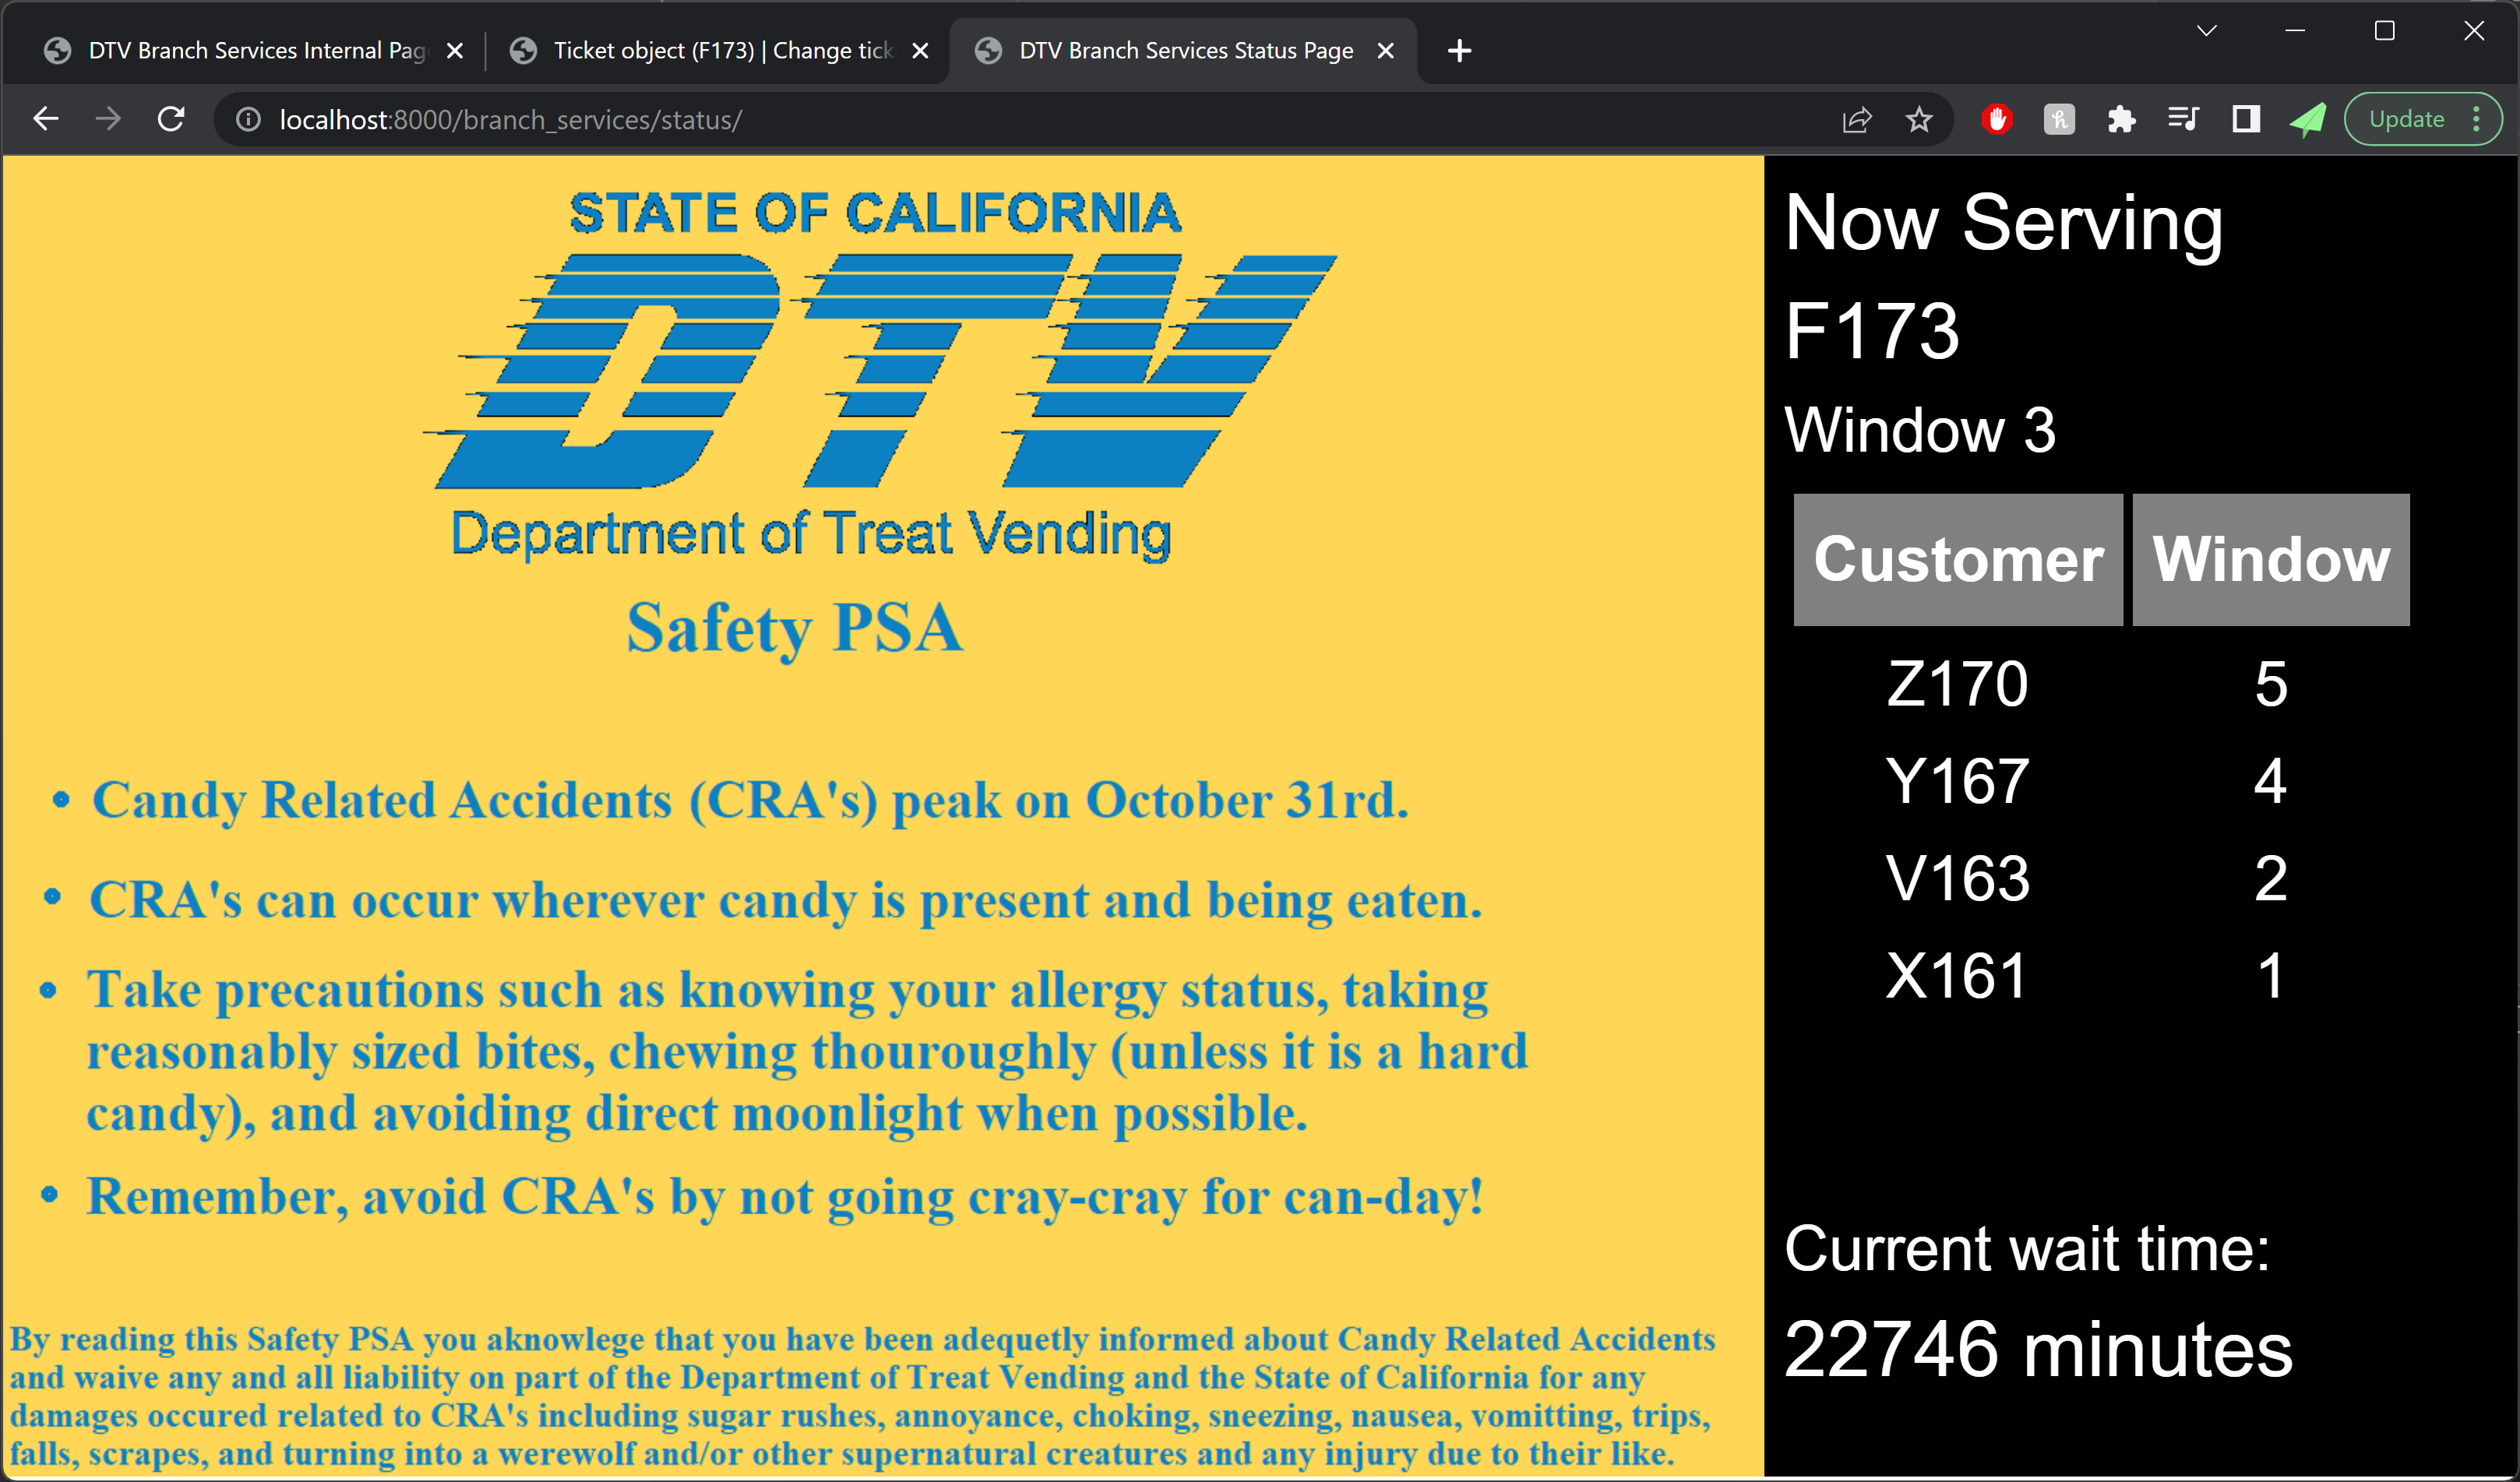
Once a trick-or-treater has received a ticket number and an RFC form, they proceed to the waiting area where they fill out their RFC form with the relevant details and wait for their number to be called by the automatic ticket calling system. Current wait time and ticket numbers being served are displayed on the ticketing system display, and new tickets are automatically verbally announced by the ticketing system when they are called. The ticketing system also displays a delightful collection of advertisements and Public Service Announcements on the screen to keep trick-or-treaters entertained and informed while they wait.

After a trick-or-treaters’ ticket number has been called by the ticketing system, they must proceed to their assigned service counter. Upon arriving at the service counter, the trick-or-treater’s RFC application is reviewed, and may be approved or denied based on the information provided. If the RFC application is denied, the trick-or-treater may be asked to correct the deficiencies in their form and return to the counter with another ticket number, or fix their RFC form at the counter. If the RFC application is approved, the service counter attendant creates a Treat License ID card using the information included on the RFC form, and may take an ID photo of the applicant for use on the card if the applicant consents.
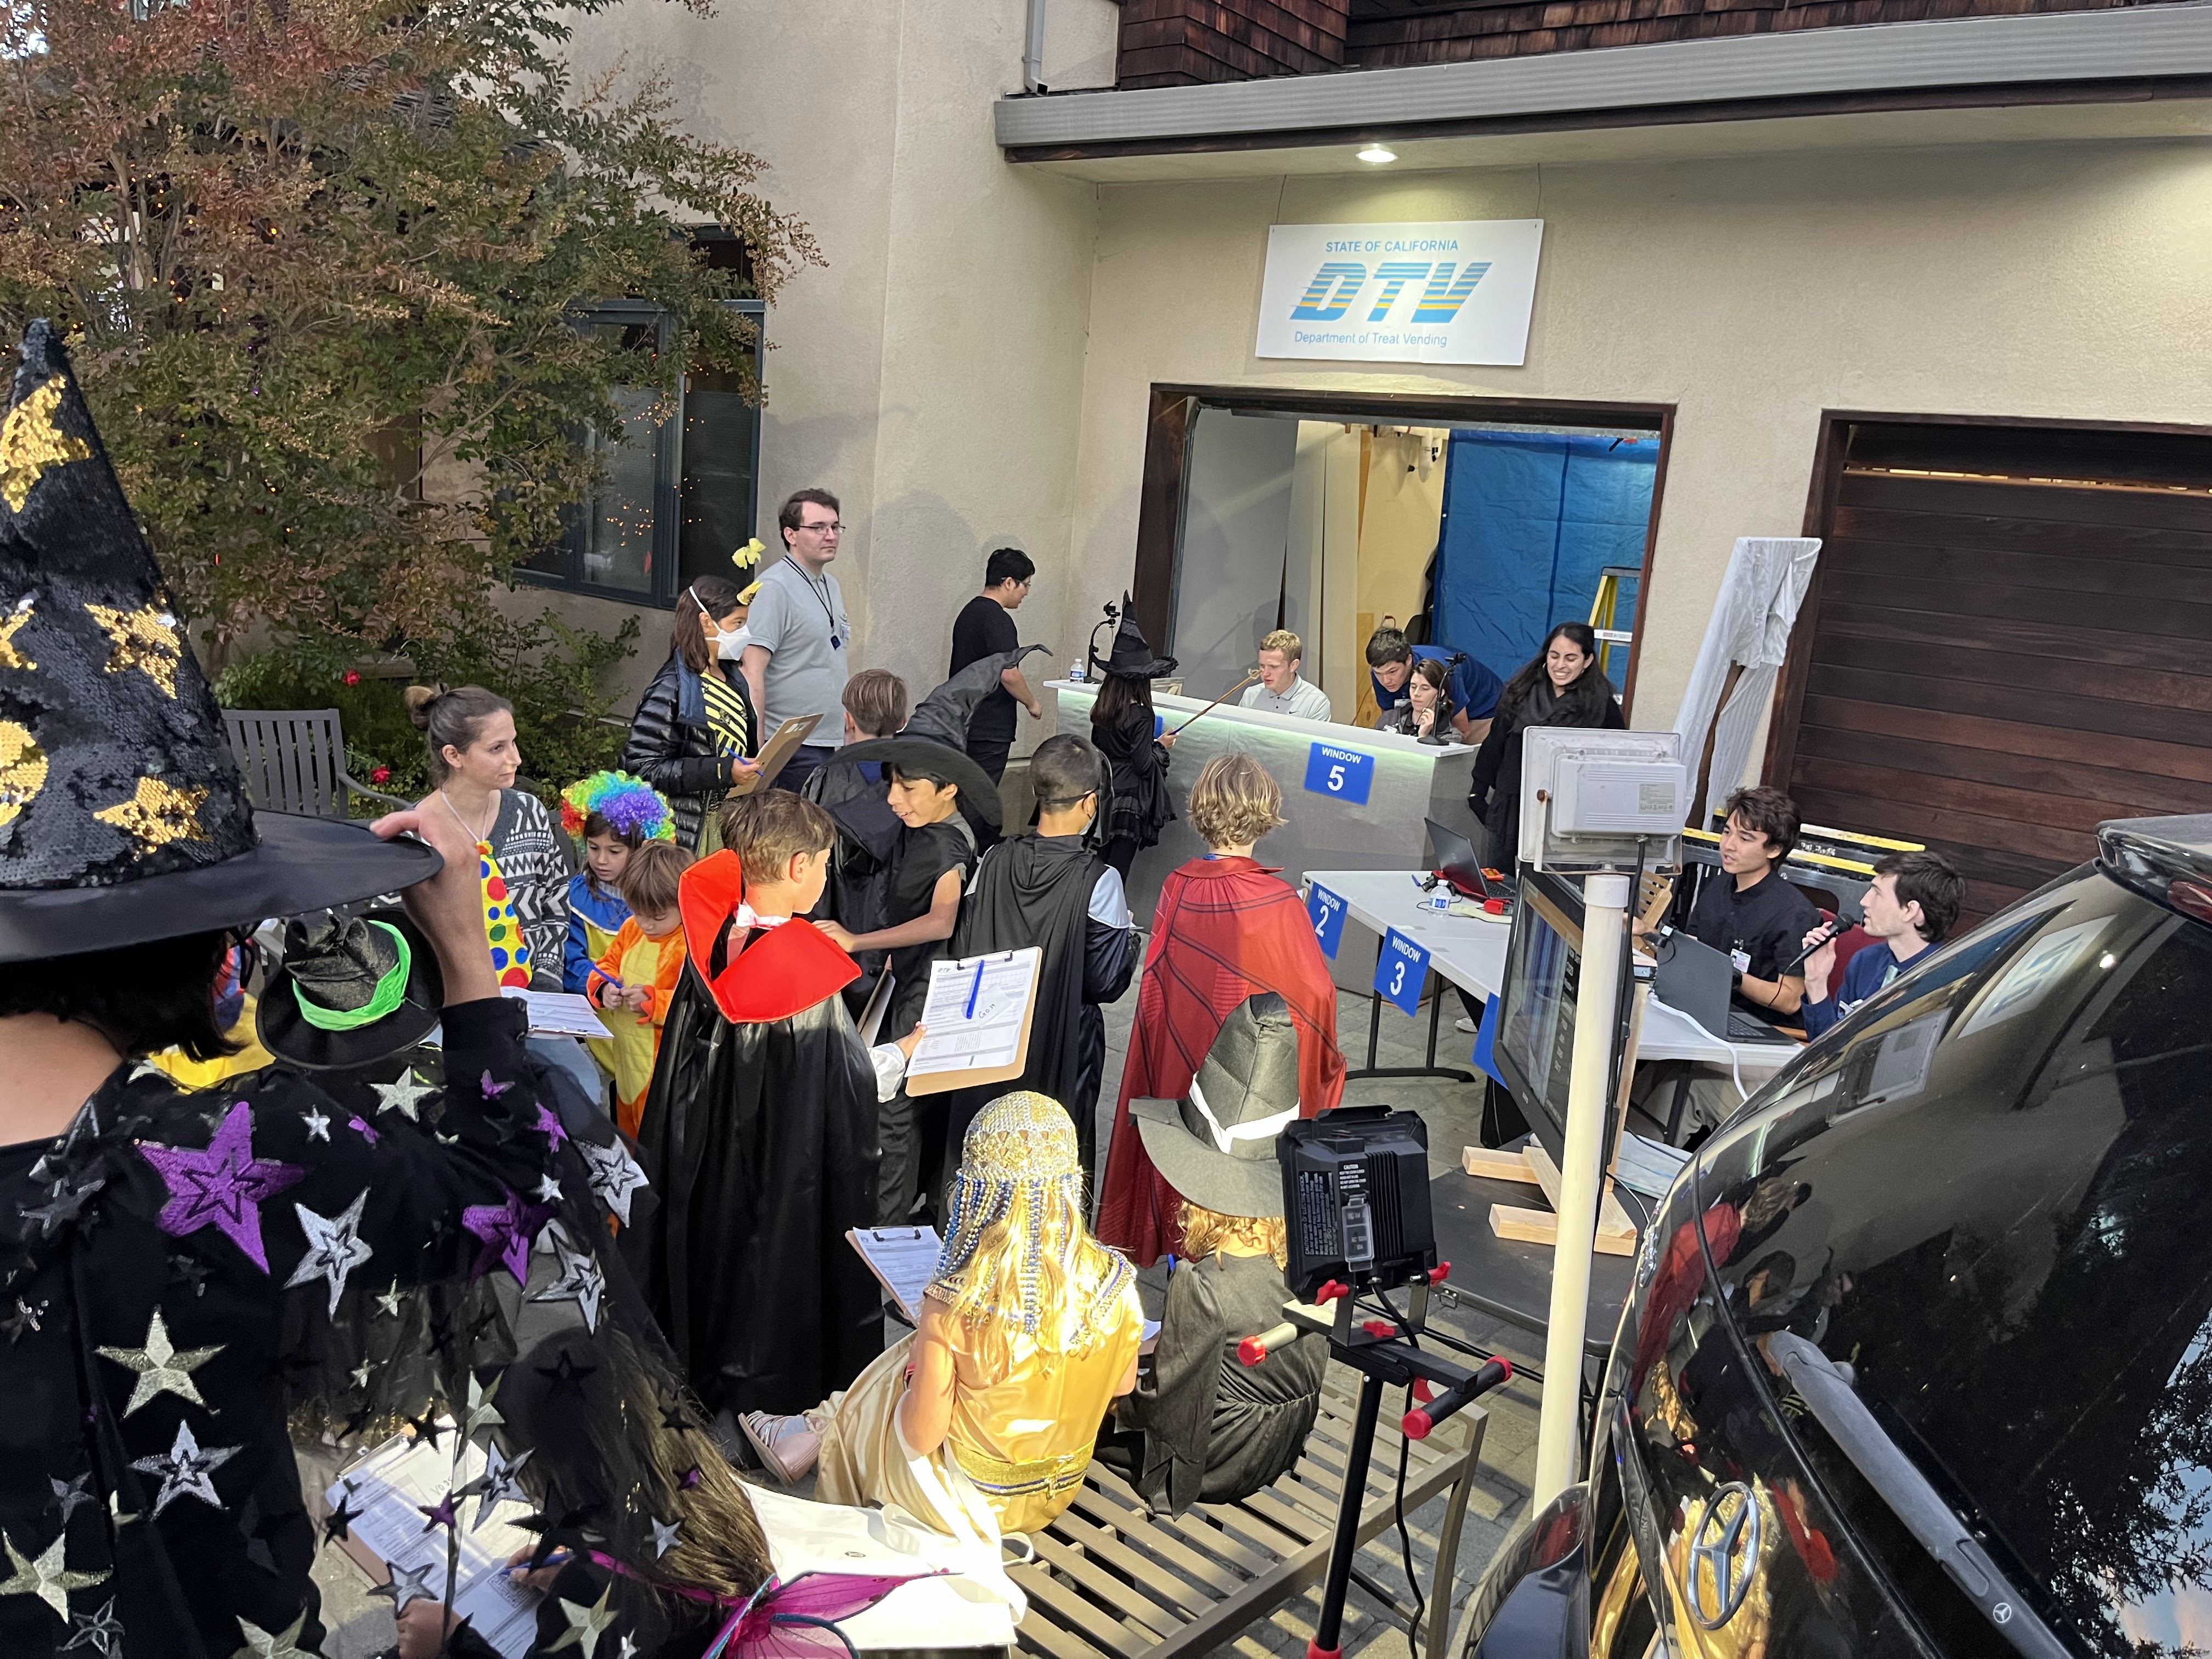
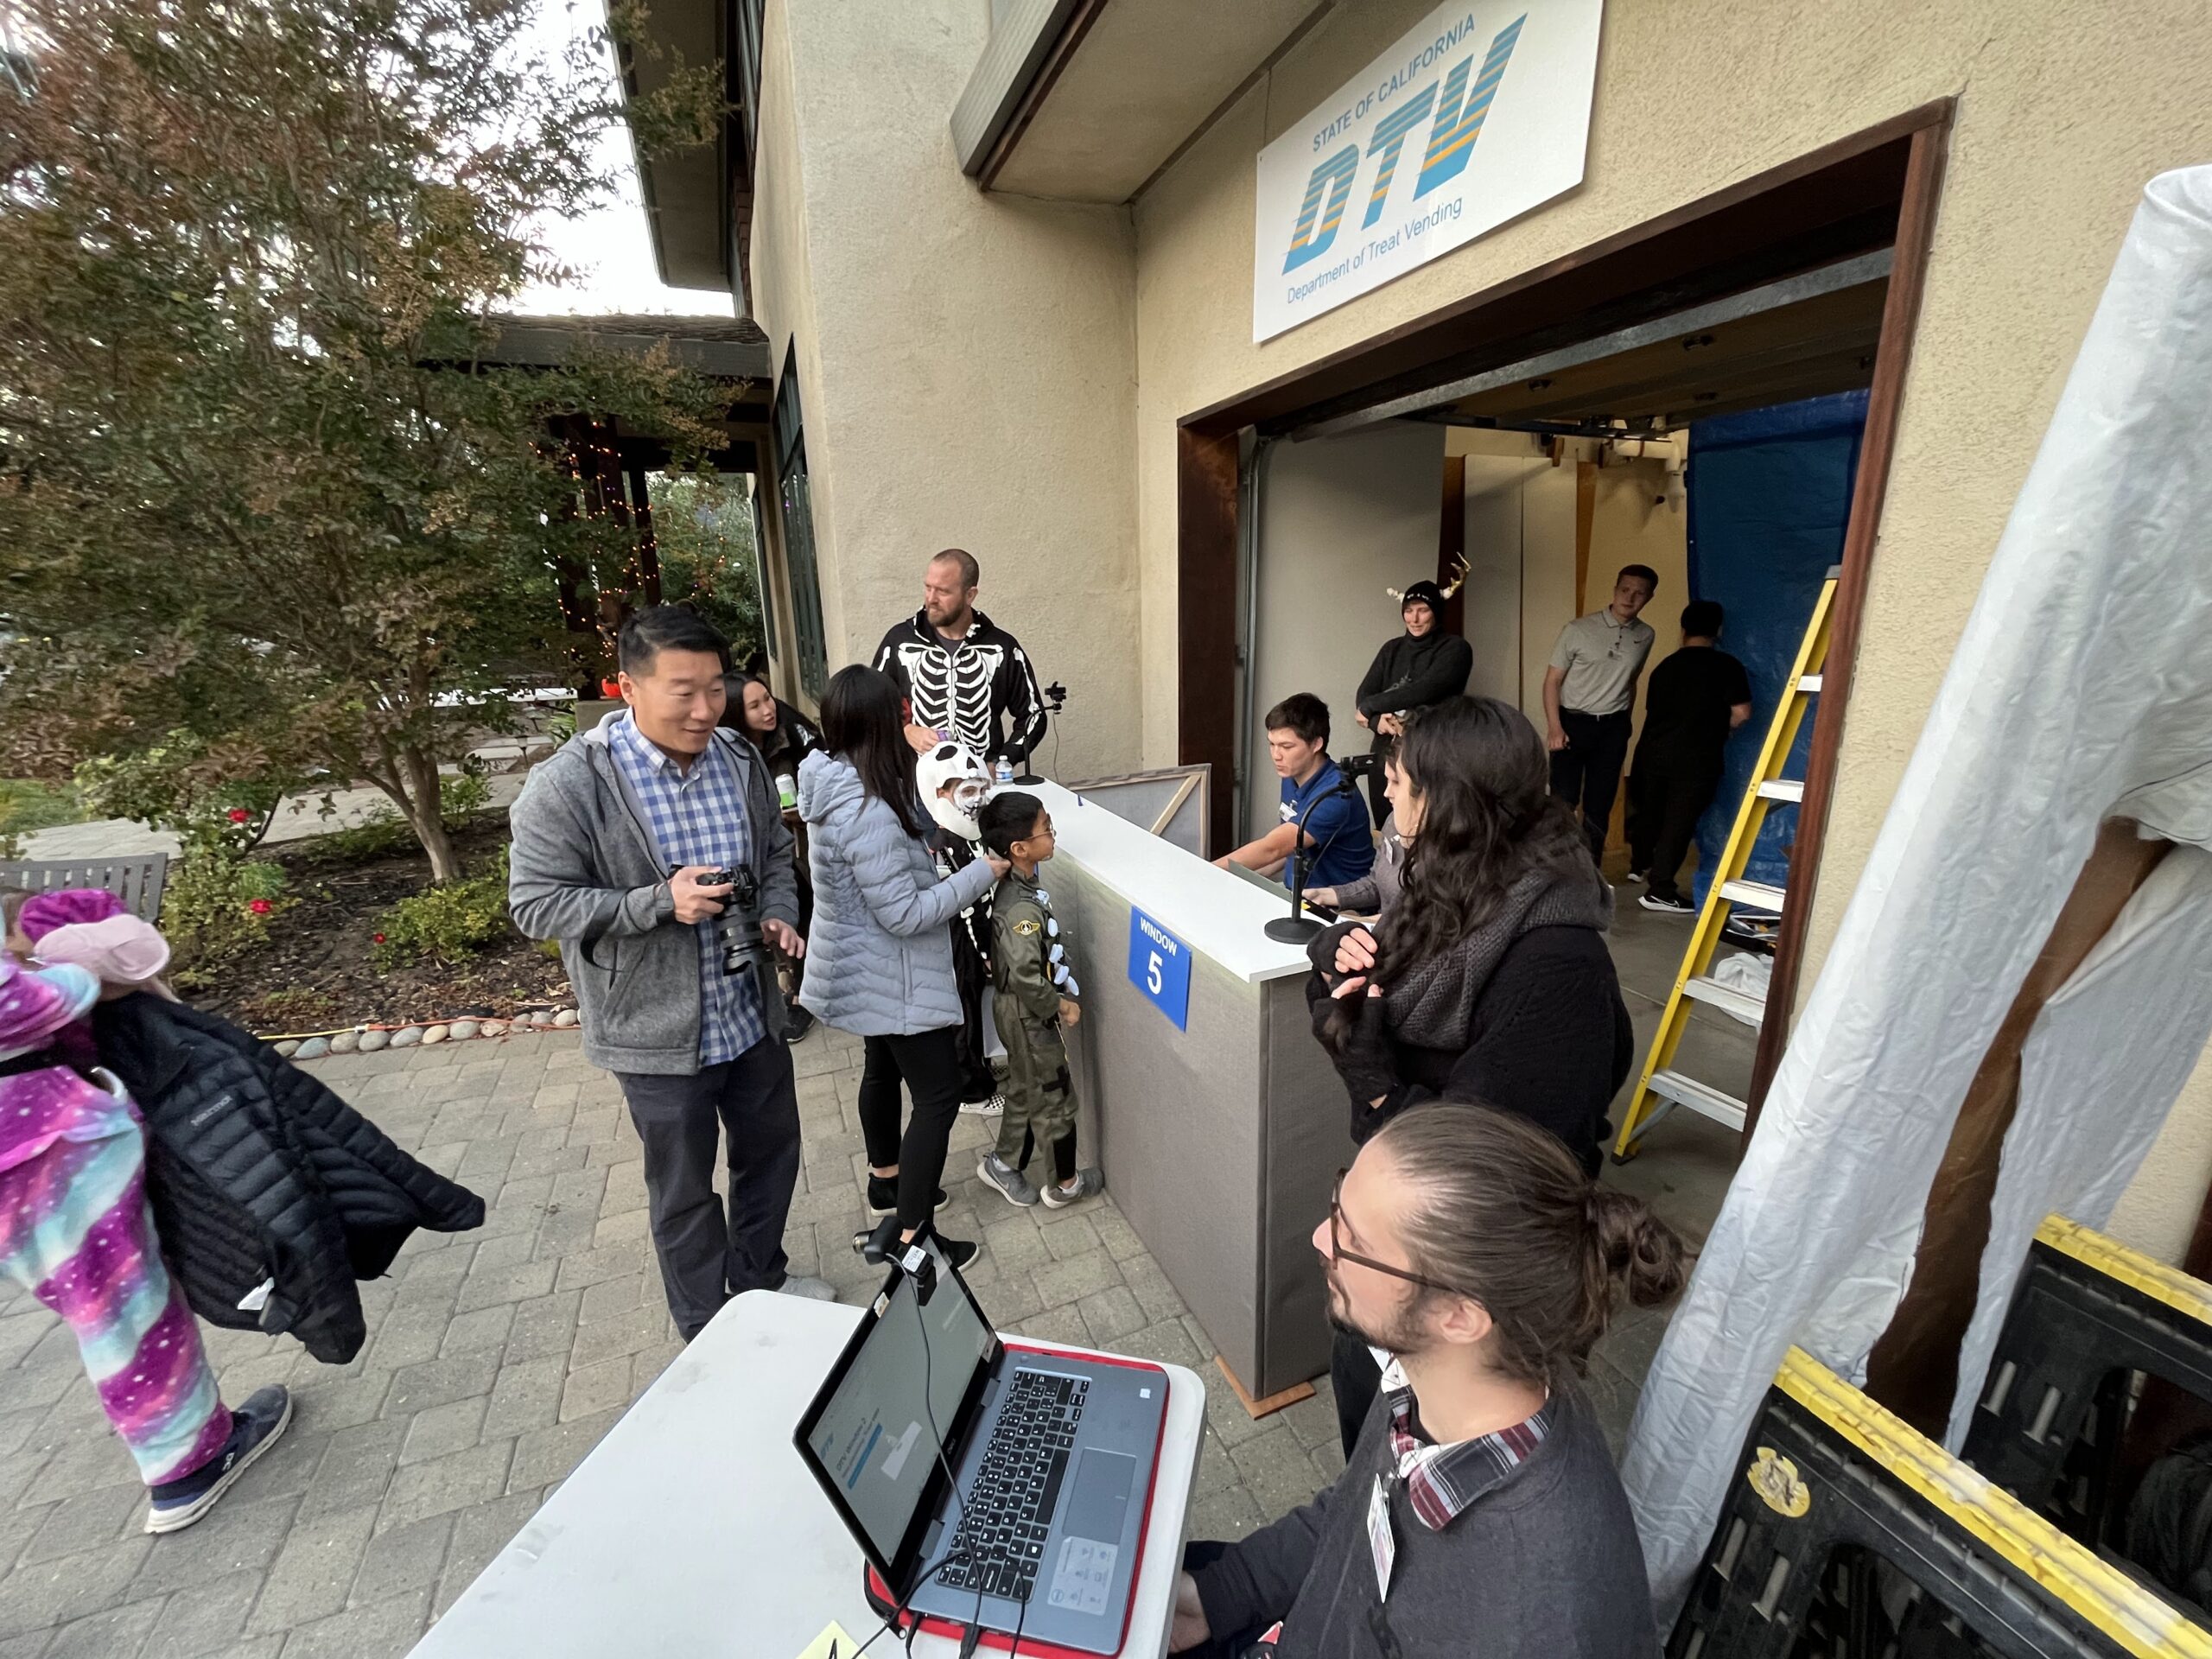
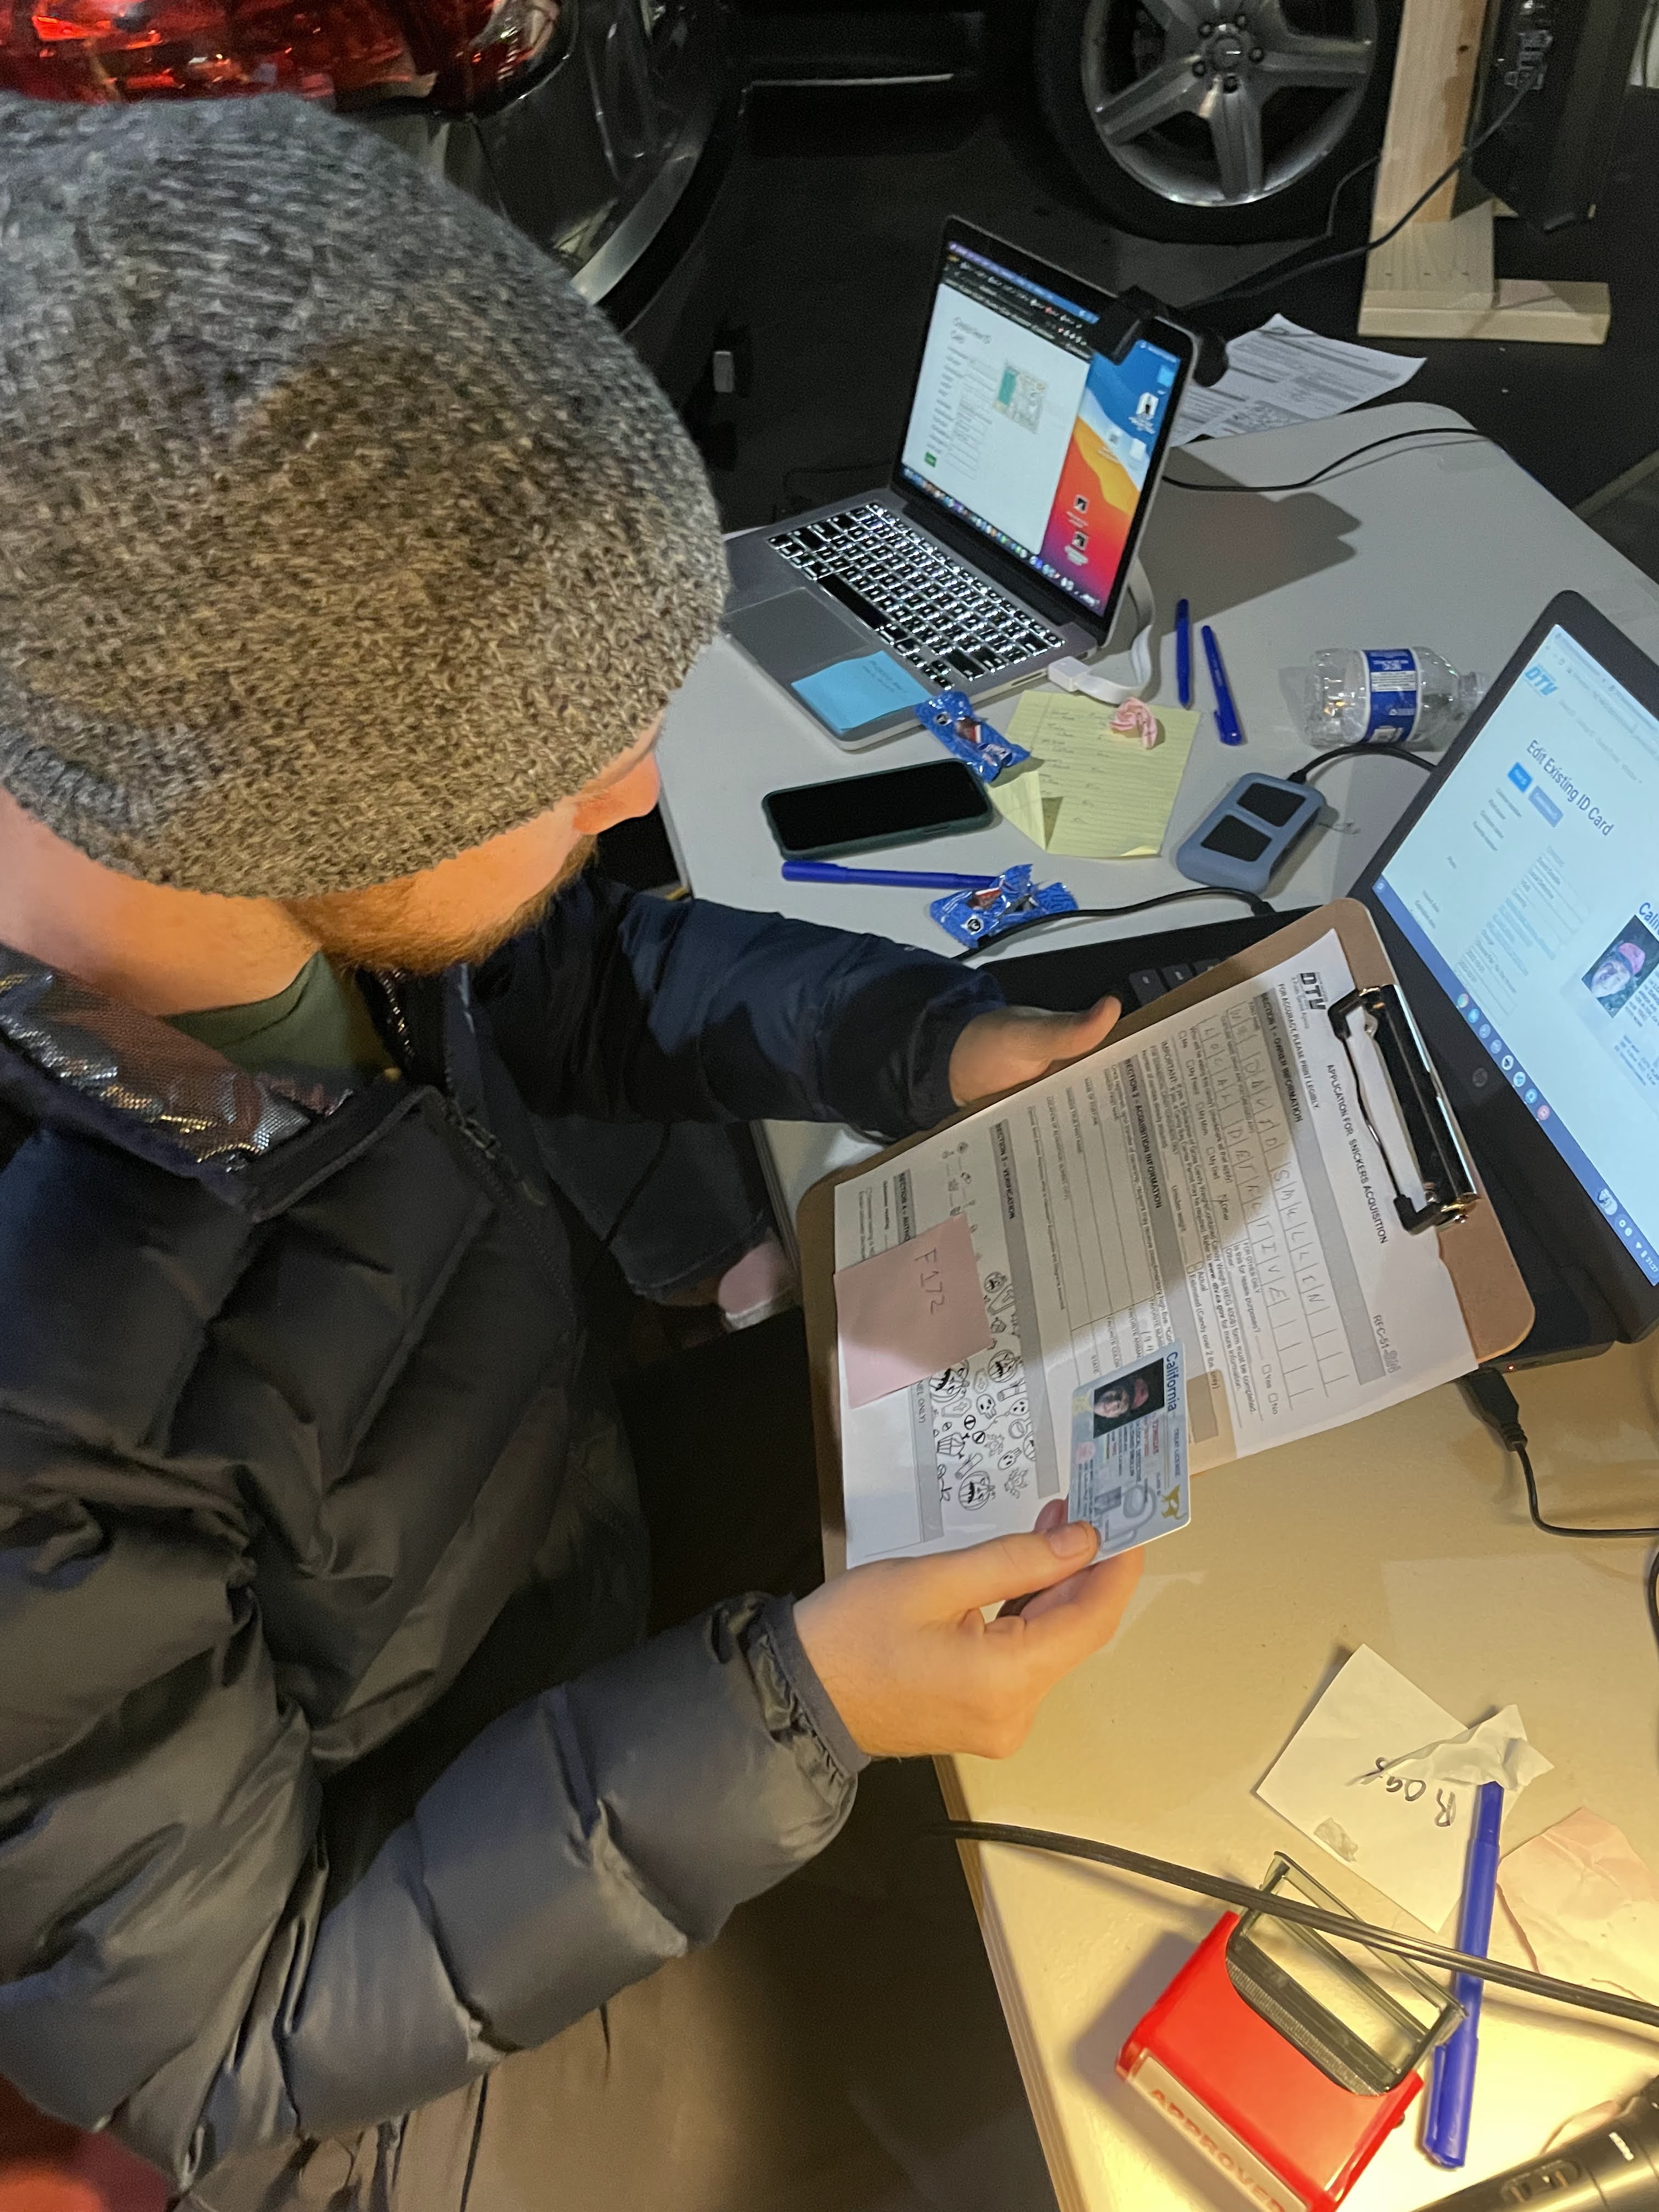

Once a standard Treat License ID has been printed, the trick-or-treater is handed back their application form (stamped with “Approved” and relevant service desk information), along with the ID card and the relevant full-size candy bar.
The DTV proved to be incredibly popular among trick-or-treaters; during its four hours of operation in 2022, it issued 269 unique Treat Licenses (and the same number of corresponding full-size candy bars).
Full walkthrough:
The Crew
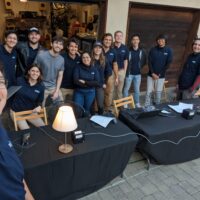
The DTV was a very ambitious halloween costume, and it would not have been able to come together successfully without the help of a number of dedicated friends and coworkers. Caitlin and I set up the IT systems behind the DTV, and Kenneth built out the graphics assets, employee ID cards, and treat forms, but many many hours of costume assembly, setup, and operation were made into light work by the excellent crew who showed up to help out.

How It Works
The DTV costume was primarily a custom IT infrastructure project, with some web development, arts and crafts, and graphic design thrown in for good measure.
Ticketing System
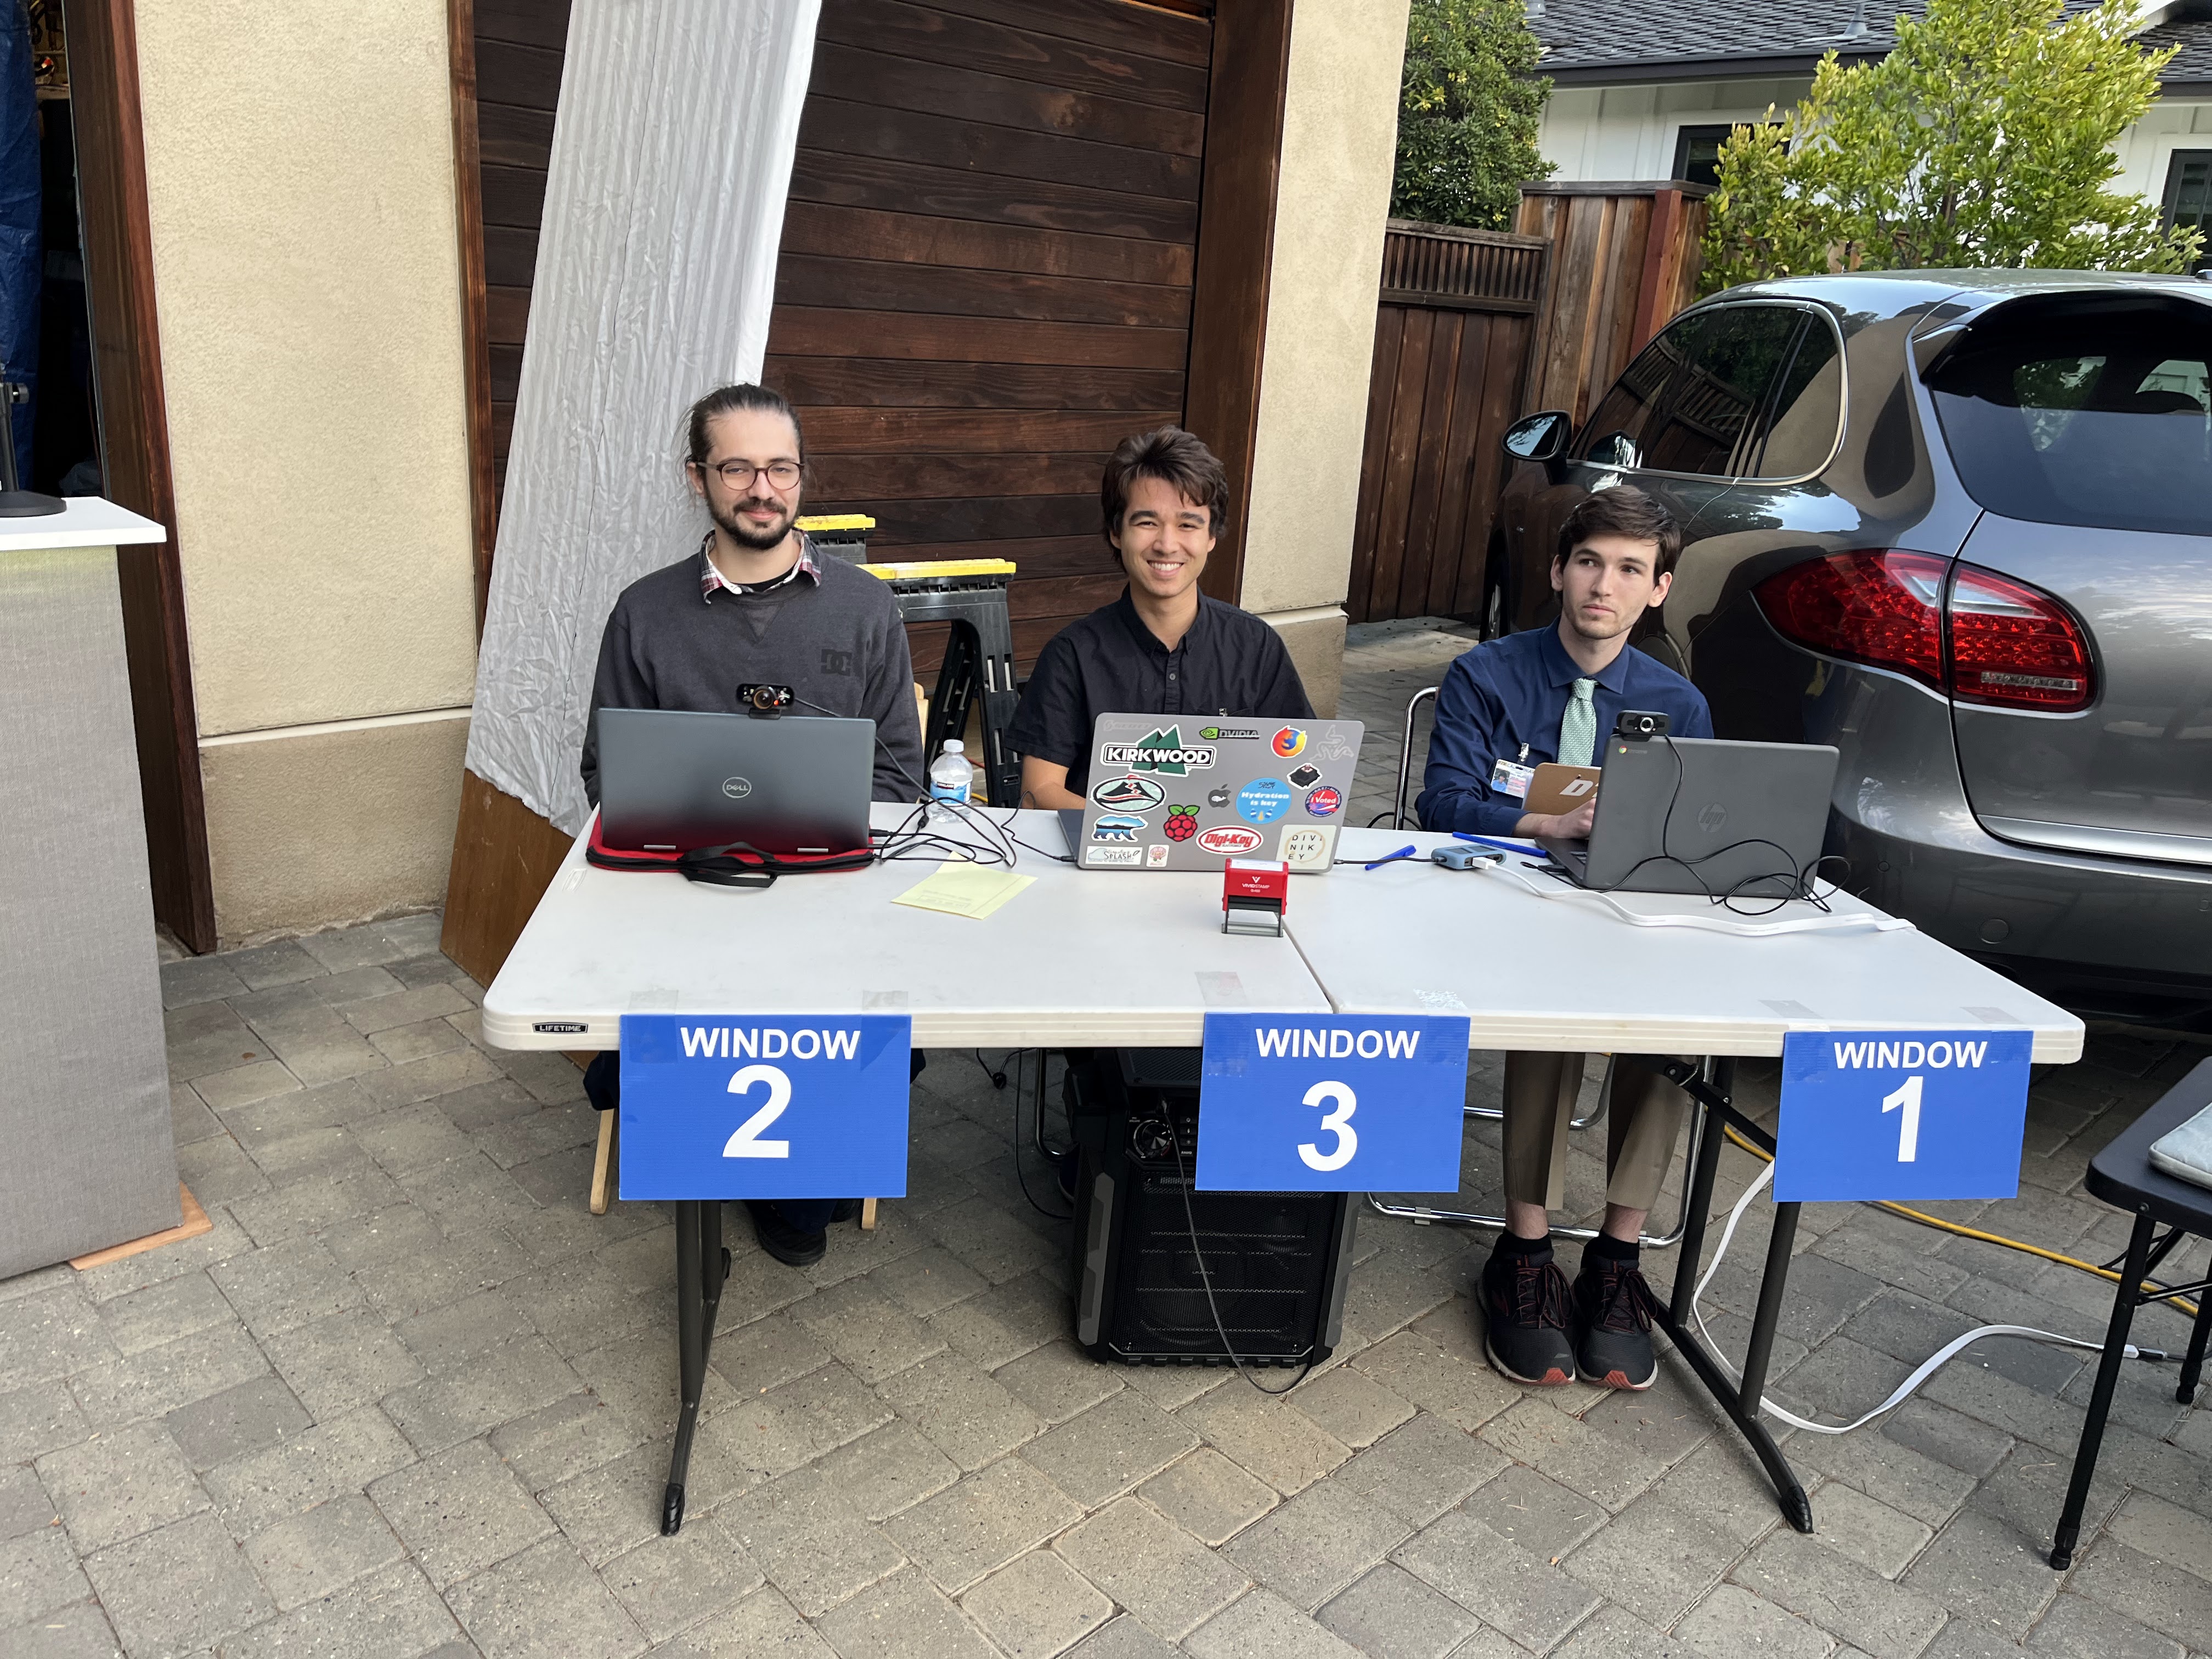
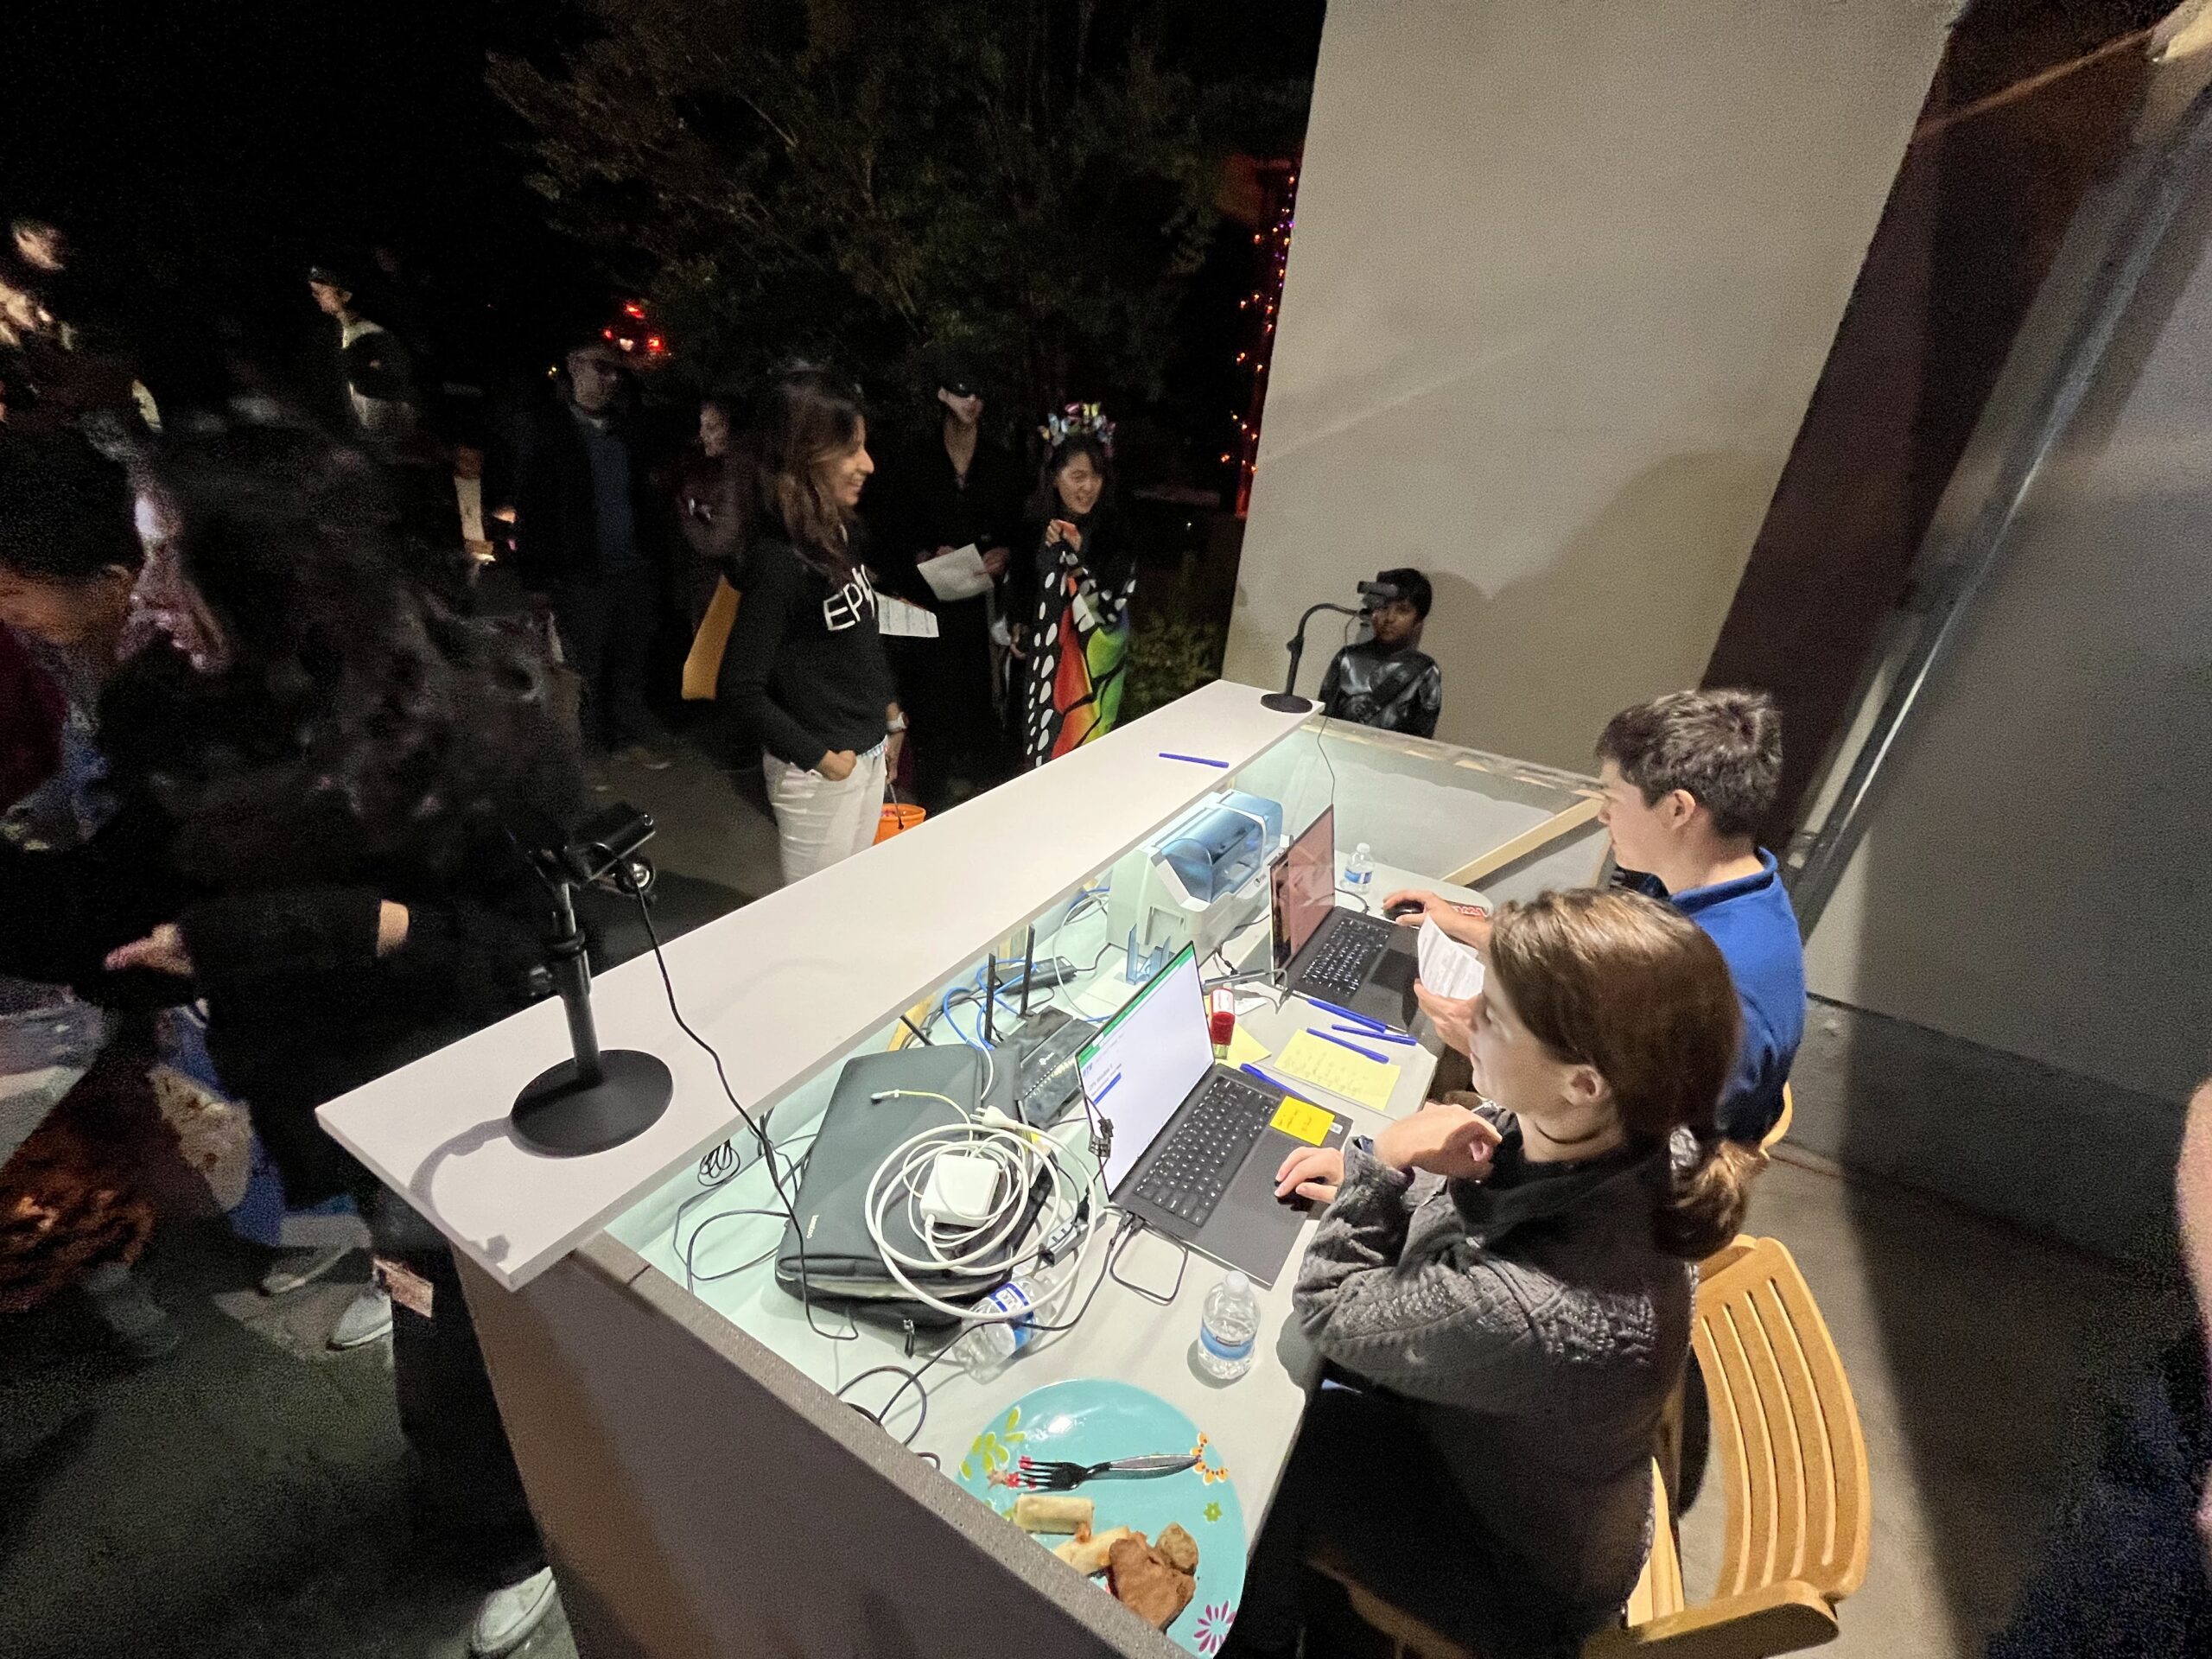
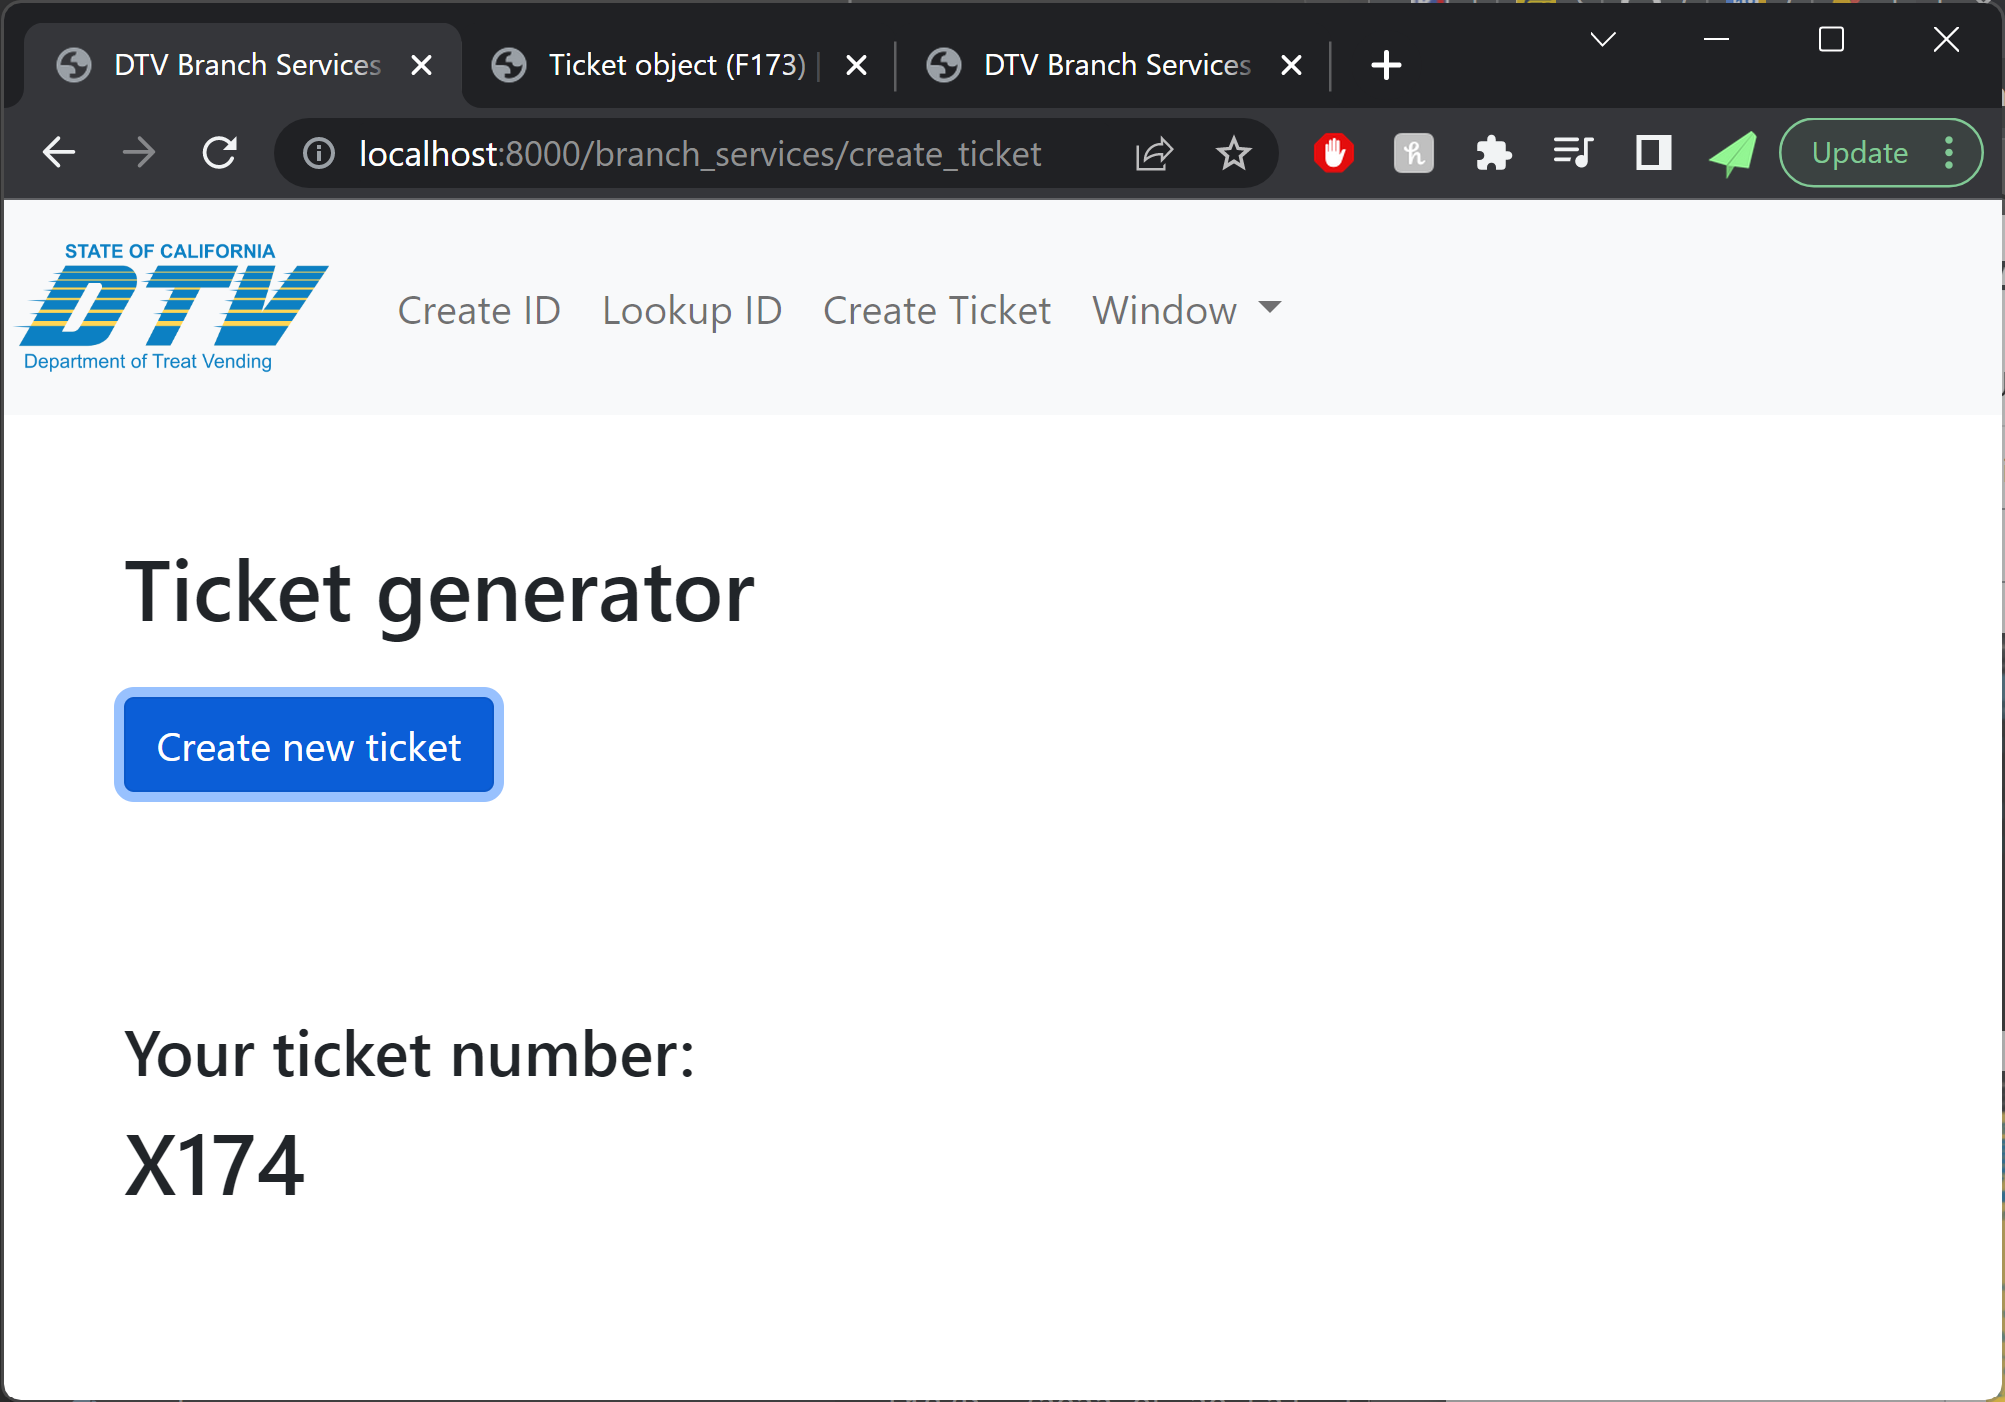
Trick-or-treaters arriving at the DTV are served on a first-come-first-served basis. In order to evoke the linoleum-floored-purgatory vibes of the DMV, as well as for the practical purpose of keeping order among the massive blob of children, we knew that we would need to implement an automated ticketing system.
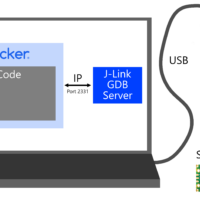
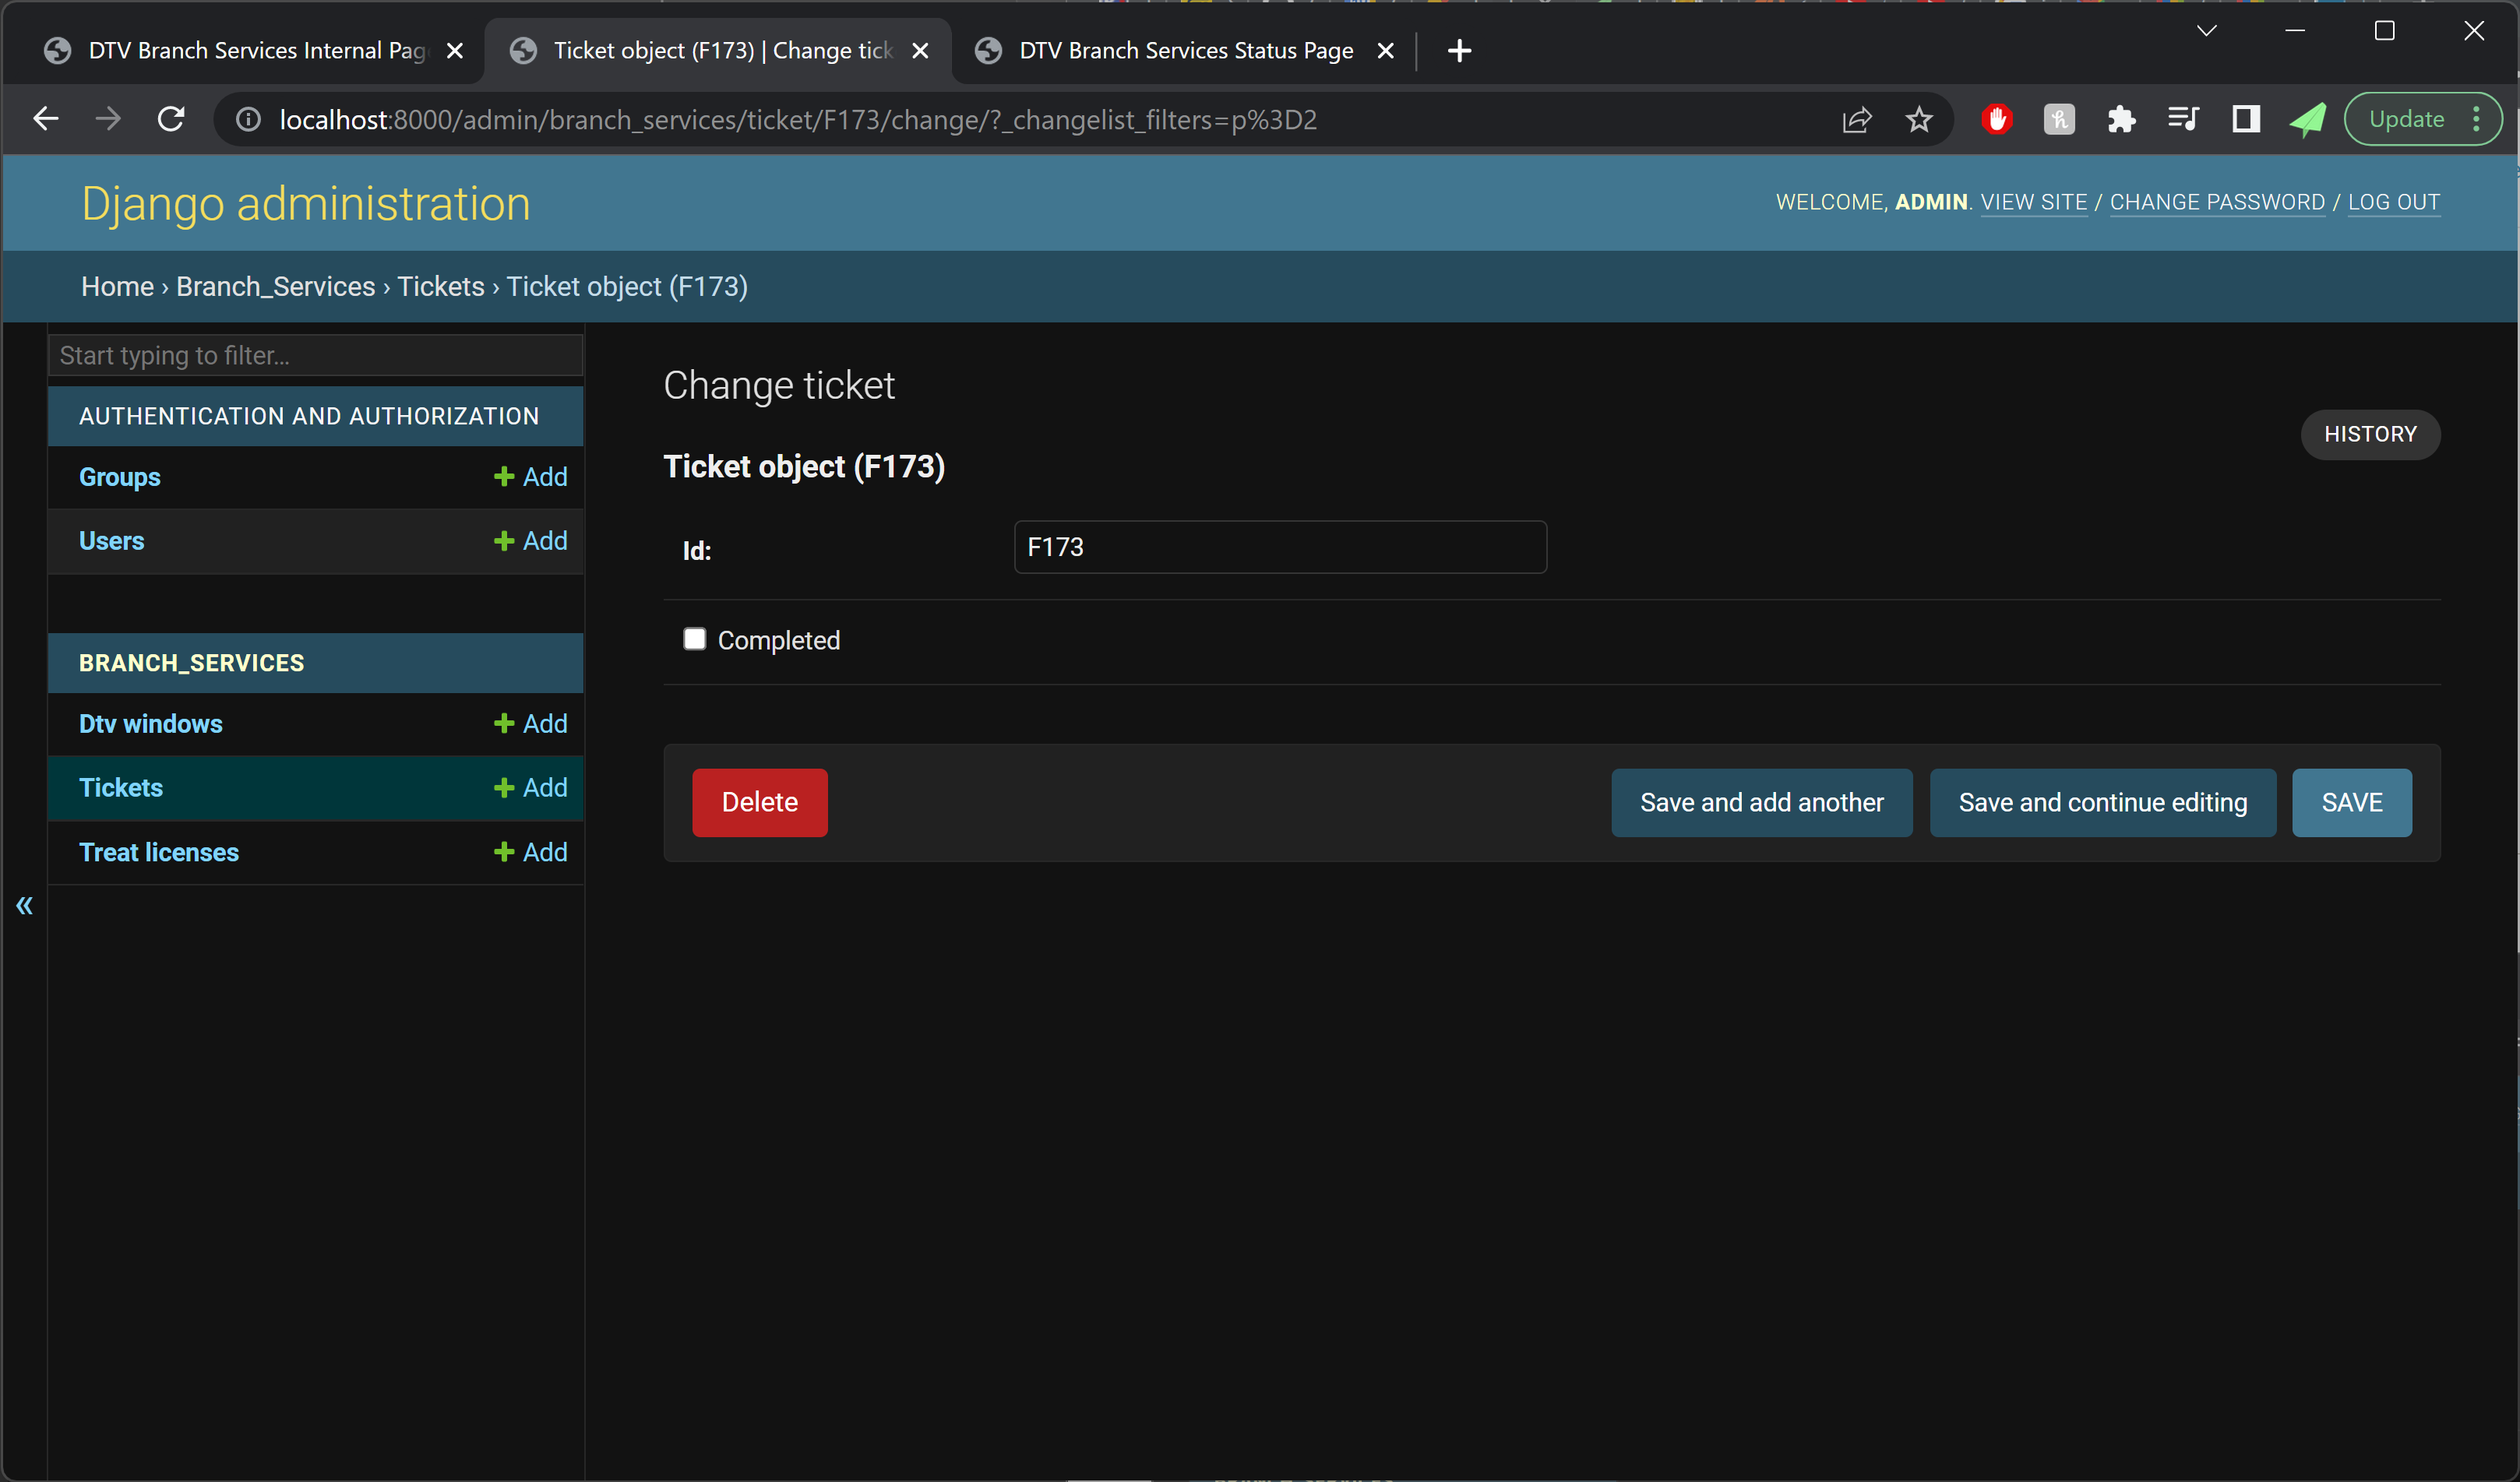
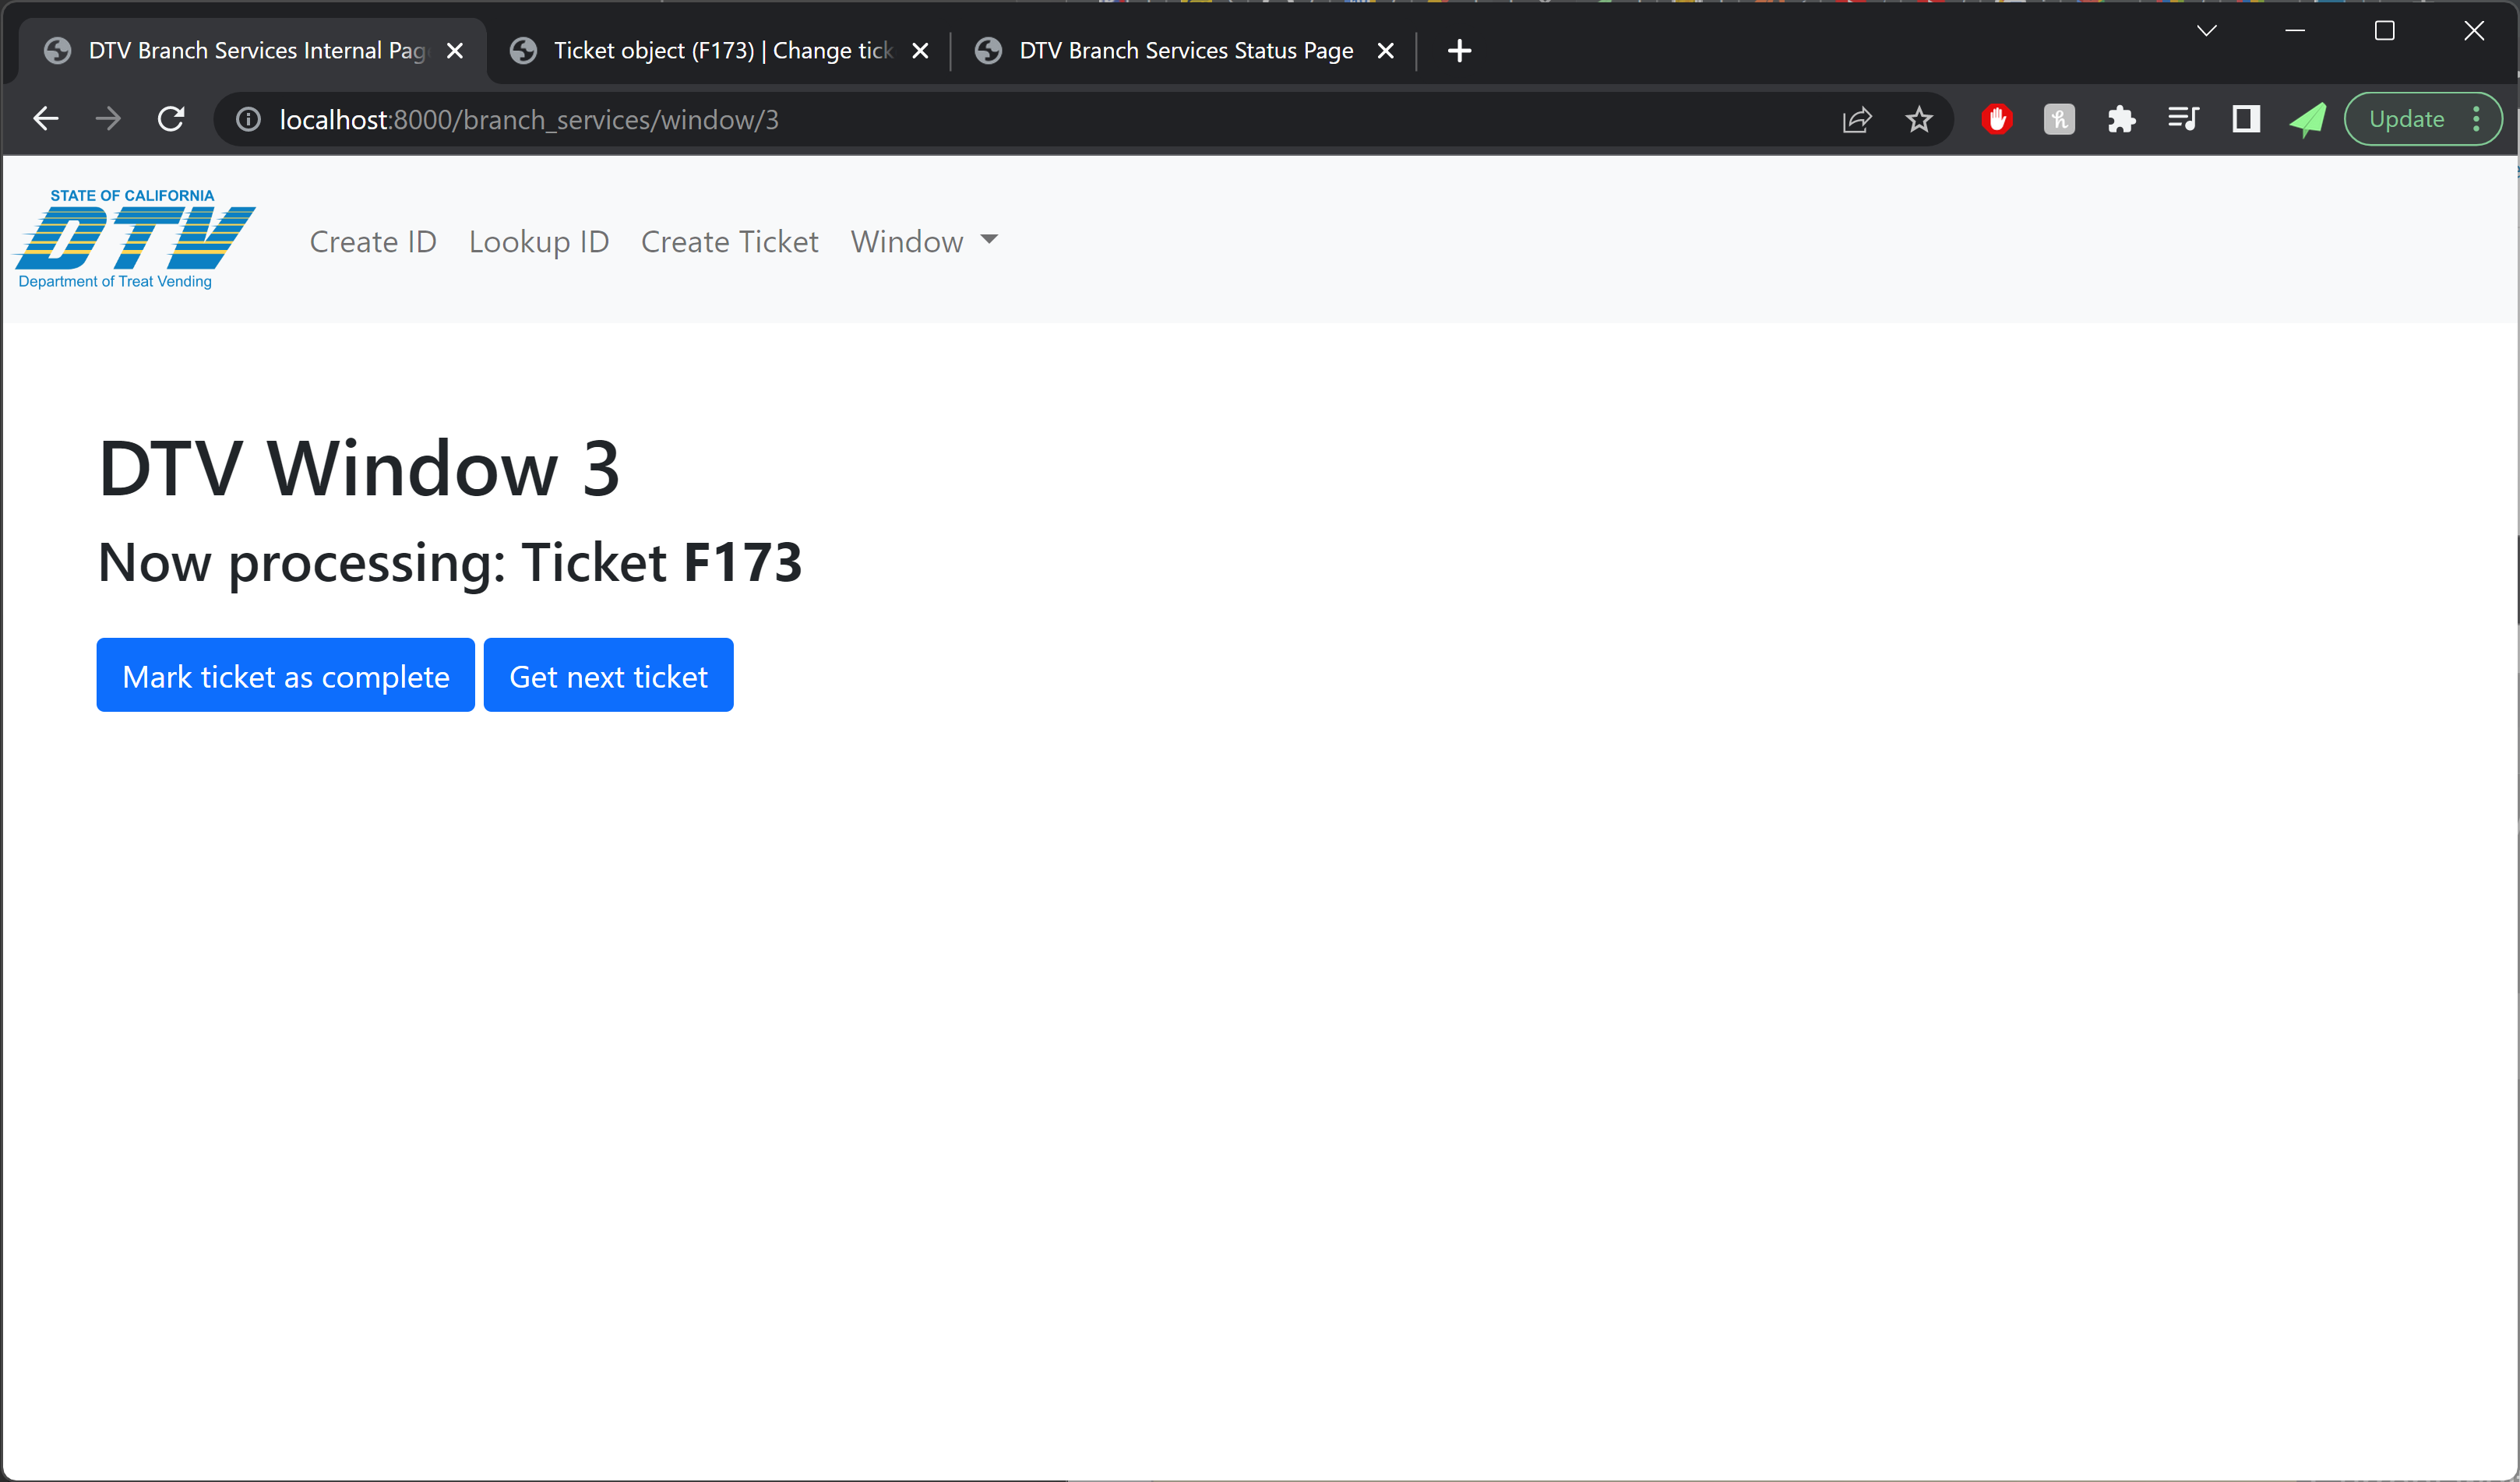
The DTV’s ticketing system is built by Caitlin in Django, with dedicated web pages for creating tickets, as well as consuming tickets from each available service window. Tickets are created by the employees at the RFC counter using the Create Ticket view, at which point they are added to a ticket database. Employees at a DTV service desk window can mark tickets as completed and ask for a new ticket number to be assigned to their window using the Window view. When new tickets are assigned to a window, they are displayed in the Status view, and announced via the text to speech API on the web browser of the machine driving the waiting area television display. Current wait time was estimated by looking at the time elapsed since the oldest still-incomplete ticket was created.
Overall, the ticketing system worked extremely well for the duration of the DTV’s operation. Wait times were estimated remarkably accurately (we topped out at a 23 minute wait time), no tickets were lost by the system, and window assignments were clear and never in conflict. We did encounter some issues with trick-or-treaters losing their ticket numbers, not going to their window when called, and then waiting infinitely while the service window assigned to them sat empty and eventually moved on to a new ticket. That said, these instances were rare and most trick-or-treaters who were assigned a ticket got processed in a timely manner.
ID Card Creation
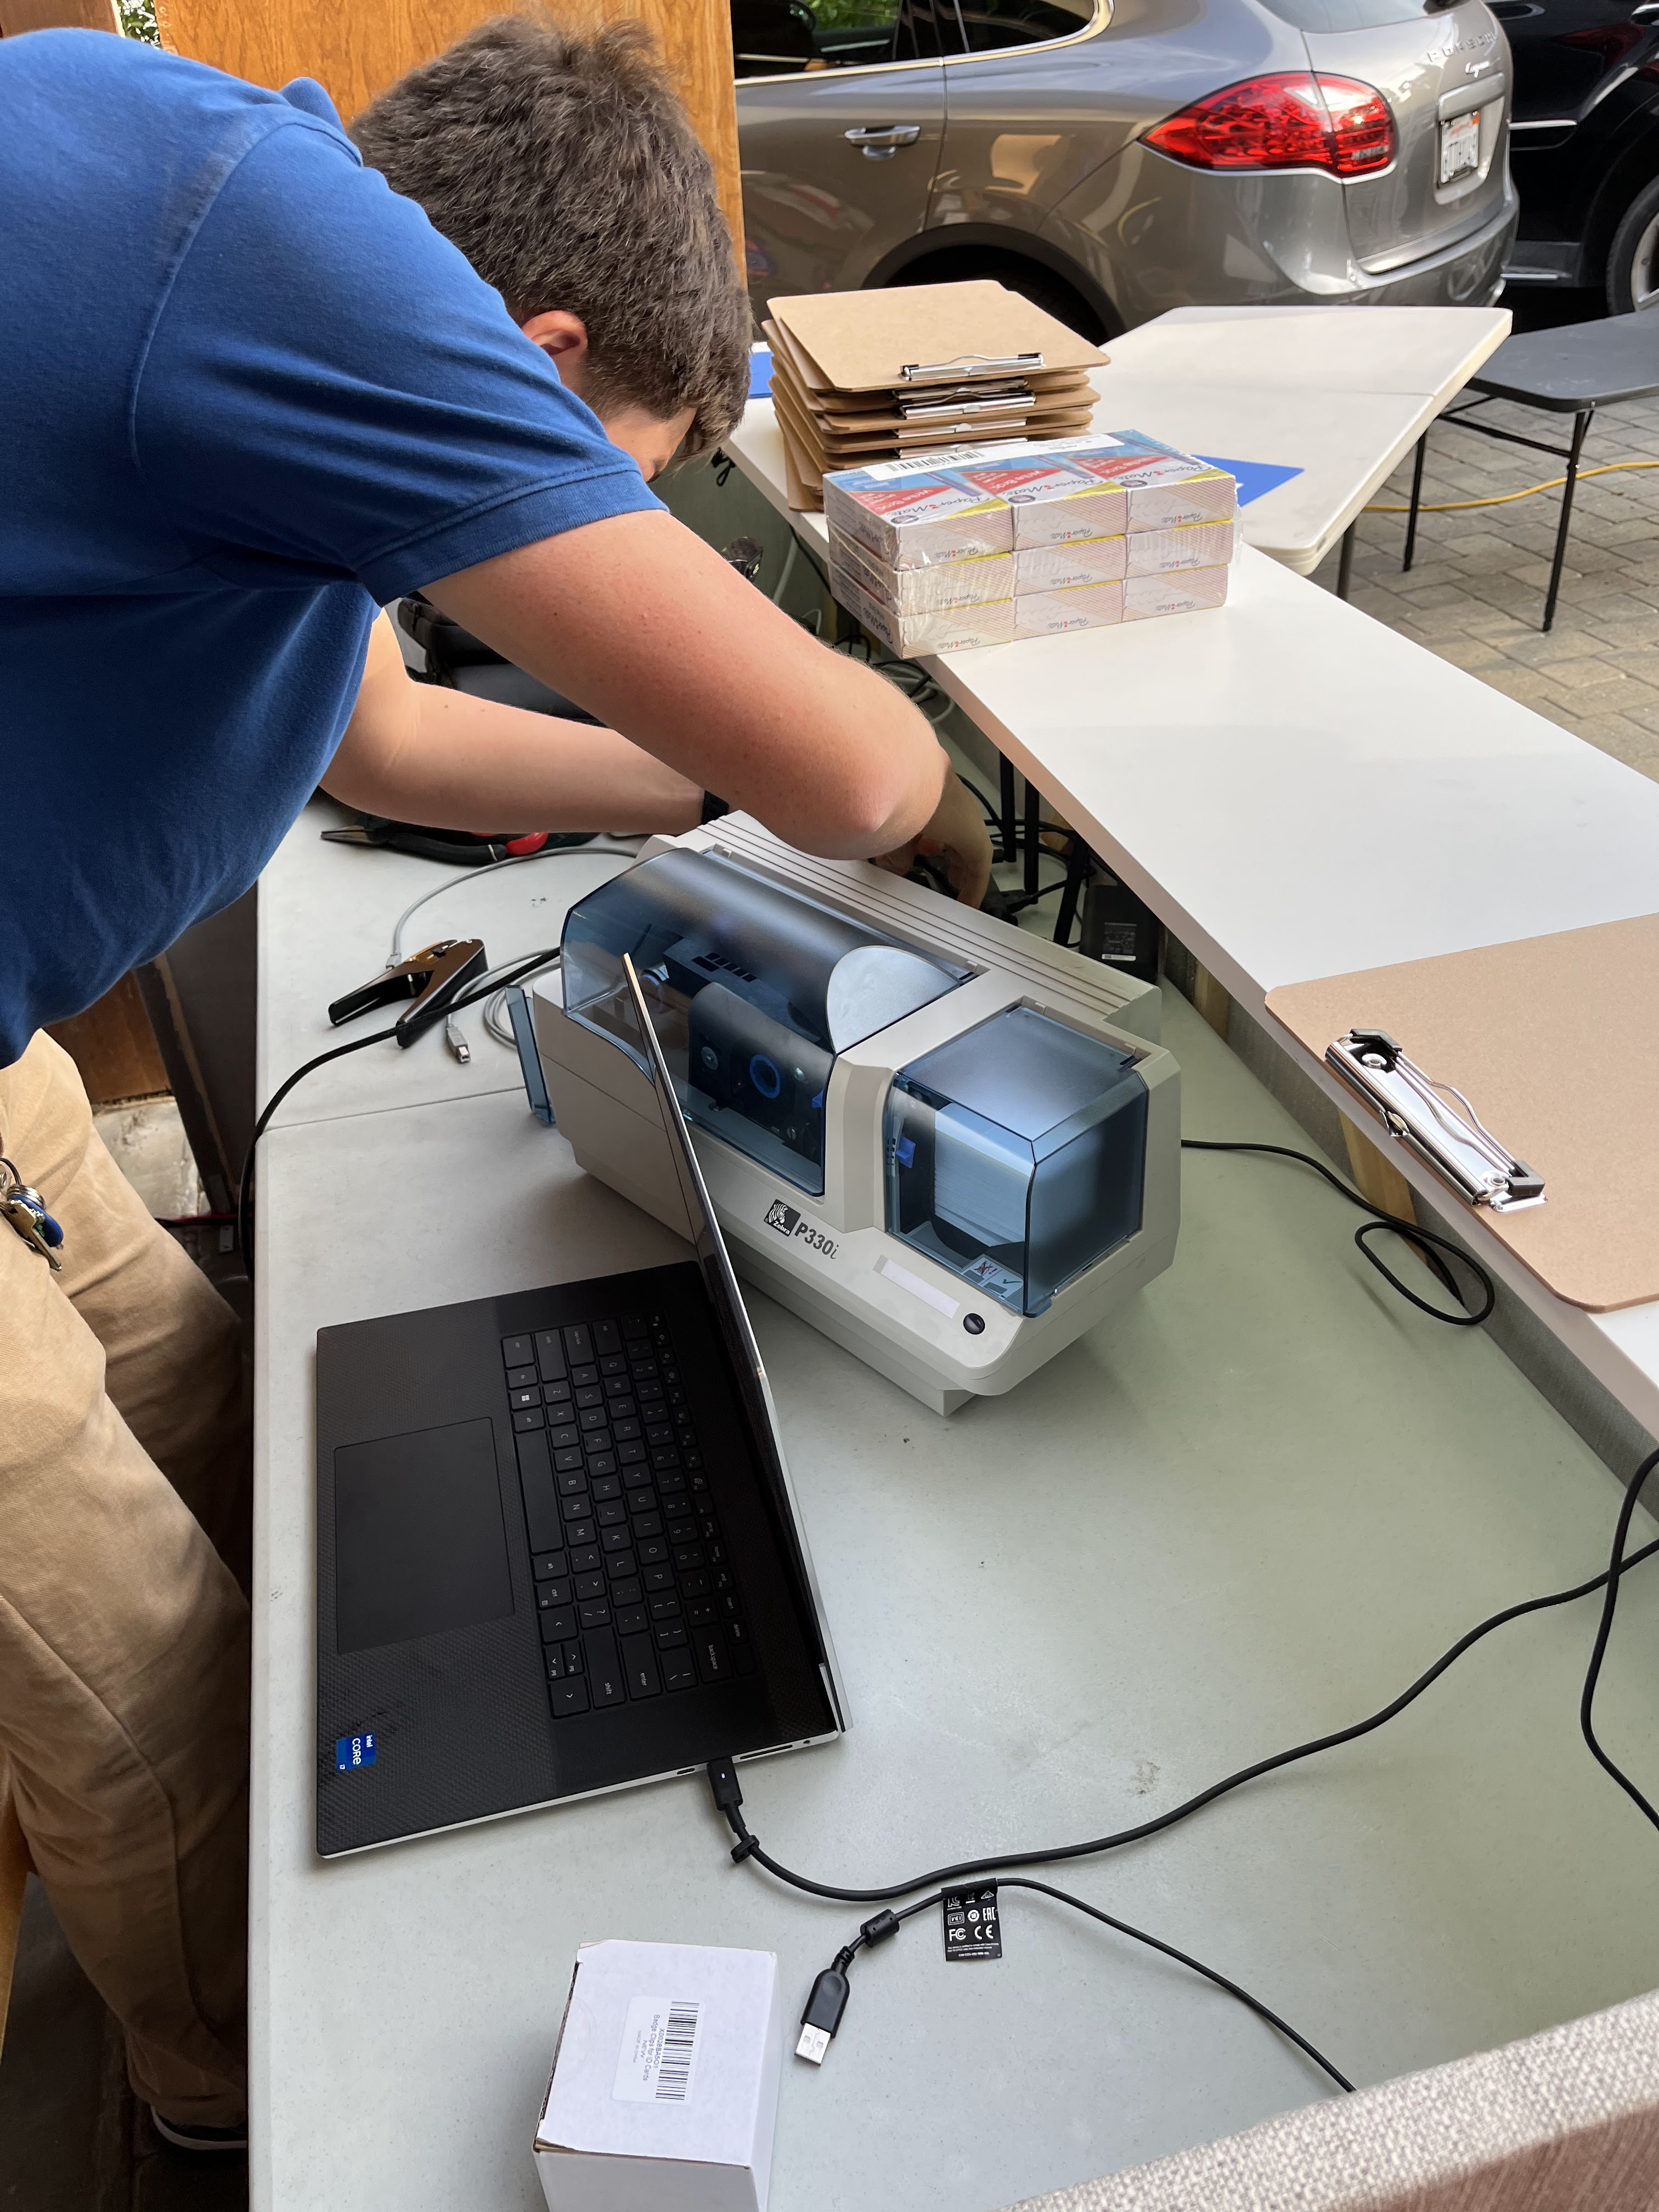
IT infrastructure for the DTV costume was based on a Django web server running on a laptop at the primary service desk, which was connected to a LAN network being broadcast by a wifi router. Each DTV employee could use their laptop or mobile device to connect to the wireless network and access an employee portal for creating / editing ID cards, printing ID cards, creating or consuming tickets, and viewing live system statistics.
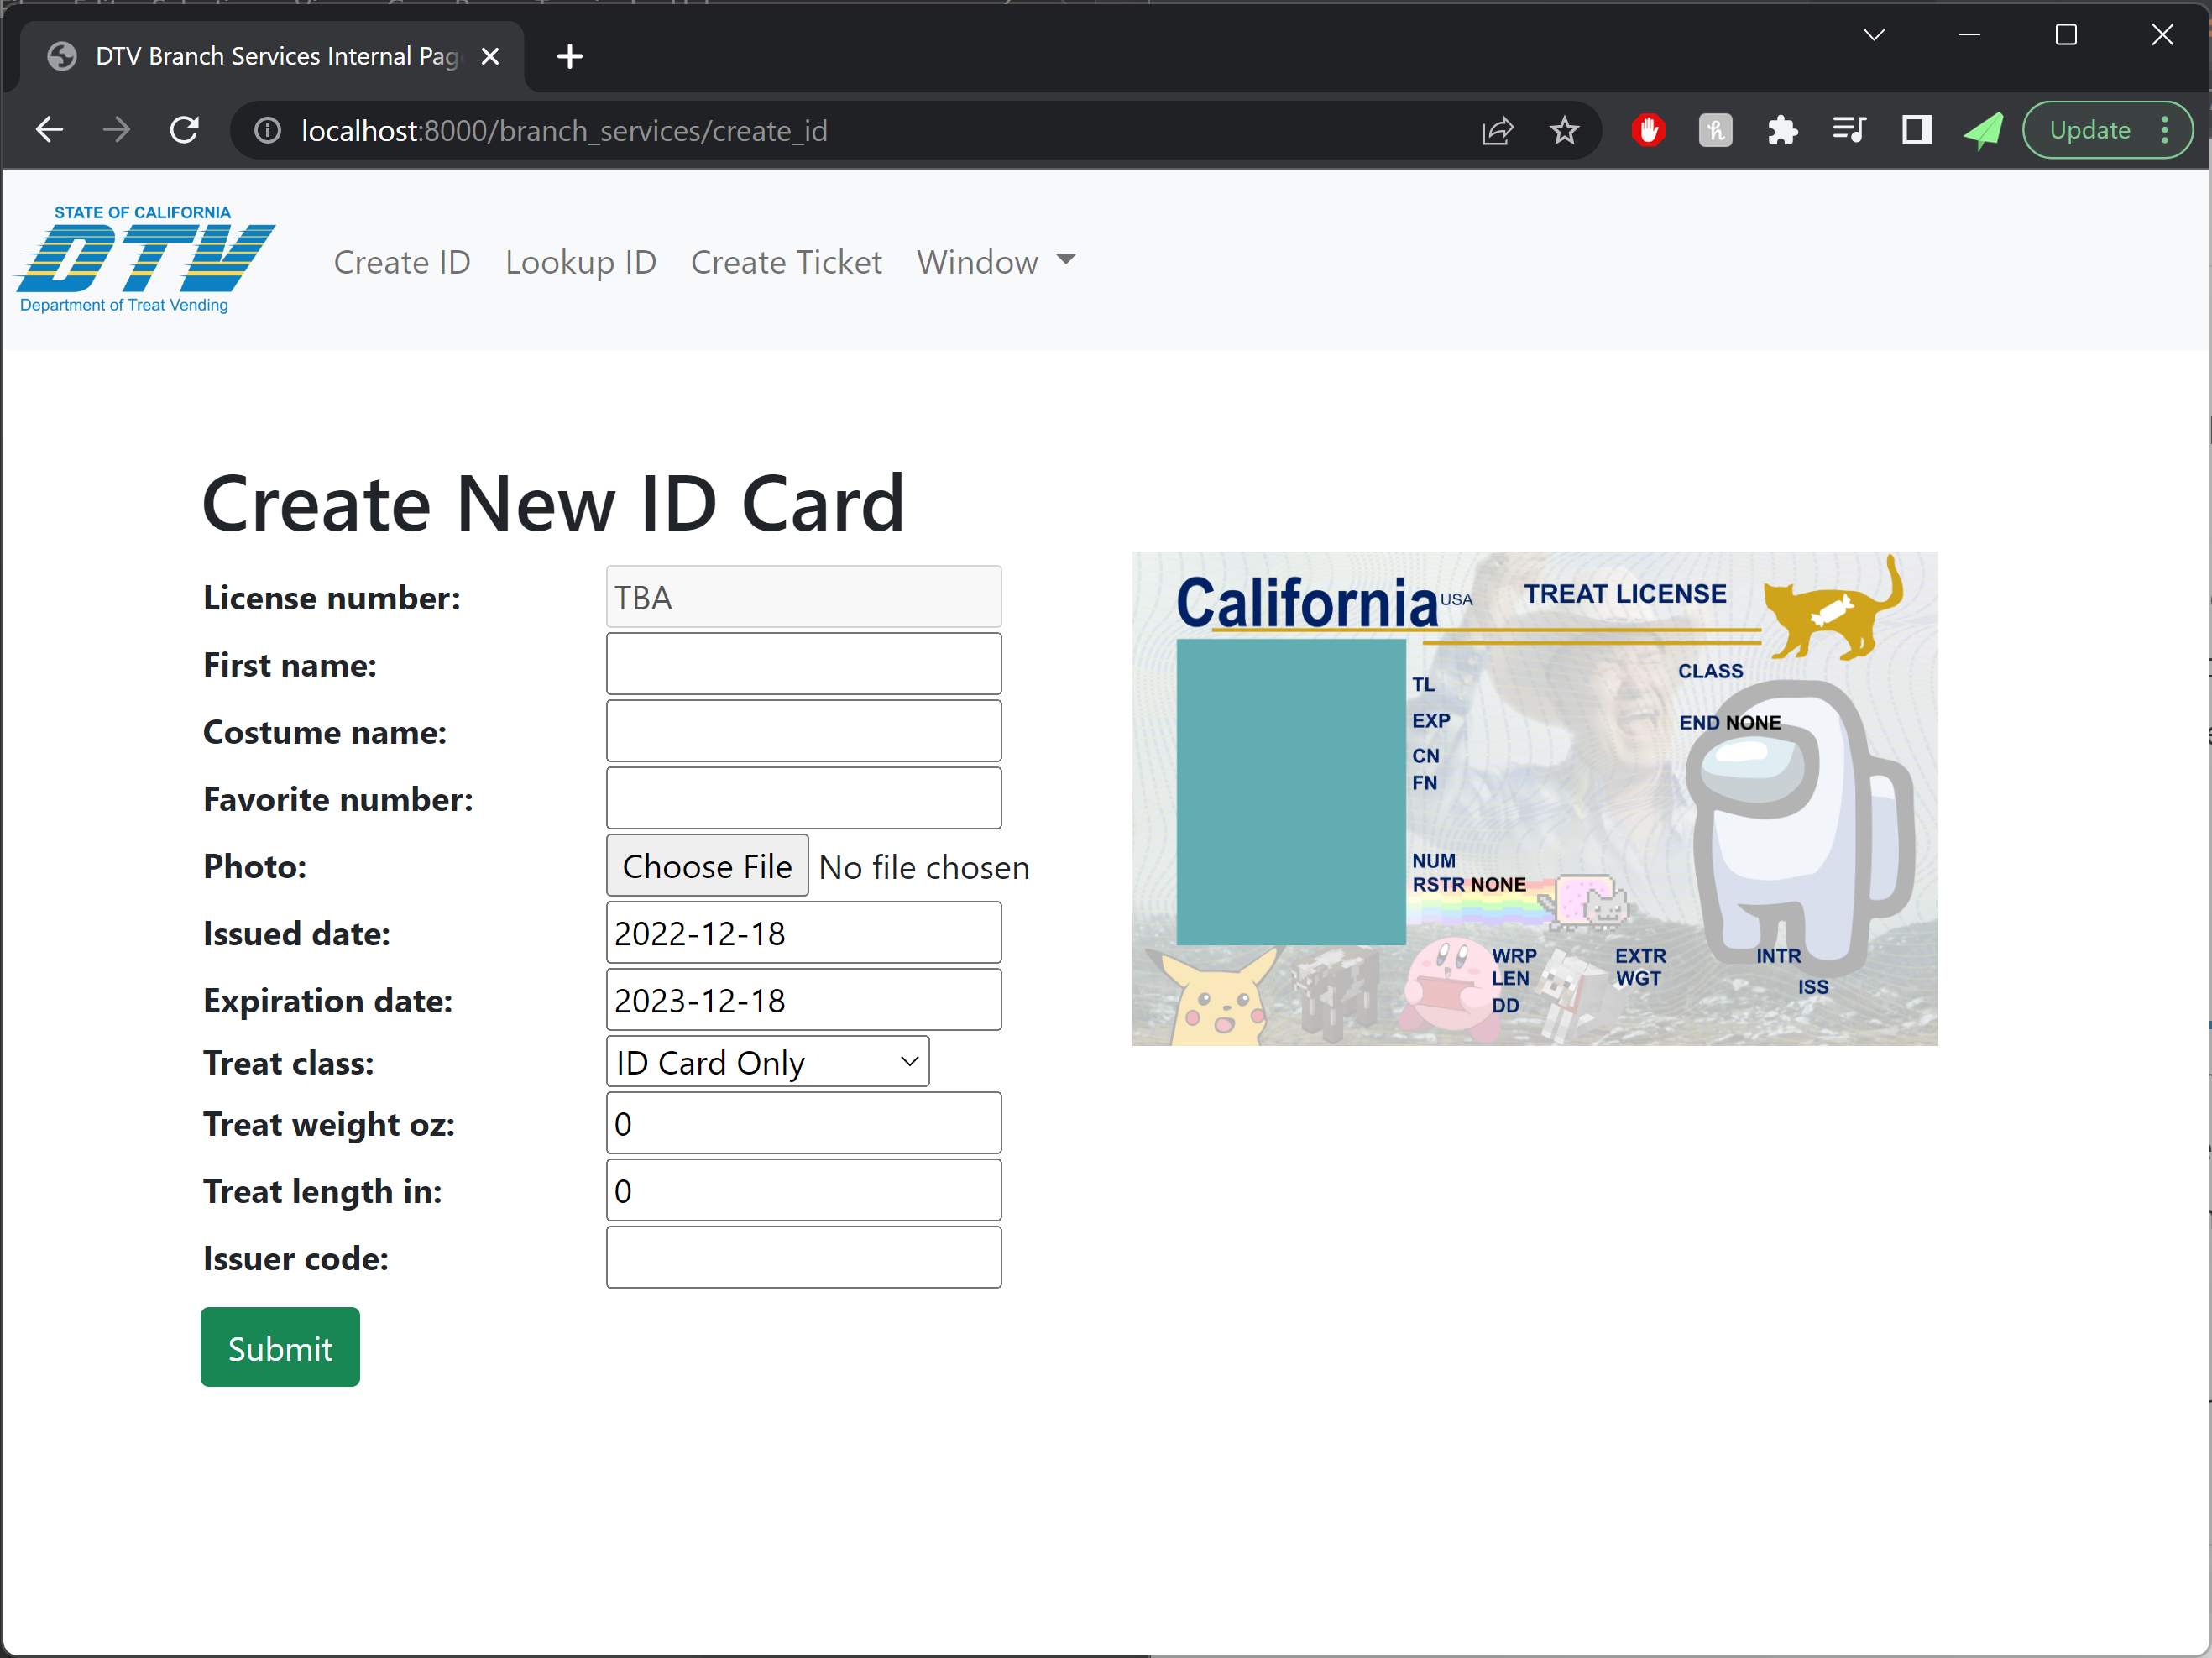
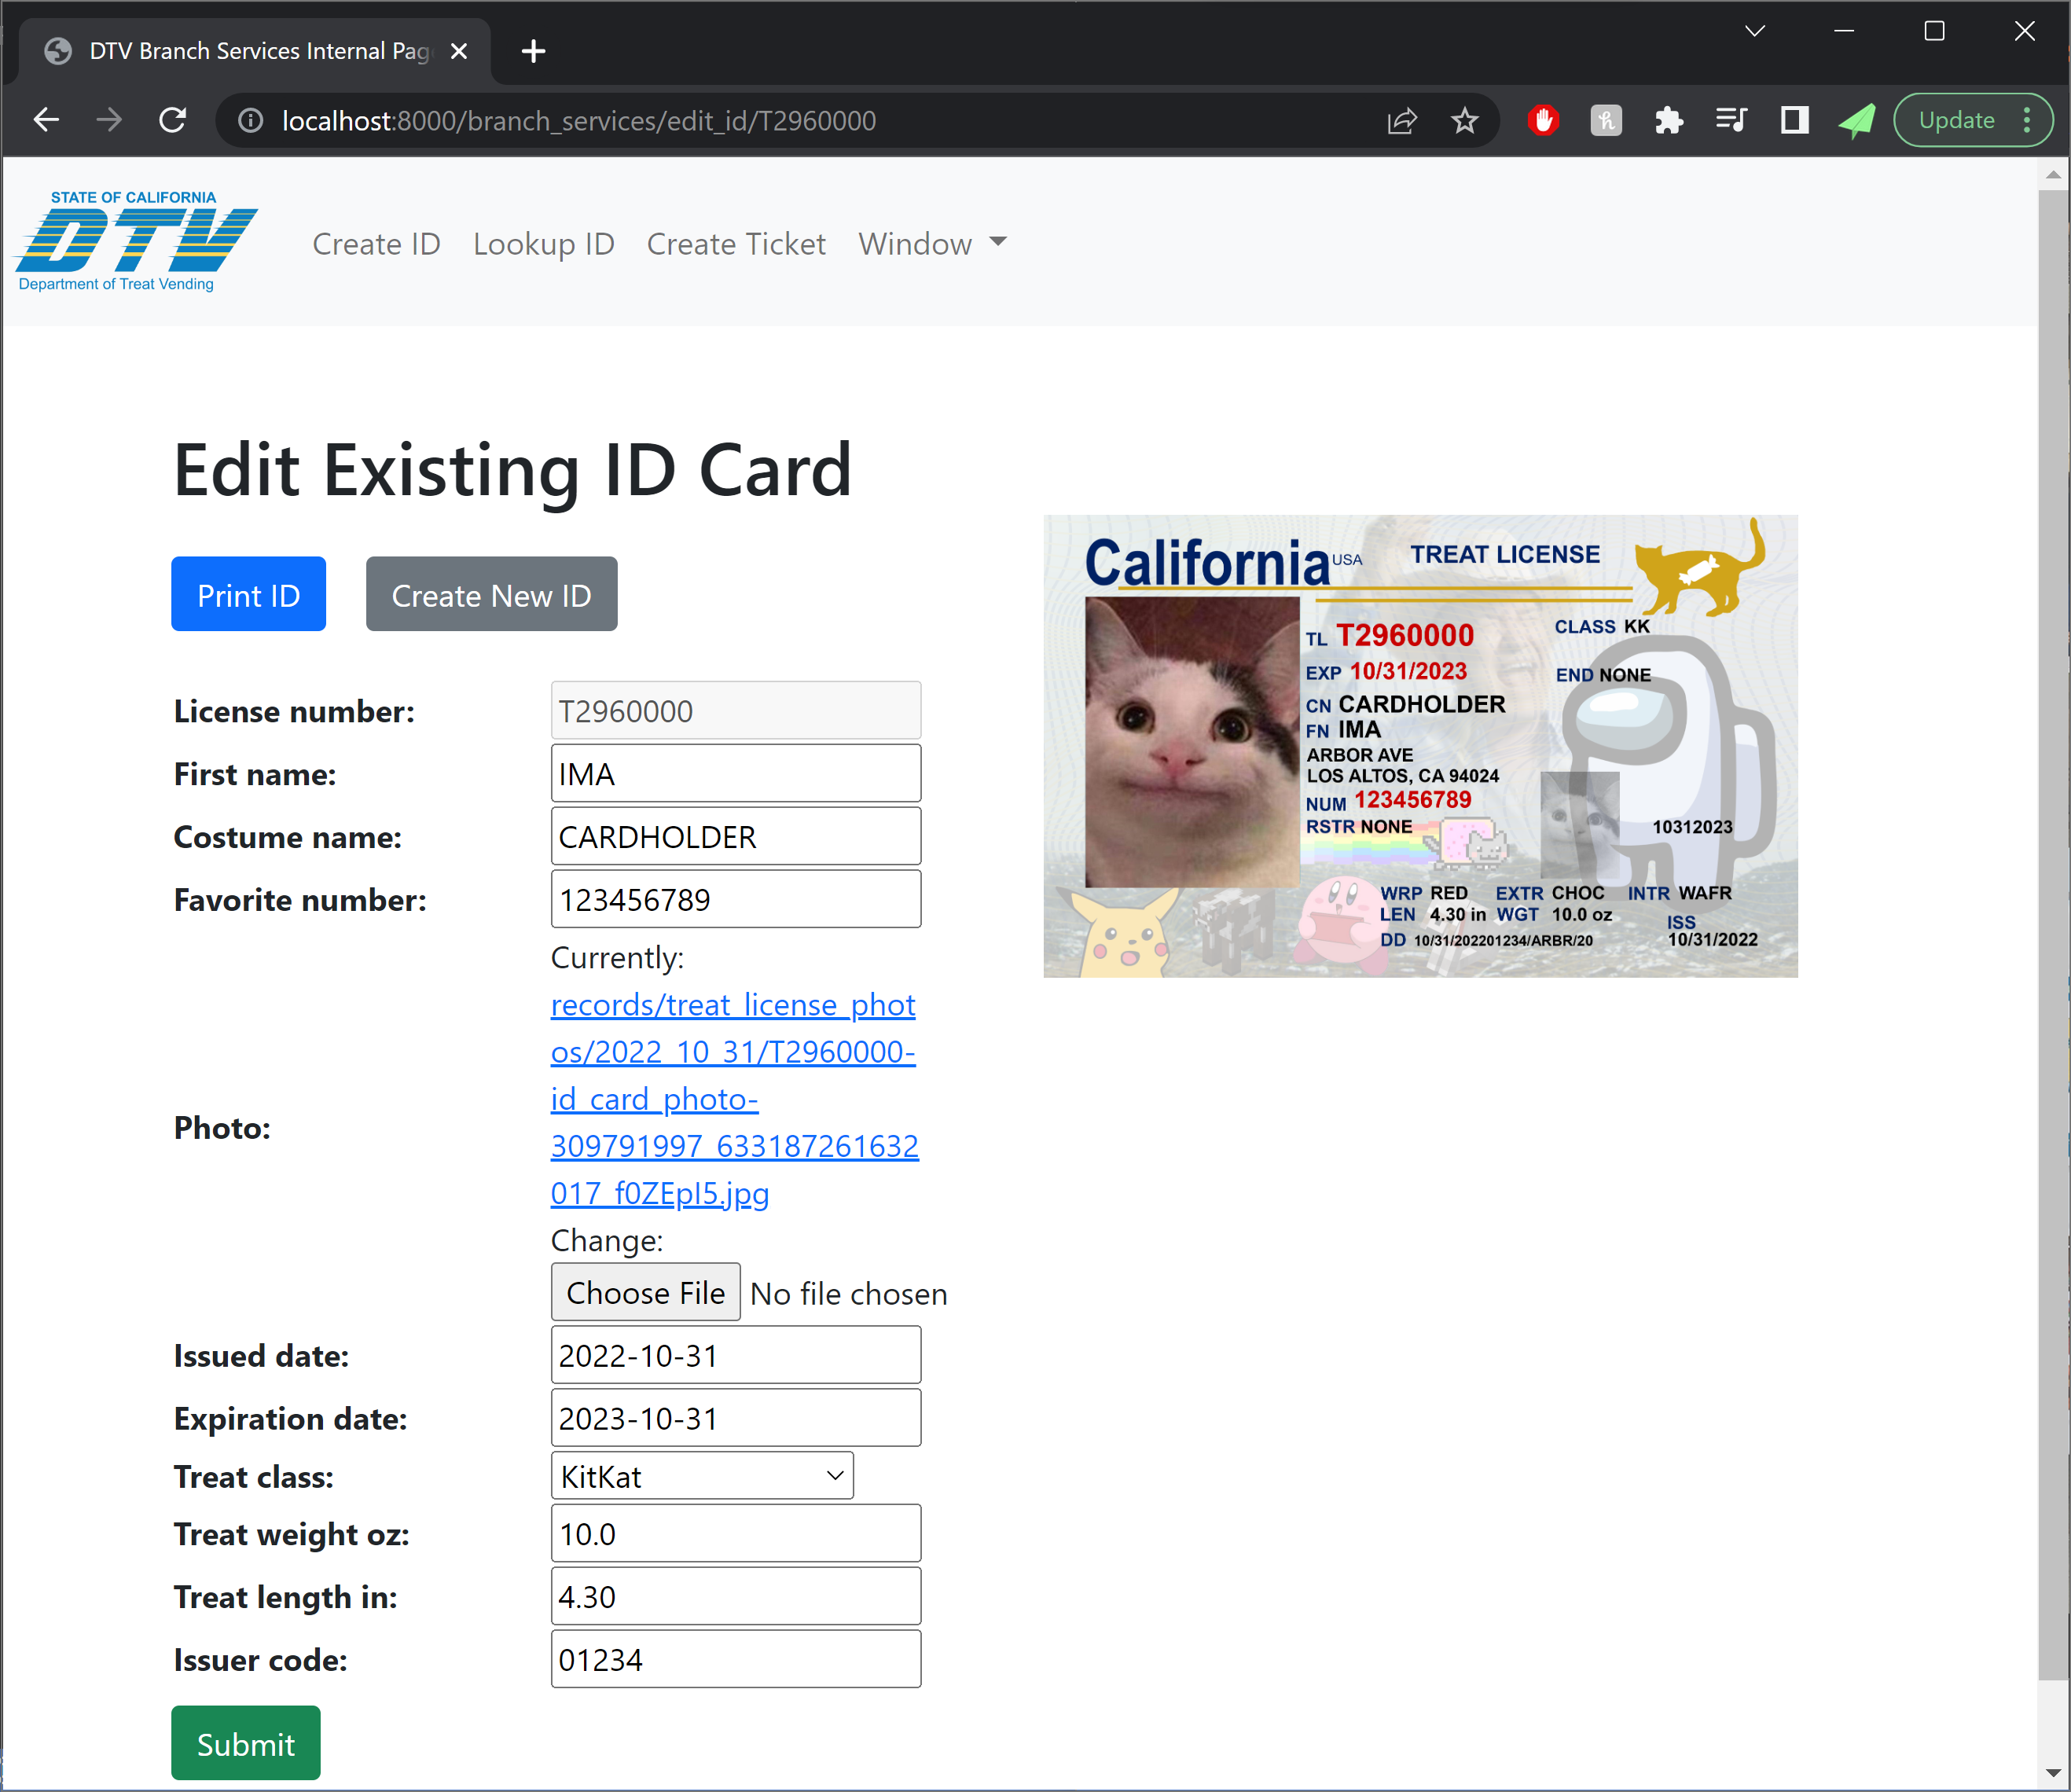
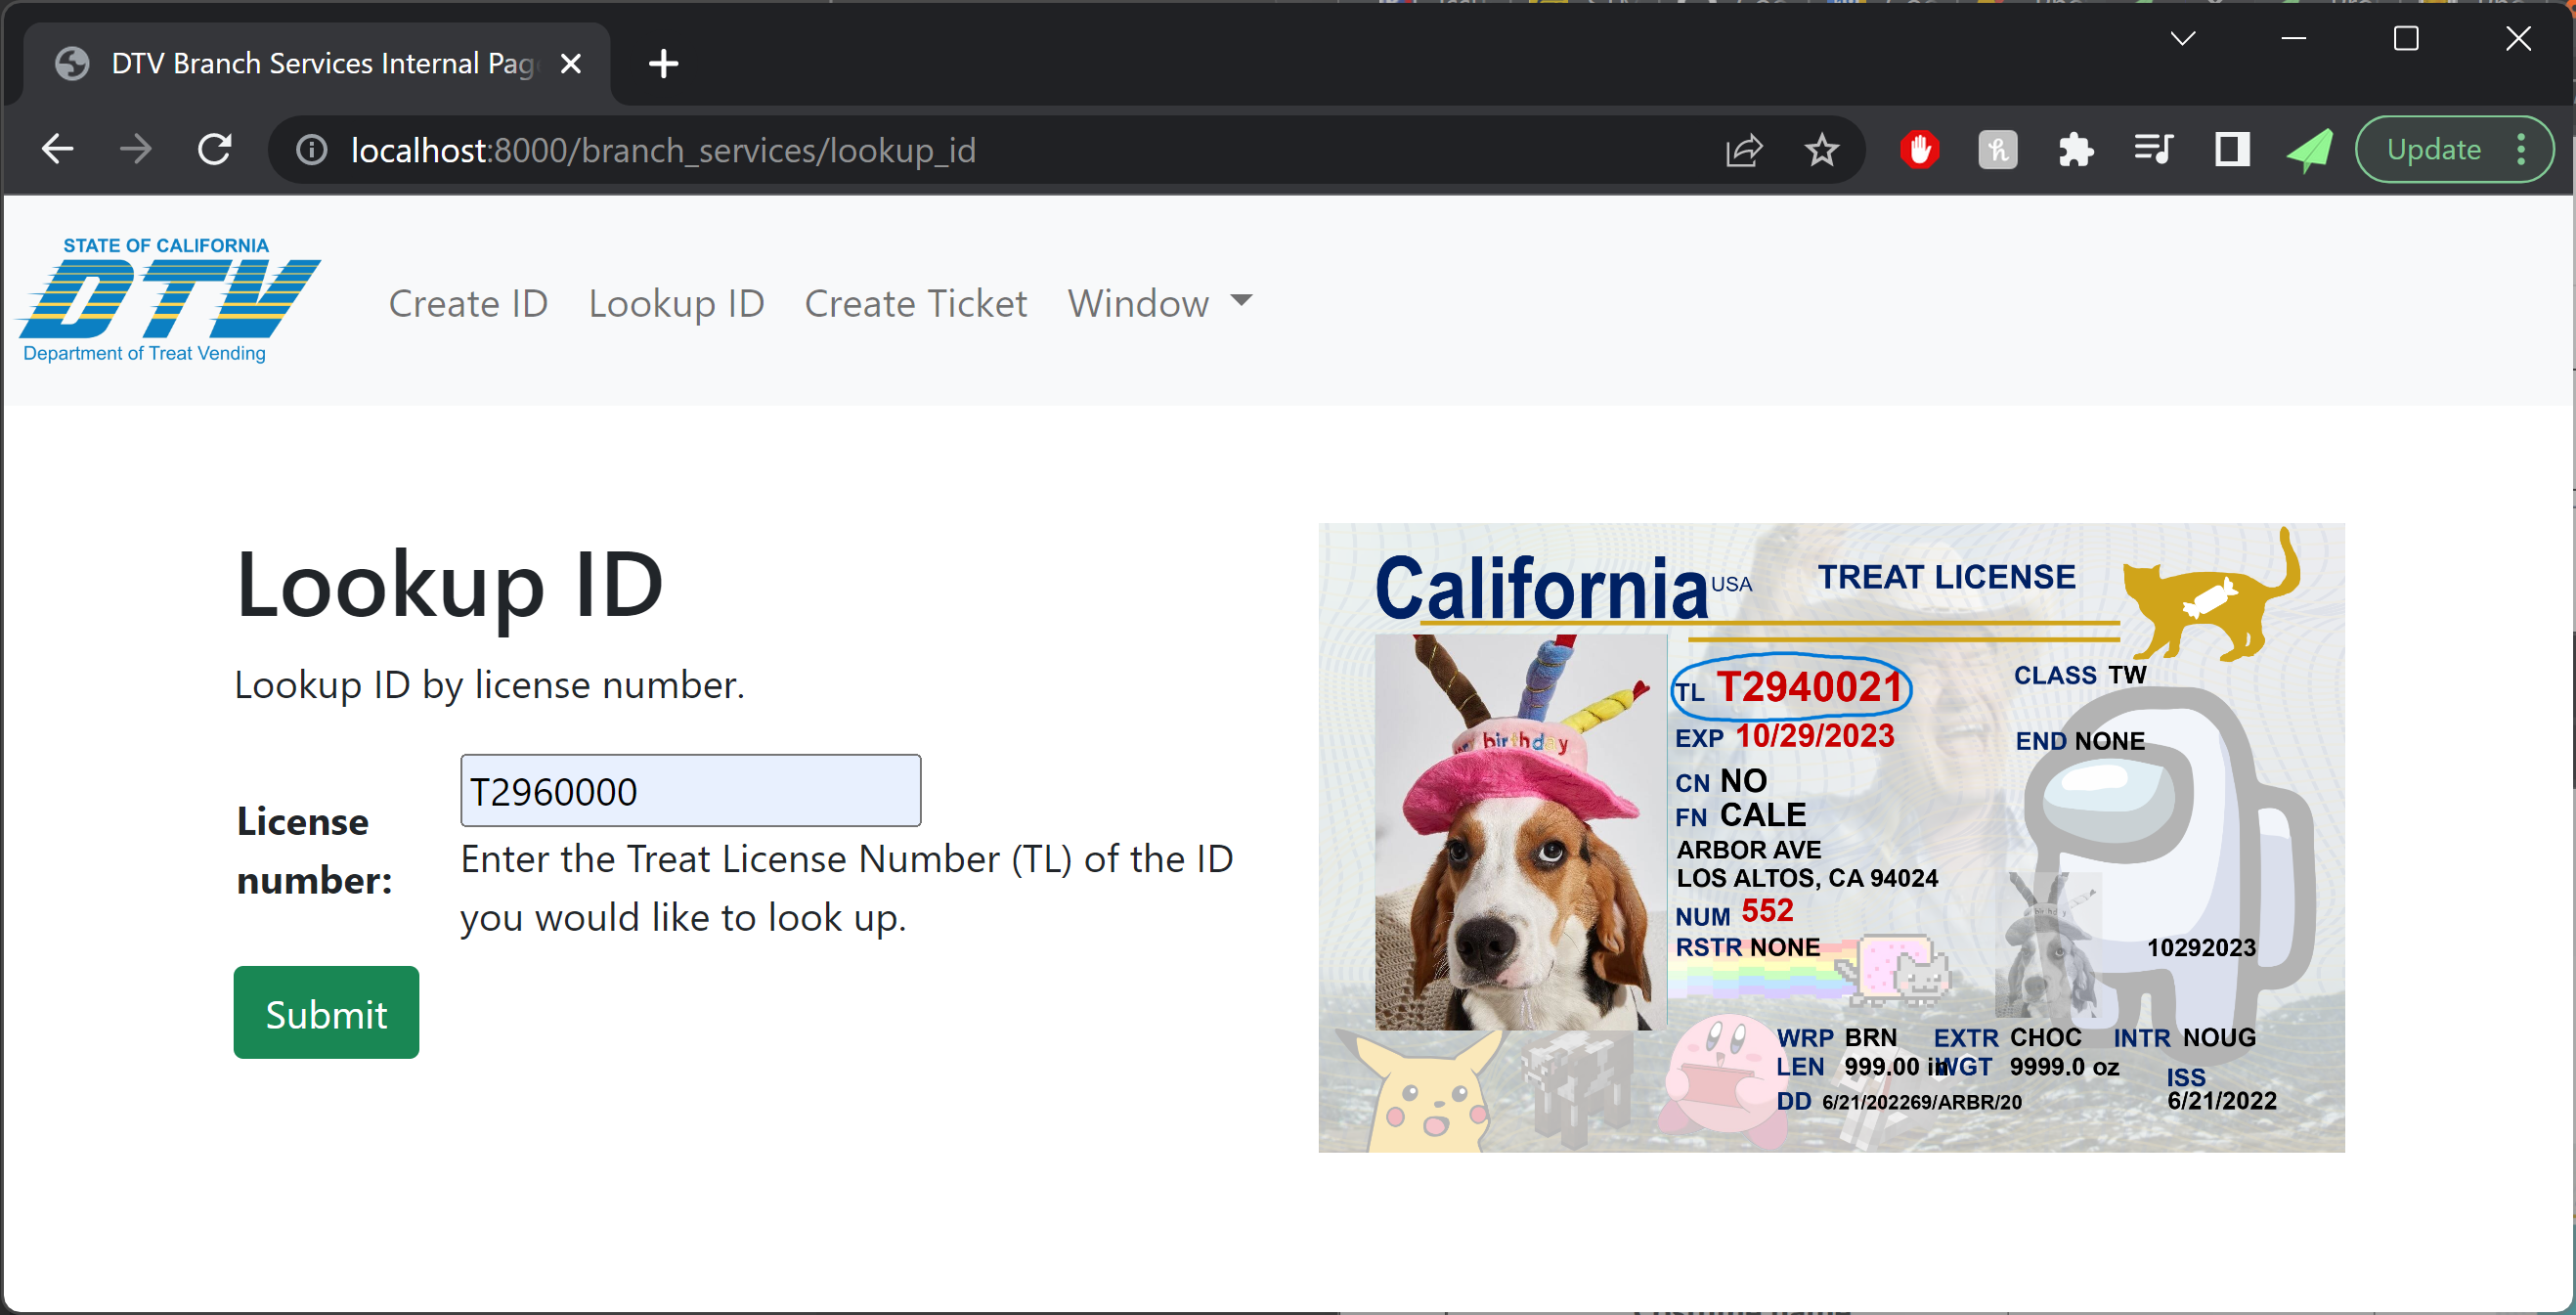
ID cards were created using a web form connected to a python script on the server computer. ID card information filled out in the webform would be sent to the python script in order to automatically generate an image of the ID card with text positioned in the correct locations with the correct format, as well as ID images and watermarks on the card.
Once a DTV employee created an ID card, they would click the “Print ID” button on their ID card interface to send a print job from the server computer to the ID card printer located at the primary service desk.
ID Card Printing
ID card printers can be quite expensive, but when sourcing equipment for the costume I found out that many old-generation printers were being sold off as surplus as schools, security offices, and government agencies were switching over to new models of printers. Venerable workhourses like the Zebra P-series were being offered for as low as 1/10 of their original list price, allowing me to snag a Zebra P330i single-sided ID card printer for under $250 (I found a deal, but normal prices are usually under $400 for devices in good condition). The printer was missing a critical component (cleaning cartridge), but with some 3D printed plastic parts (and later a used part sourced from eBay), we were in business.
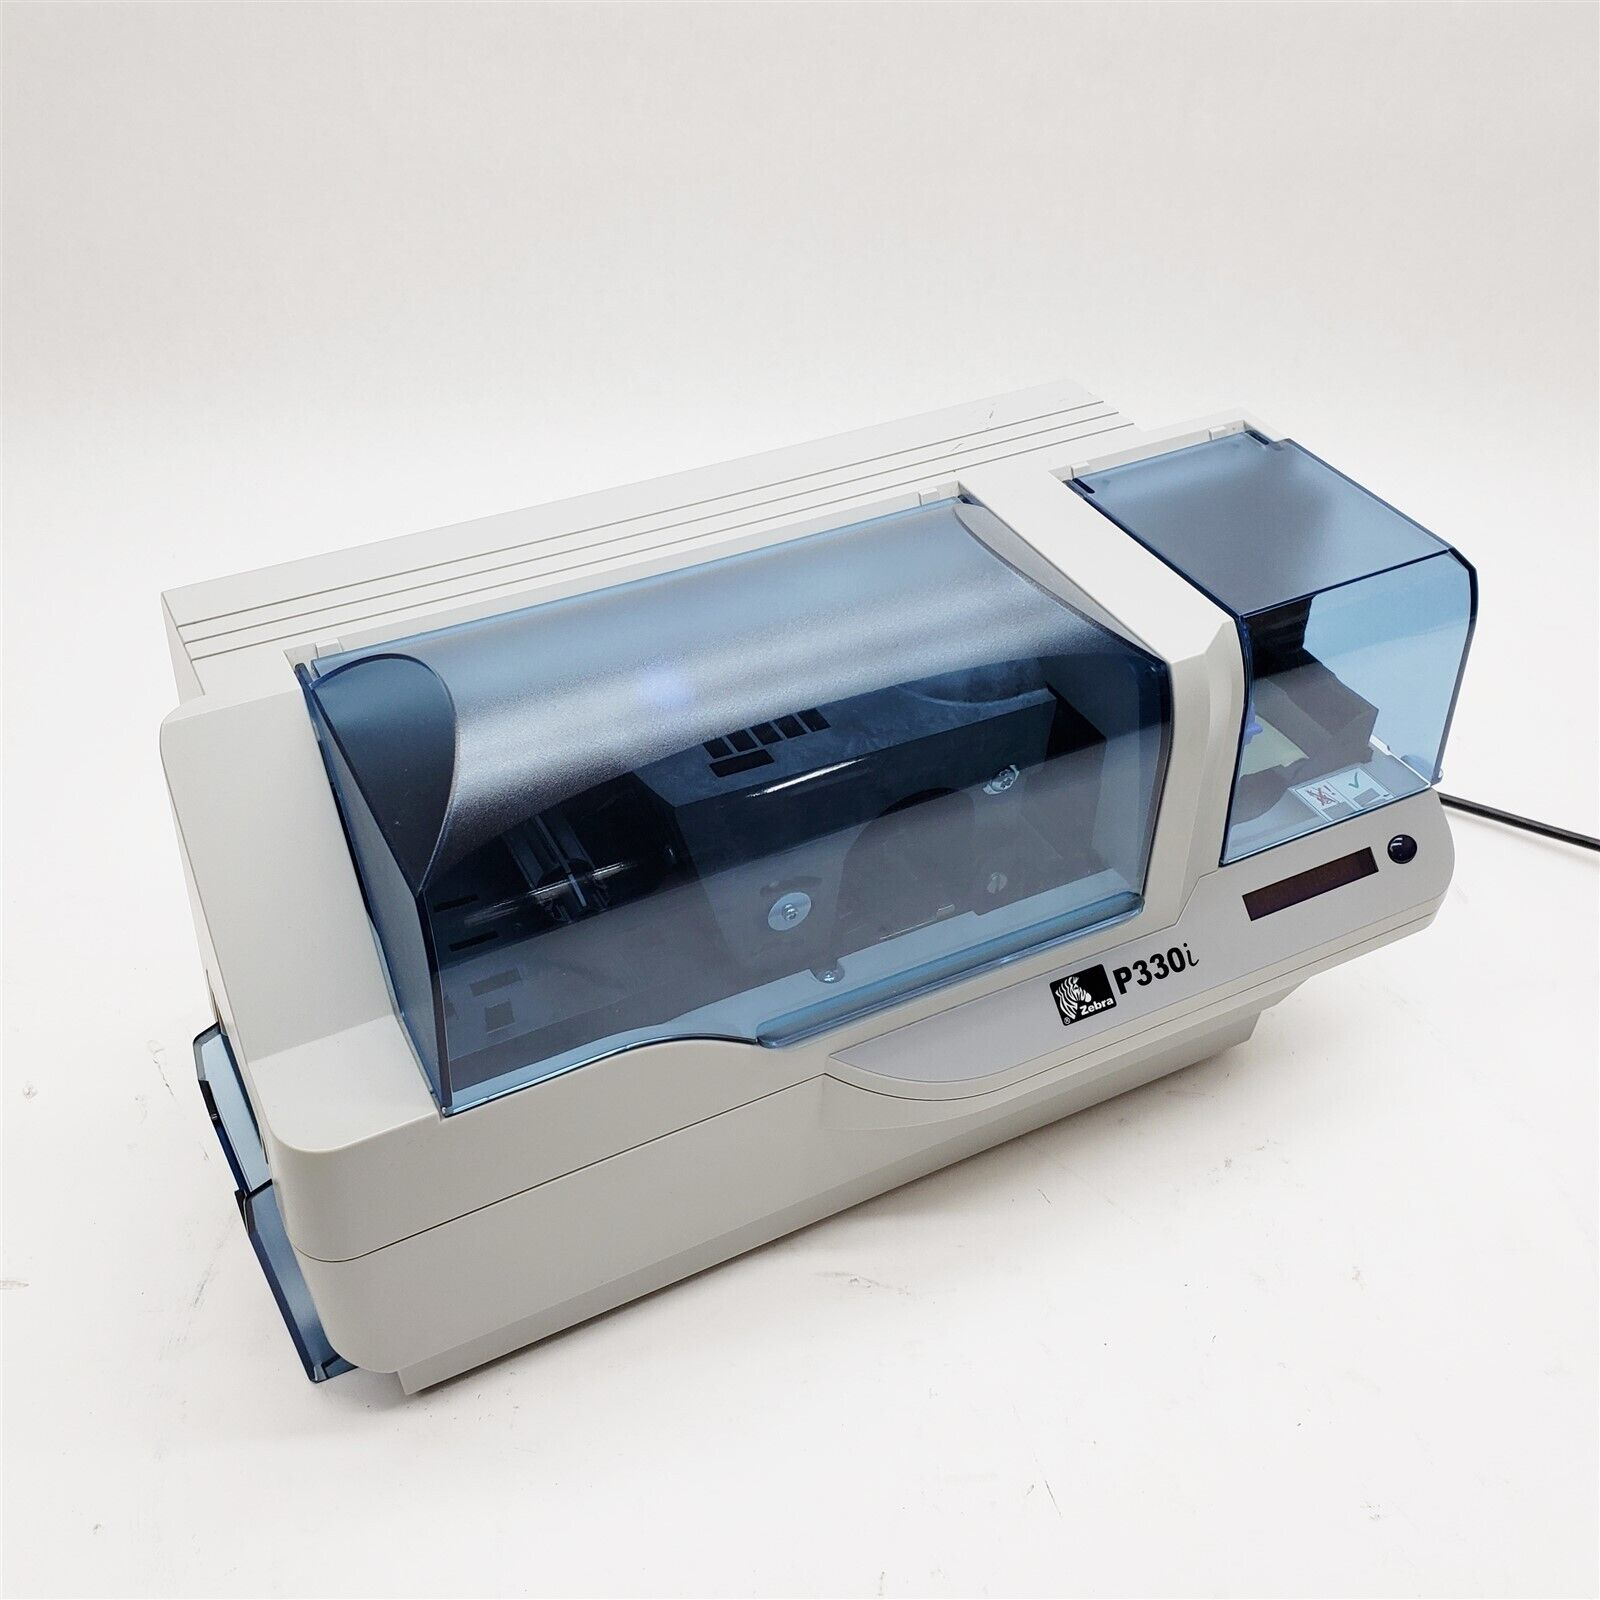
While bringing up the printer, I was continually plagued by issues with cards printing some or all of their colors with a nasty offset. Looking at the card from left to right, it seemed like there would be a sudden vertical bar and everything to the right of the bar would be a smear of black or other mushed-up colors. Fortunately, this turned out to just be an issue with the color sensor having drifted over time, and running a ribbon sensor calibration with the stock driver was able to get things working consistently.
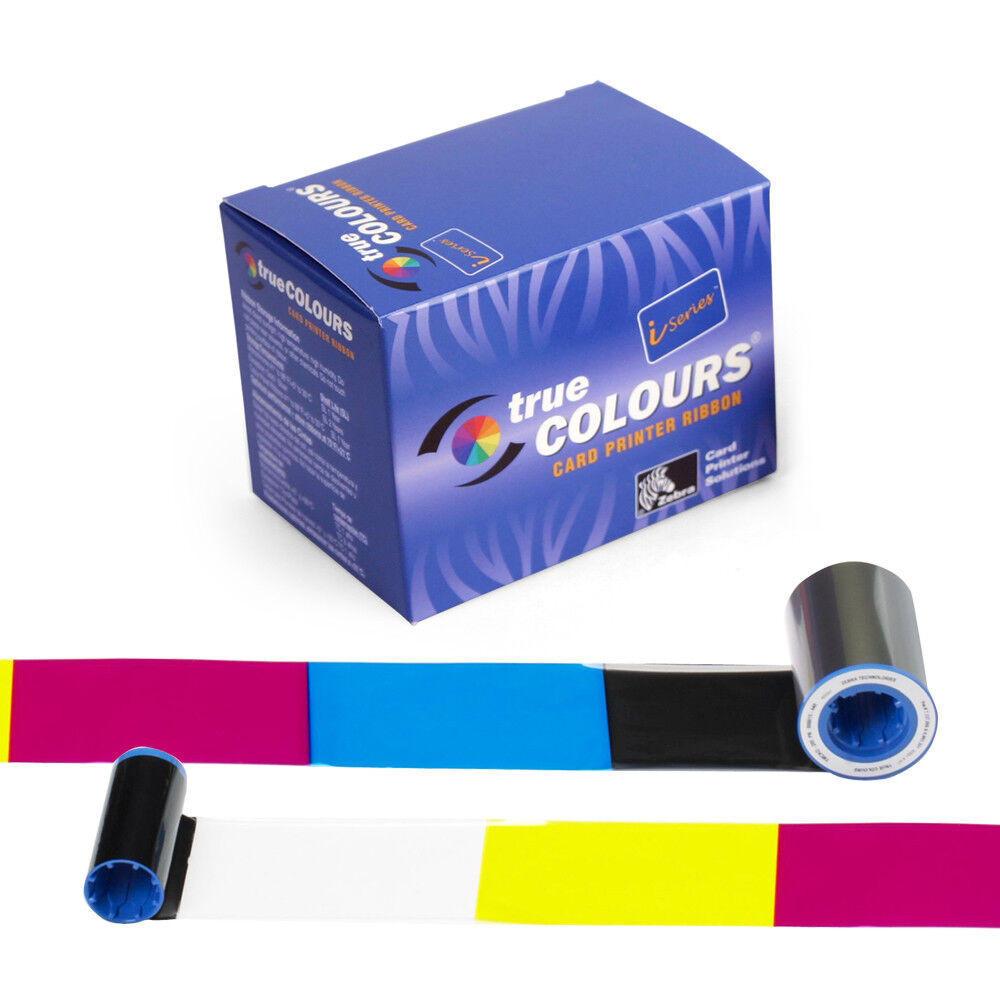
Each ID card is printed on a standard CR80 PVC card blank using a CMYKO (Cyan Magenta Yellow blacK Overlay) dye-sublimation ribbon. These ribbons are super cool (and very expensive), as they include a long chain of stitched-together color panels which are run across a thermal print head one at a time in order to print the various color layers onto the card. With genuine ink ribbons and the cheapest CR80 card blanks I could find on Amazon, we were averaging around $0.50 in materials per ID card. Expensive, but not bad considering that a full-size candy bar would be around $0.80.
Set Design
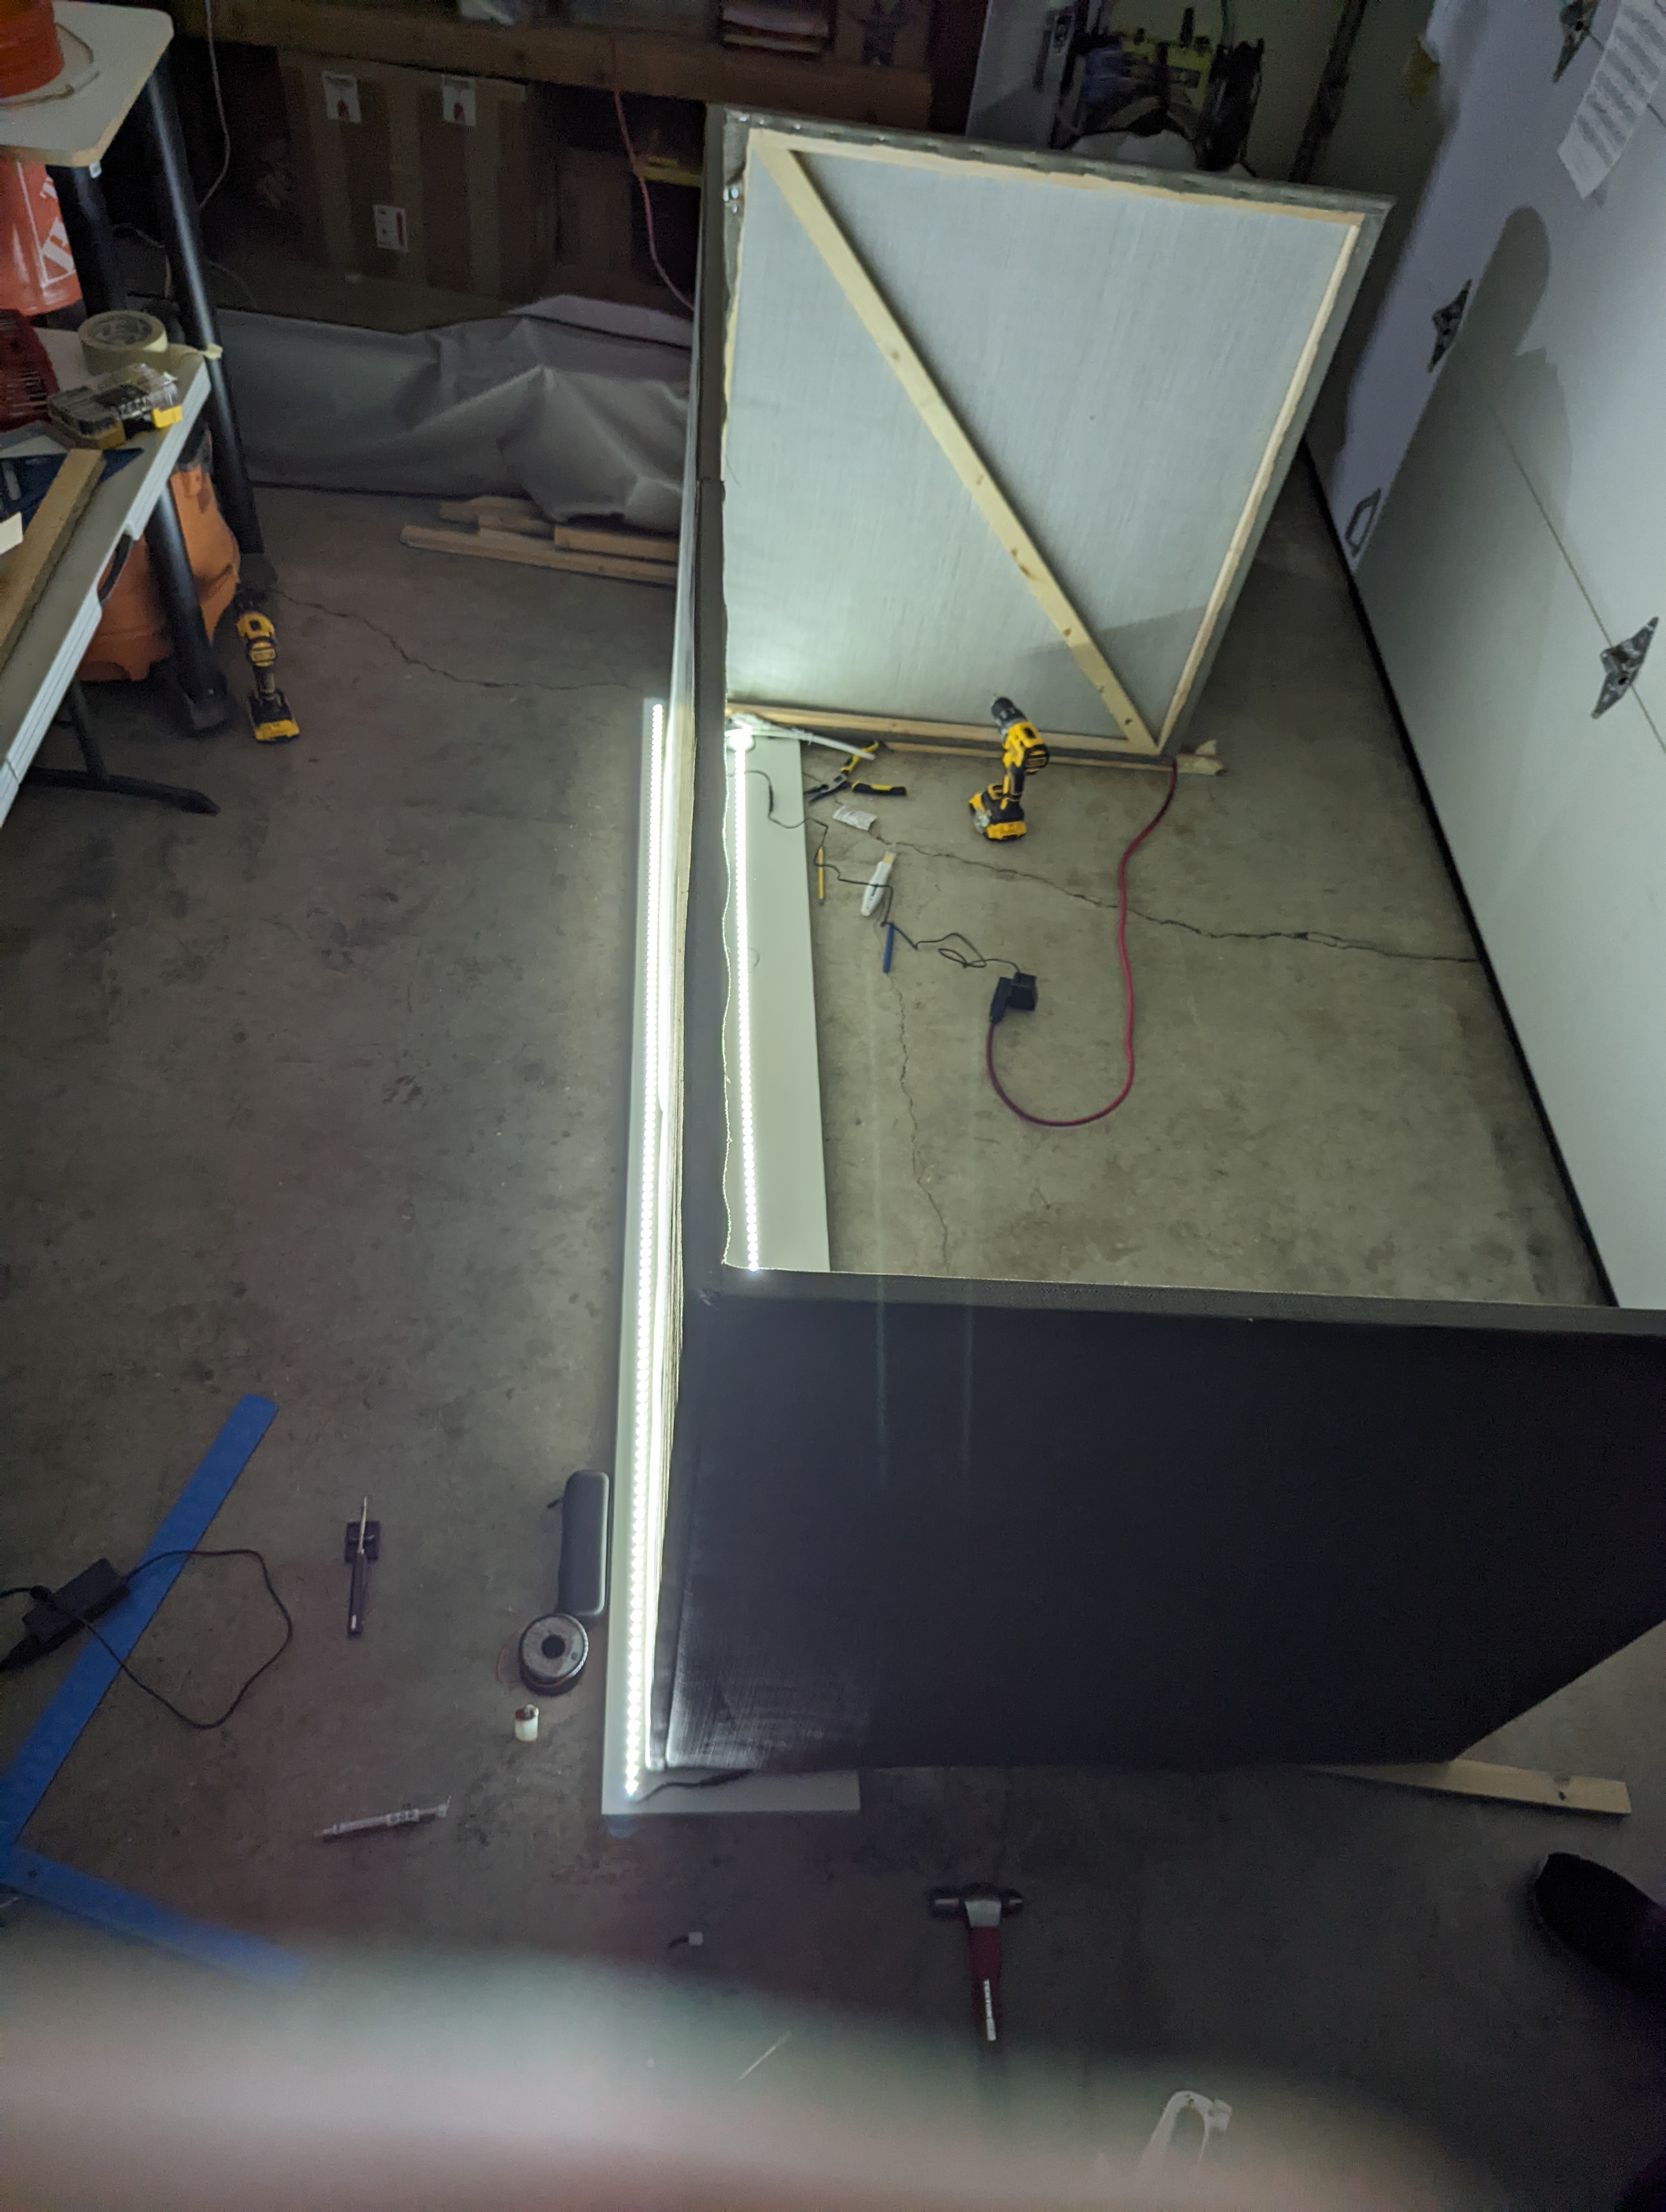
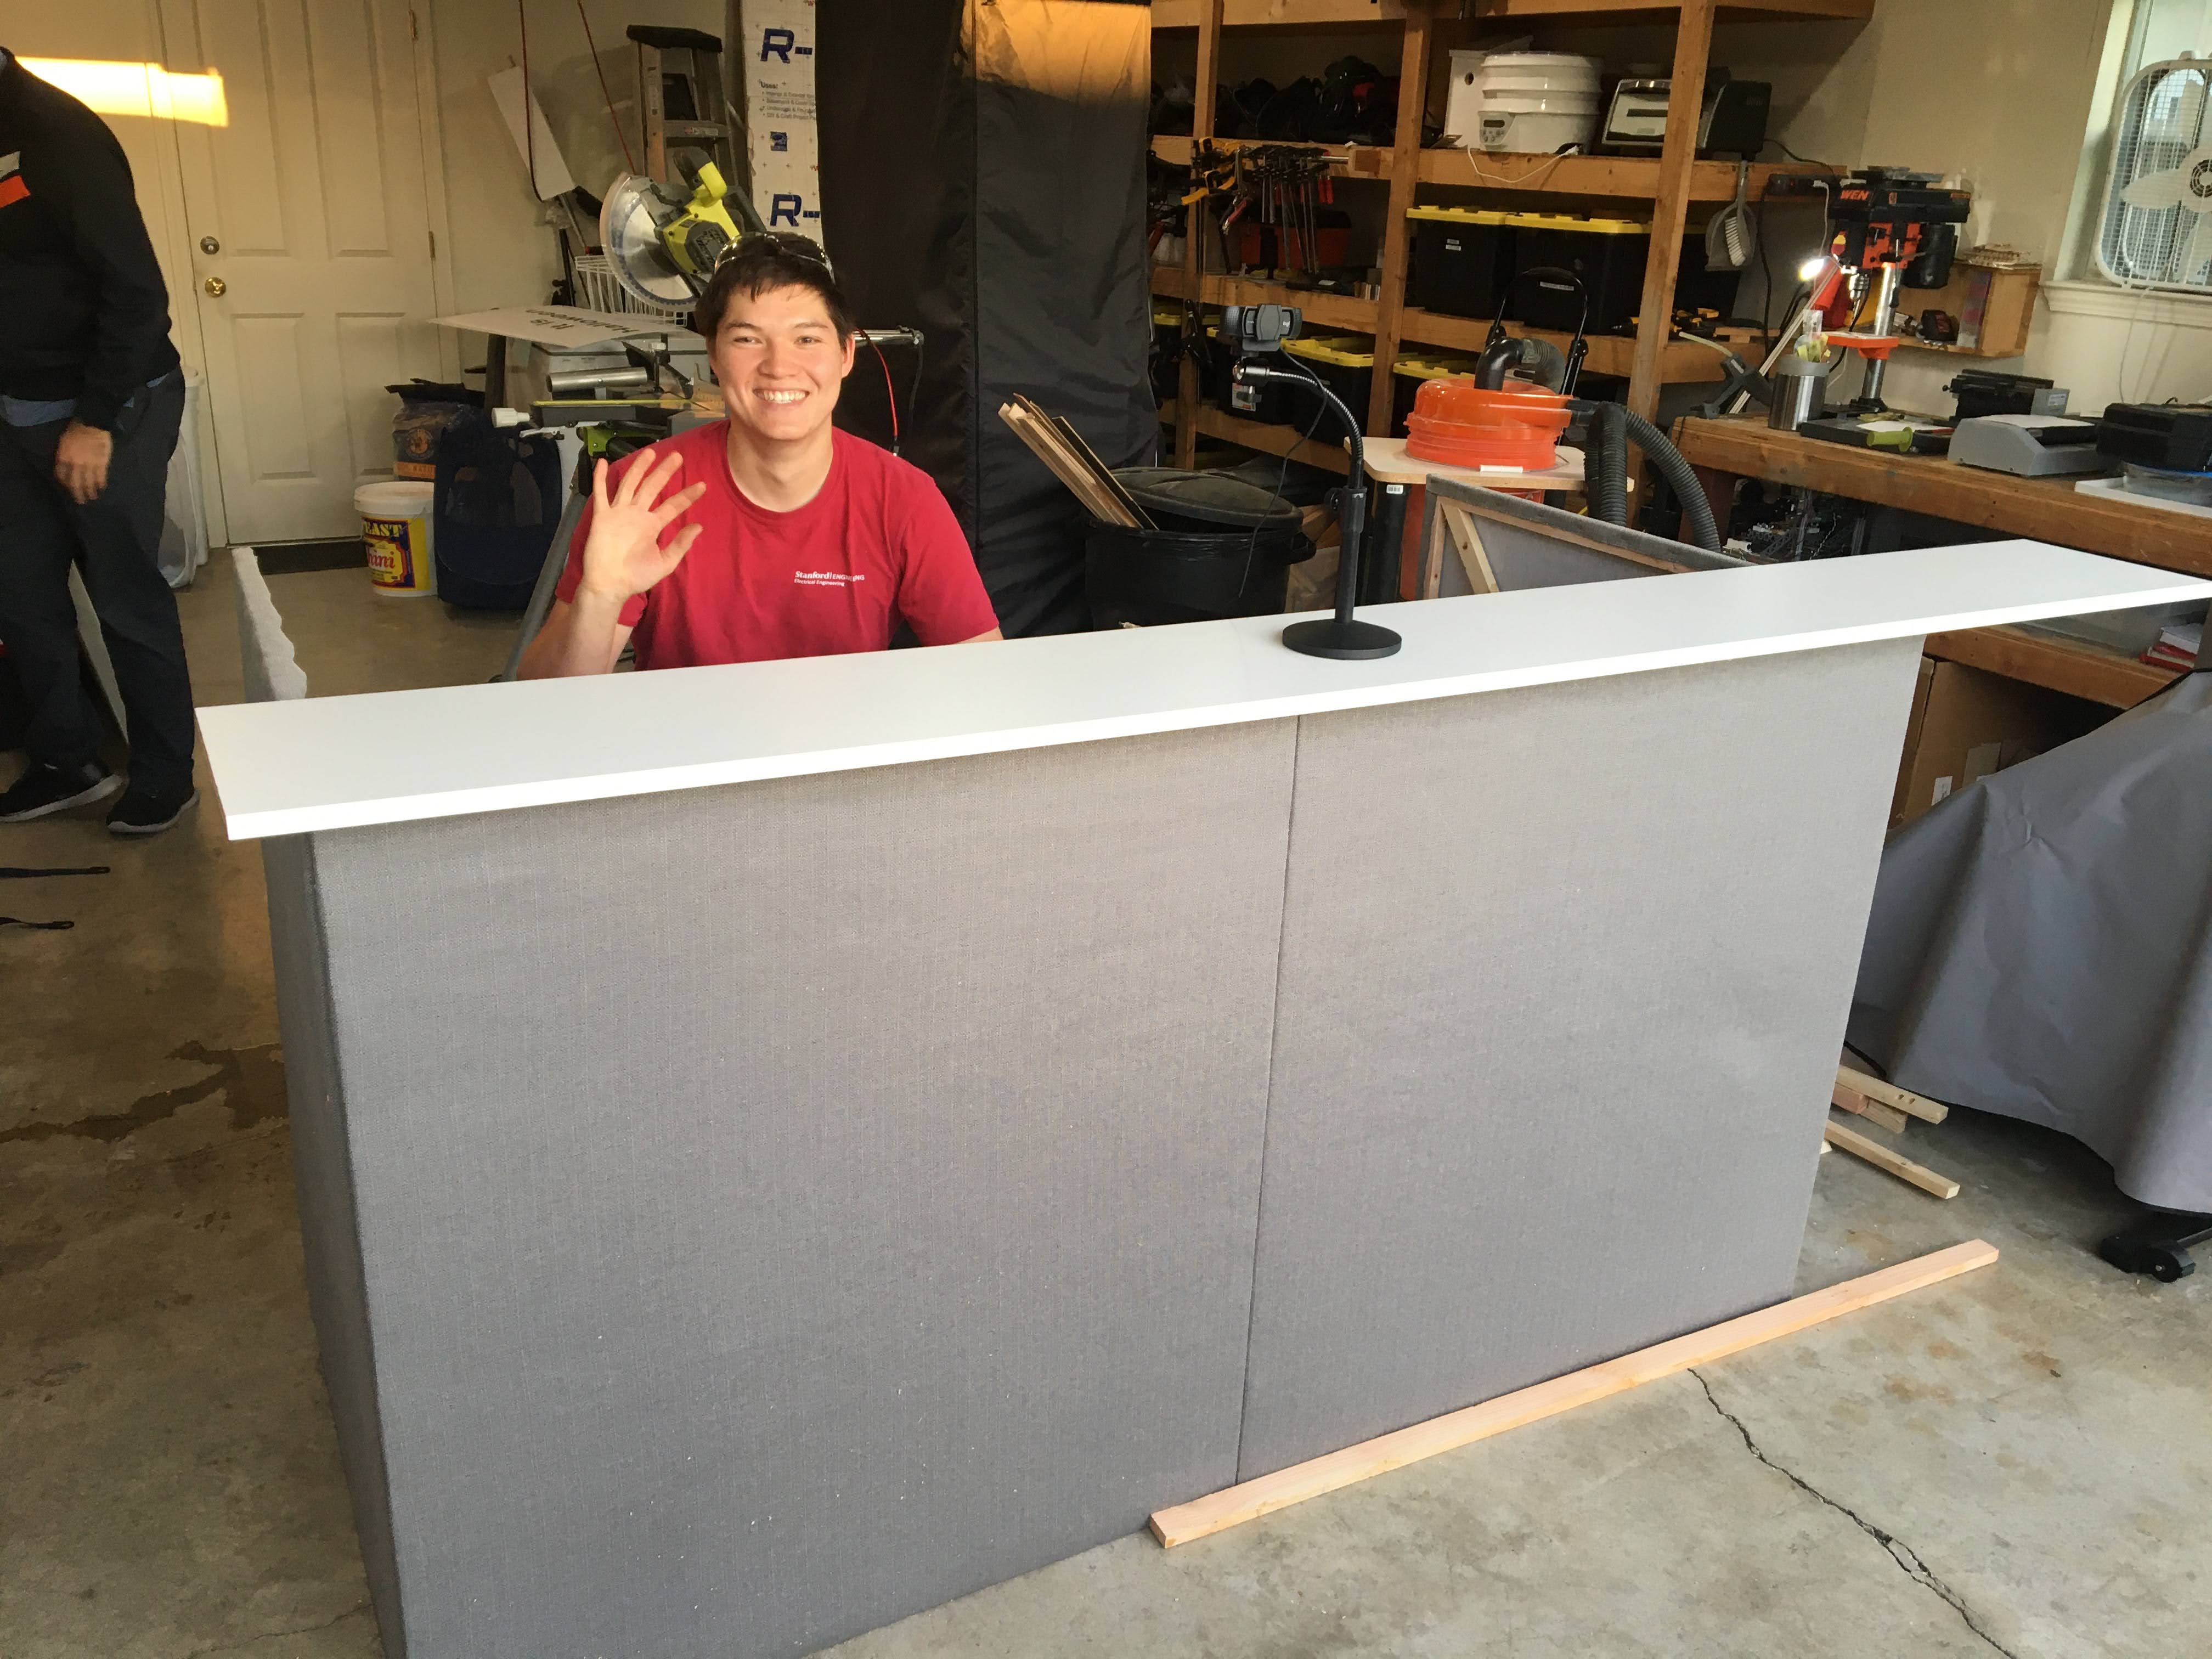
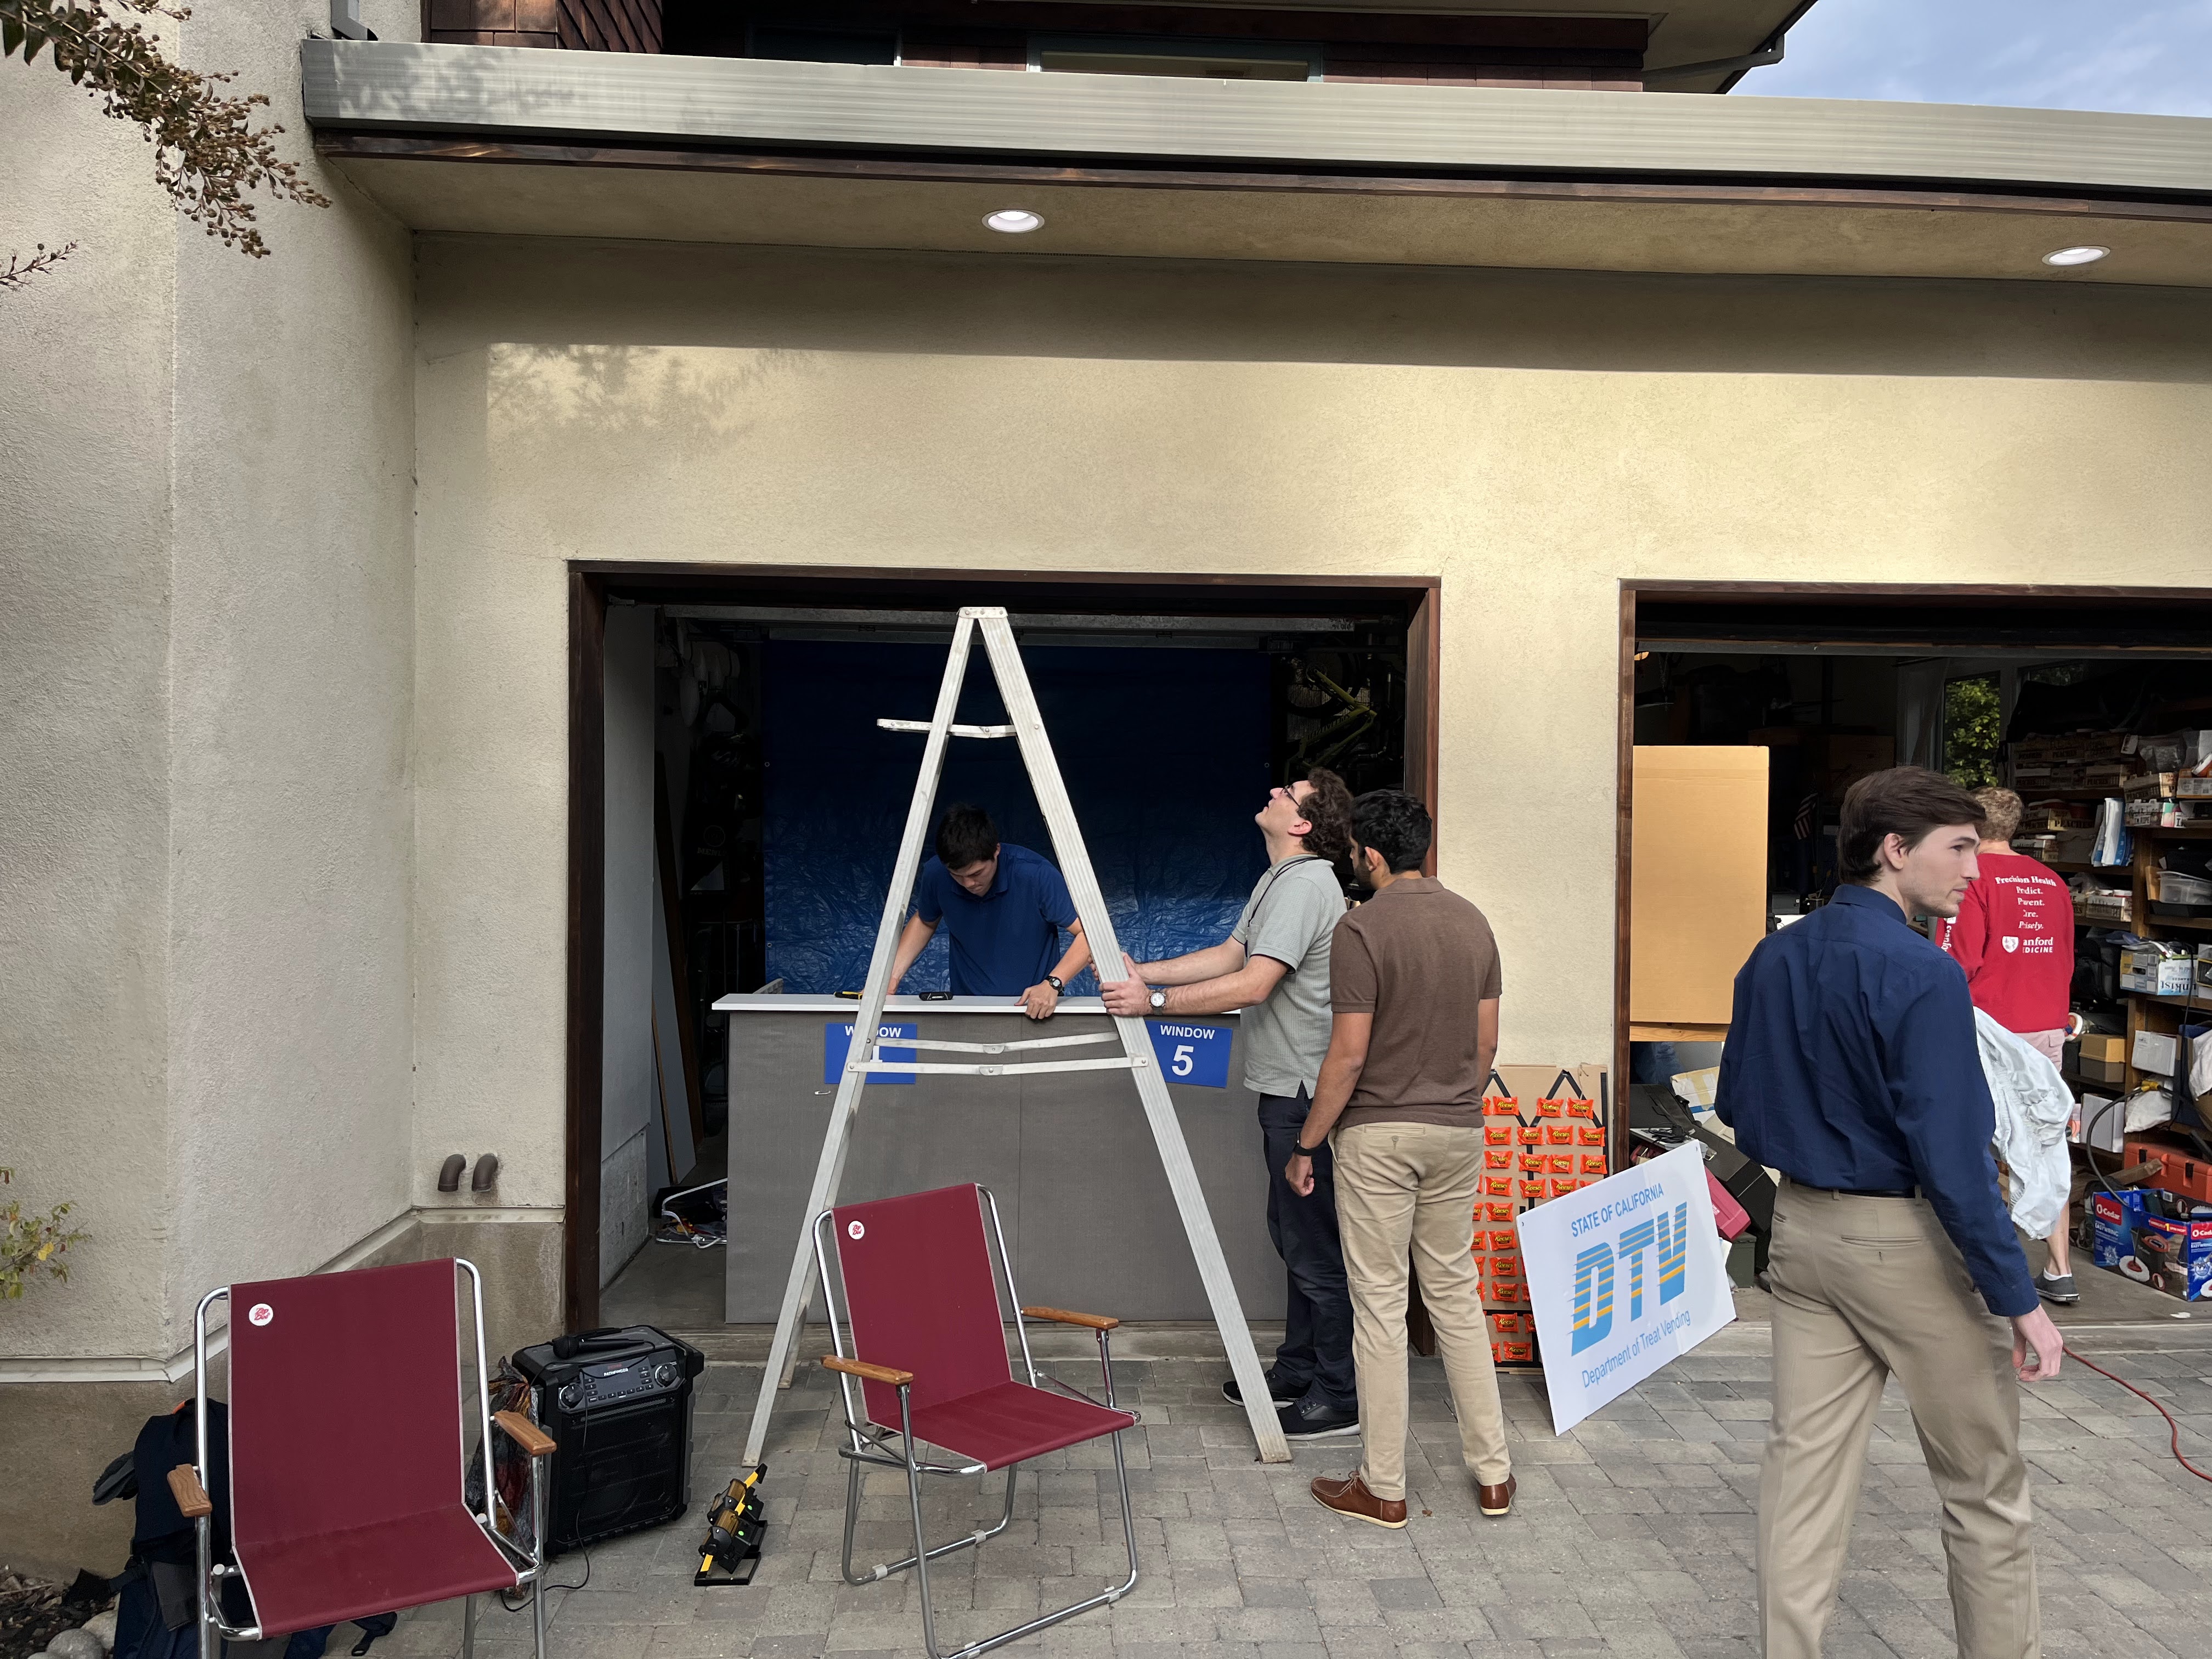
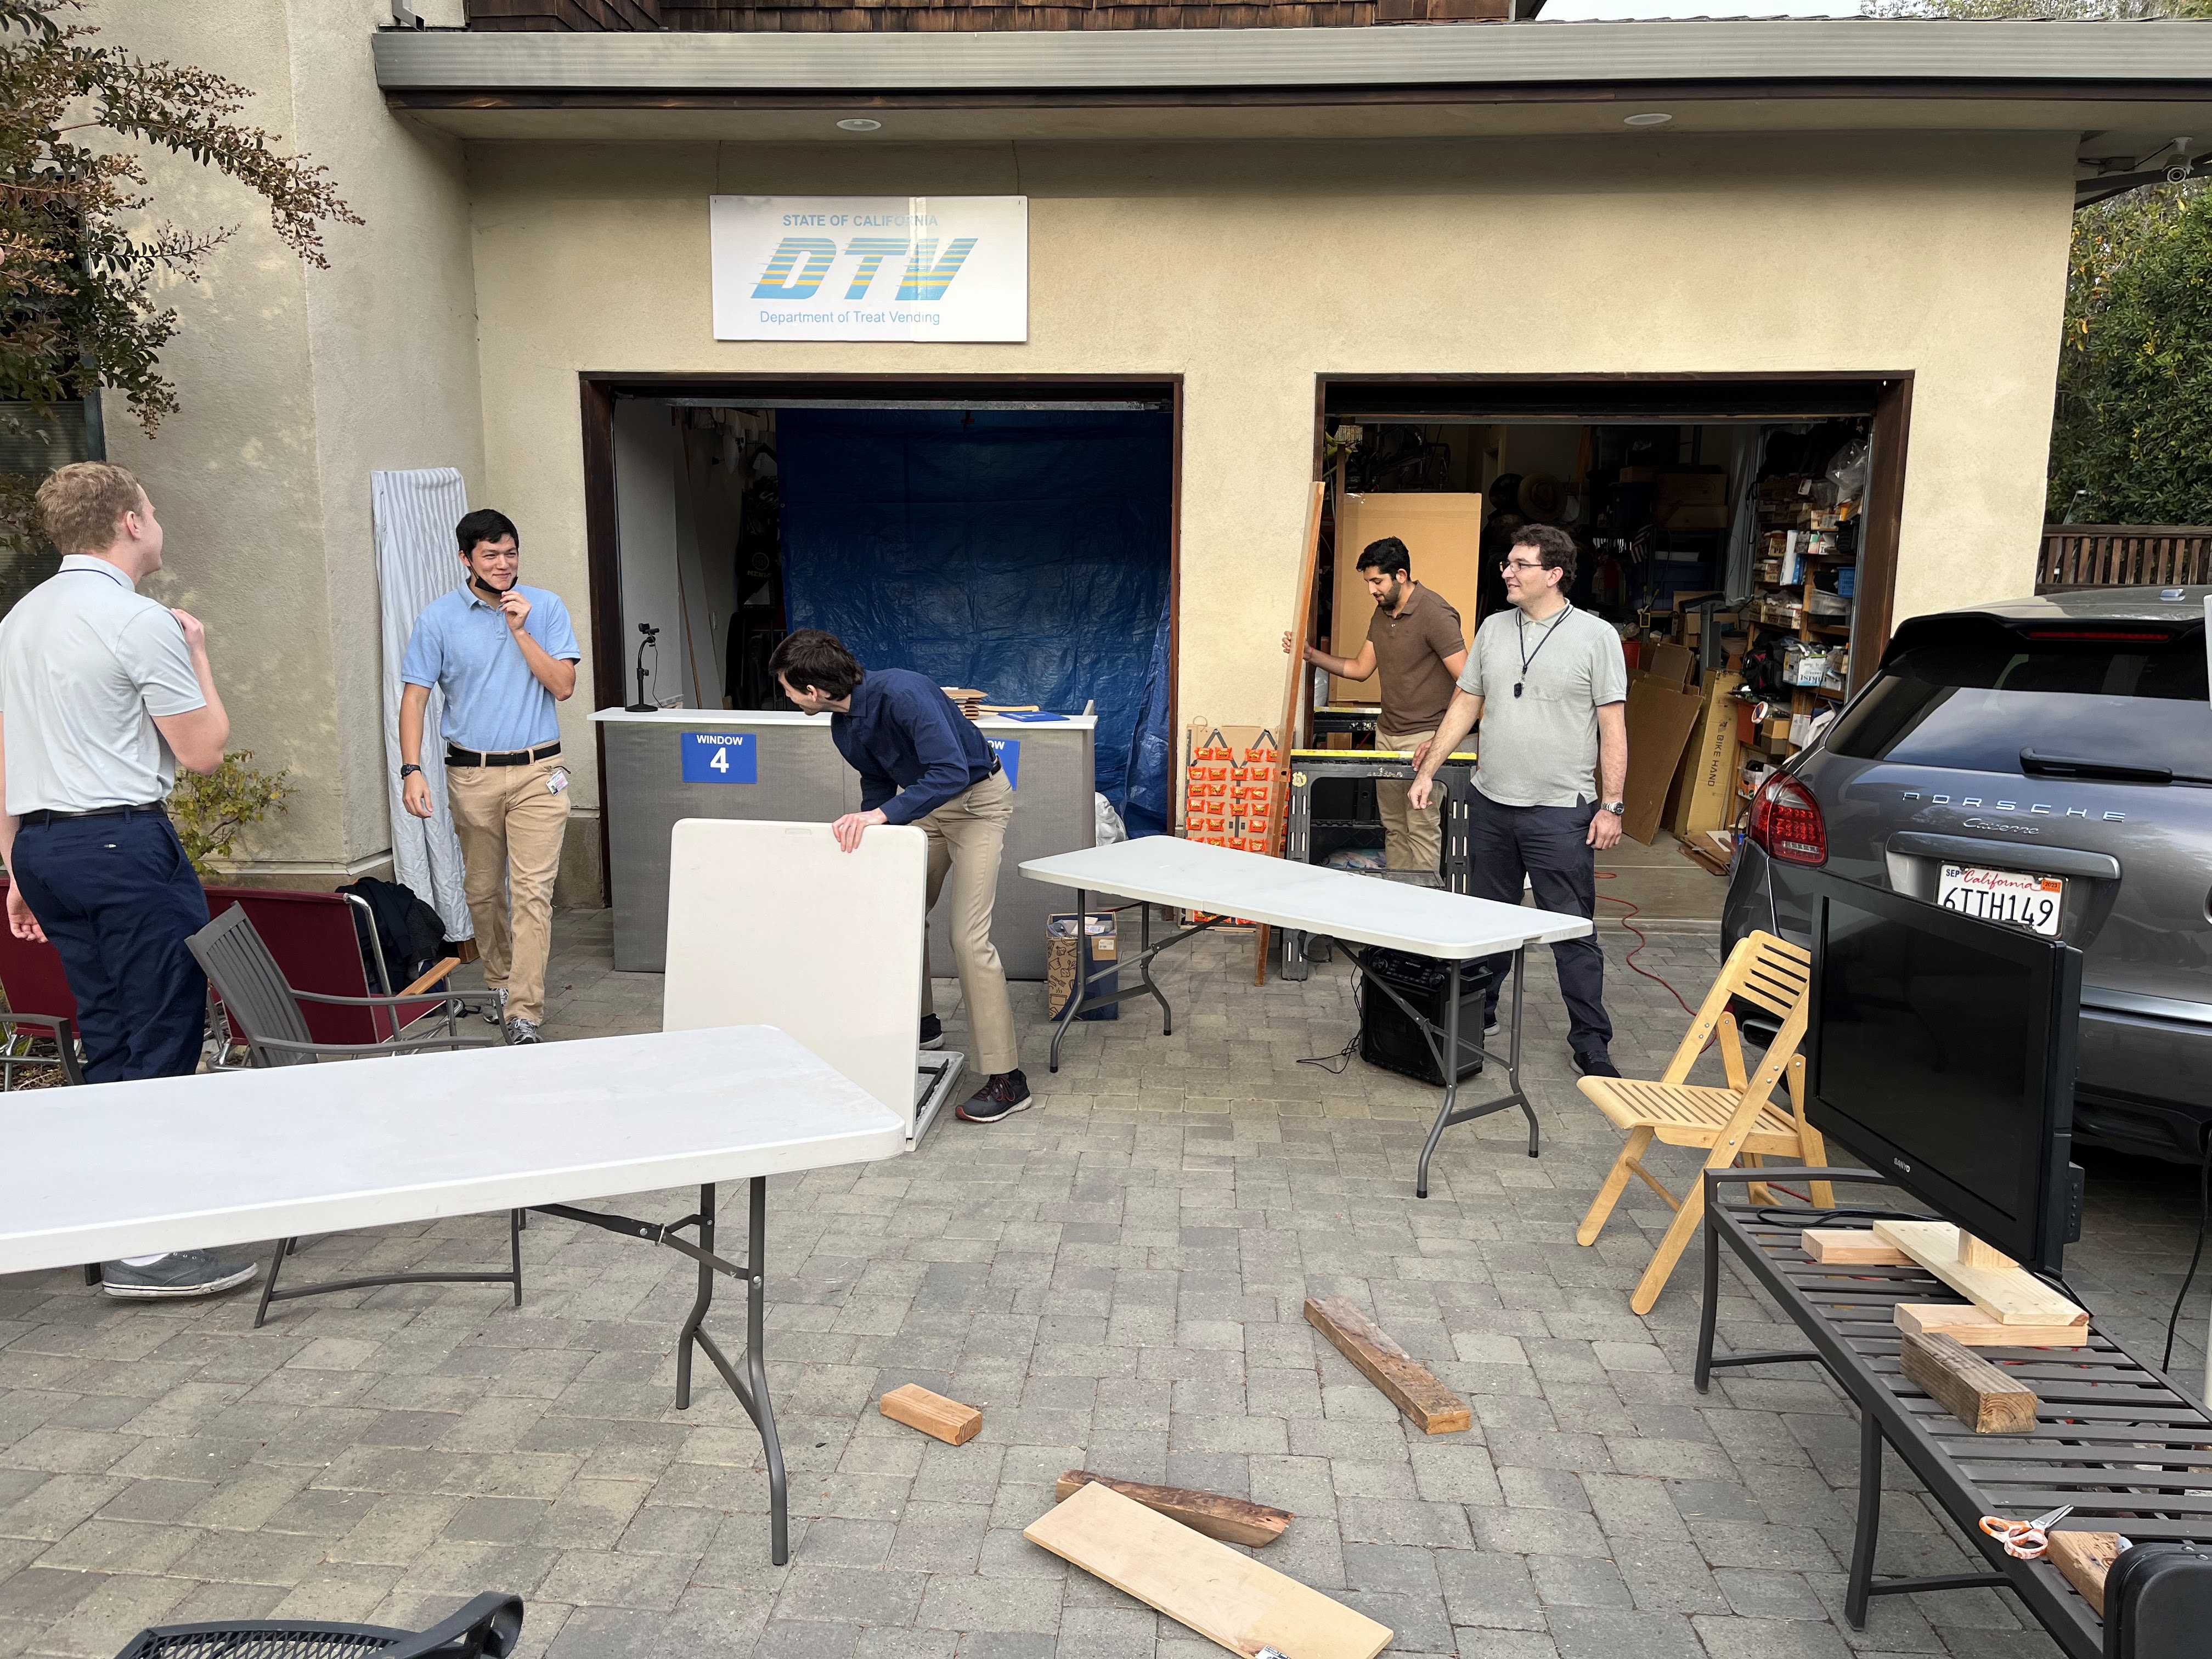
In order to capture the aforementioned “linoleum-floored purgatory” vibe of the DMV, we knew we were going to need to incorporate cubicles and a stuffy waiting area into the driveway of my parents’ house. My brother designed a half-cubicle / service counter to be constructed out of thin 1×2 planks and cubicle fabric, and we scrounged around the backyard for any lawn furniture we could find in order to create enough seating for the waiting area.
The primary service counter was constructed out of four identical wood-framed cloth panels framed with 1×2’s (we couldn’t find any non-crappy ones at home depot for a good price, so I ended up ripping down some nice 2×4’s with a table saw). These 1×2 frame pieces were cut to length and joined using pocket screws, and some convincingly cubicle-y fabric was stretched over each frame and stapled down. M6 threaded inserts were installed on each frame piece in order to join them together in a strong but reversible manner (we needed to disassembly the desk to transport it to my parents’ house, and I didn’t want to drive screws in and out of soft wood multiple times). There were some brief issues with getting brackets from Home Depot that would fit our M6 fasteners, but a sketchy hole-embiggening rig made out of a trigger clamp and my drill press made quick work of that. The plastic-lined countertop at the top of the service desk was built from some cut-down melamine shelf material, and iron-on edge banding was used around the edges to complete the appearance. LED lights were mounted to the underside of the counter to provide lighting behind the desk (for service counter employees) and along the front of the desk (to illuminate signage). A power strip was installed under the counter to allow IT equipment at the primary service desk to be powered conveniently.
Signage on set was constructed from coroplast with vinyl lettering cut on my plotter. Many friend-hours were dedicated to carefully lining up and applying lettering with transfer tape.